Eloquent Images by Gary Hart
Insight, information, and inspiration for the inquisitive nature photographer
Manual Exposure Simplified
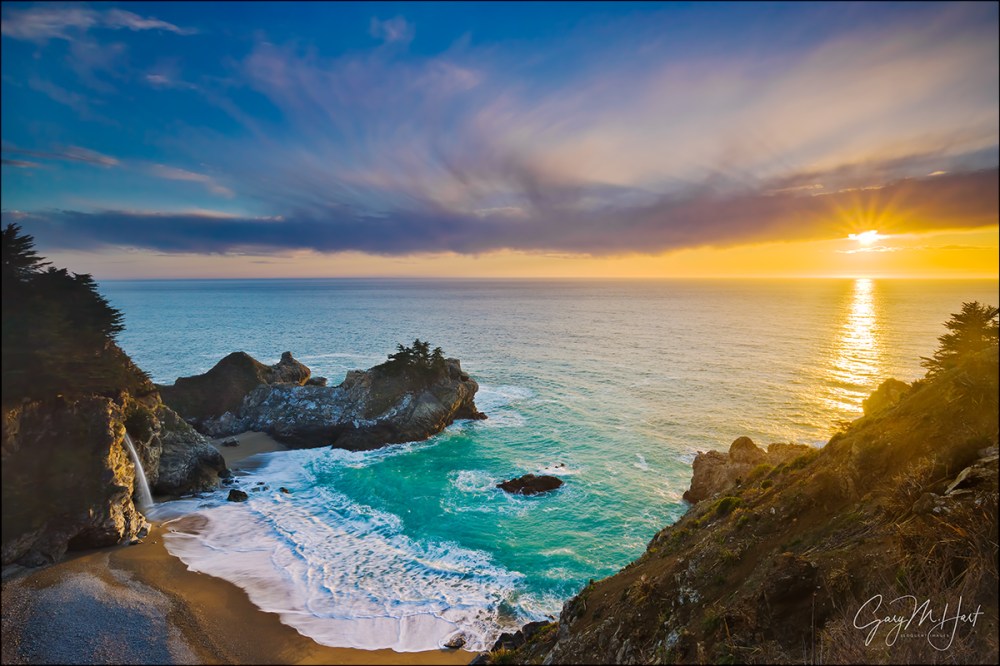
Sunset, McWay Fall, Big Sur, California
Canon EOS-1Ds Mark III
Canon 17-40 f/4L
.4 seconds
F/18
ISO 100
Metering and exposure is more about results than technique: If you’re getting the exposures you want, it doesn’t really matter how you got there. But if you’re one of those photographers who avoids manual exposure because you’re overwhelmed by all the settings choices (and even the word “manual” induces flashbacks of your dad teaching how to drive a stick-shift), let me assure you that manual exposure is really quite straightforward.
Some exposure facts
Understanding the following basic facts is the cornerstone to controlling your camera’s exposure variables:
- A meter thinks the entire world is a middle tone and does everything it can to make it so: Sunlit snow? Without any input to the contrary, your camera will turn it a murky gray. Moonlit coal? Without any input your camera will try to turn it…, wait for it…, a murky gray.
- No matter what you meter on, and regardless of your metering mode, you’re setting the exposure for the entire image. That doesn’t mean everything will be the same tone, it means that the relative brightness between tones will stay about the same (unless part of the scene exceeds your sensor’s capabilities).
- We measure the amount of light reaching the sensor in “stops”—think of a stop of light as you would a cup of sugar: Too sweet/bright? You need less sugar/light. Not sweet/bright enough? More sugar/light.
- Your camera has three exposure variables that control the amount of light reaching the sensor (or film) and therefore the exposure of your image:
- Aperture: the size of the opening that allows the light in, measured in f-stops—controls depth. Large f-stops (it’s a ratio, so the smaller the f-stop number, the larger the aperture—e.g., f/2.8 is a larger opening than f/4) allow more light, but they also shrink the depth of field (range of sharp focus).
- Shutter speed: the duration that the sensor is exposed to light—manages motion. Long shutter speeds let in more light, but increase the blur of anything that’s moving. Often we want freeze motion with a fast shutter speed, but blurring motion with a long shutter speed is a creative technique.
- ISO determines how sensitive the sensor is to light: The higher the ISO, the greater the sensitivity to light, but the worse the image quality.
- For every one-stop change in any exposure variable, a corresponding one-stop change in another exposure variable will keep the amount of light reaching your sensor unchanged.
Getting in the mode
Manual exposure is all about control: you choose an exposure target and dial in its tone—the camera guides you with a scale that tells you whether your exposure is brighter or darker than a middle tone, but you make the ultimate exposure decision. A spot meter is the most precise way to pinpoint your target and therefore should be your metering mode (the way the camera “sees” the scene) when you expose manually.
Most of today’s mirrorless/DSLR cameras offer a spot meter; if your camera doesn’t, select the metering mode that uses smallest percentage of the frame (for example, Canon’s “Partial” mode). Whether you’re metering in spot or partial mode, zooming your lens as tight as possible will further increase your metering precision by shrinking the percentage of the scene the meter evaluates.
Controlling scene variables
Photographers have three scene variables to take into consideration when they compose an image: motion, depth, and light. Landscape shooters on a tripod can take advantage of a one-to-one relationship between these scene variables and the three camera exposure variables: ISO, f-stop (aperture), and shutter speed.
In other words, for each scene variable we need to control, there’s a corresponding exposure setting to handle it. Understanding this relationship is the foundation for using manual exposure for creative effect—once you get it (it doesn’t take long), you’re well on your way to full control of any metering situation Nature throws at you.
Motion: ISO in a static scene
If you’re on a tripod photographing a static landscape, nothing is moving and you can automatically go with your camera’s native (best) ISO, usually 100 or 200 (check your camera’s manual). Pretty simple—I’ve already given you 1/3 of the total number of exposure variables and you haven’t exhausted a single brain cell.
Motion: ISO when something’s moving
As long as you’re on a tripod (no camera shake), the steps above will handle all exposure situations when nothing in the scene is moving. But sometimes we have to contend with movement in the scene: flowing water, wind-blown leaves or flowers, the night sky, and so on. In these situations, because I don’t want to compromise my depth or sharpness by choosing a less than ideal f-stop, I adjust my ISO until I get the shutter speed necessary to achieve the desired motion at the ideal aperture I’ve already chosen.
When you want a little more motion, for example to blur flowing water, you don’t have as much wiggle room because your native ISO is already at, or close to, the camera’s lowest. Check to see if your camera offers an “expanded” ISO option that provides an ISO a stop or so lower than the camera’s native (ideal) ISO. For many cameras, since the expanded ISO is an emulated ISO, you need to go into the menus to enable it. (My Sony cameras allow me to go down to ISO 50, but because it’s not quite as good as thI only use expanded ISO when I need a longer shutter speed.) A neutral density filter or polarizer will also cut the light reaching your sensor and enable a longer shutter speed.
Depth: F-stop for depth and sharpness
With ISO handled, it’s time to determine the f-stop. Your f-stop choice starts with the understanding that there’s an ideal f-stop for each shot. Really. The two f-stop factors to consider are, in this order: your desired depth of field (DOF); and the f-stop at which your lens is sharpest.
Start with the f-stop that returns your desired depth of field, without going any smaller than necessary (remember, f-stop is a ratio, so when I say smaller I mean smaller aperture but larger the f-stop number). In scenes with no noticeable difference in DOF between f-stops (such as when everything in your frame is far enough away that it’s sharp when you’re focused at infinity), select your lens’s sharpest f-stop.
So what’s a lens’s sharpest f-stop? You can take the time to test each lens at a variety of f-stop/focal-length combinations; or find a reliable lens test and review source; or you can keep it simple (my preference) and go with the usually safe assumption that a lens’s sharpest f-stop is in the middle of its f-stop range, usually f/8 to f/11. Either way, don’t deviate from your lens’s sharpest f-stop unless your composition’s DOF requirement calls for it.
Why not shoot everything f/22 (or whatever the lens’s smallest aperture is) to maximize DOF? Well, sometimes you want less DOF, not more (see the example below). And even when you want lots of DOF, in addition to the fact that lenses tend to be less sharp at their extreme f-stops (and without getting into too much technical detail), the smaller the aperture, the greater the diffraction that robs your lens of resolving power. You can usually assume you’re safe from significant diffraction at f-stops f/11 and larger (smaller f-stop numbers like f8, f5.6, and so on) and should go with a larger aperture unless you really need the extra DOF.
My general approach is to always default to an f-stop in the f/8-f/11 range (my default f-stop is f/11—I deviate from this only when I think it’s necessary), then adjust smaller or larger when I want more or less DOF. Mastering DOF and focus point are an art in themselves, so if you’re not comfortable with determining and controlling DOF, take a little time to learn hyperfocal focusing. But for now, if you’re not sure what f-stop you should be using, go with f/11 for the best balance of DOF and sharpness.
Light: Shutter speed for exposure
Now that we have motion (remember, right now we’re assuming nothing is moving) and depth handled, let’s get down to the business of managing light. Notice that we haven’t even started thinking about metering, and we already have two of our three exposure variables set.
Metering: The old fashioned (harder) way
The entire foundation of exposure is understanding that your meter wants to make everything it sees a middle tone. In manual exposure mode, if you point a spot meter at any object and dial the exposure so the meter indicator registers zero, you’ve made that object a middle tone, regardless of its actual brightness; dial the exposure to +1 and you’ve made the object one stop brighter than a middle tone, -1 and it’s one stop darker than a middle tone, and so on.
“Blown” (hopelessly overexposed) highlights are death to most images, so it’s usually best to ensure that you haven’t overexposed anything in your frame. This is easily achieved by pointing your camera’s spot meter at the brightest thing that you want to retain detail (unless the sun is in your frame, you’ll usually be pointing at the brightest thing in the scene) and adjusting the shutter speed until that bright target is the tone you think it should be (and no brighter than your camera can handle). Remember, this target tone isn’t usually (and rarely is) 0 on the metering scale—it’s determined by the brightness of your metering target.
You don’t need meter on the brightest thing in the scene, but that just makes the most sense to me. Viewers’ eyes are most drawn to the brightest element in the frame, one reason overexposed highlights are usually a worse problem than underexposed shadows. If you’ve metered on the brightest thing in your frame and set it to a value that won’t be overexposed, you’ve made the entire scene as bright as possible without overexposing anything (if the brightest thing isn’t overexposed, nothing is). And the beauty of manual exposure is that you can remove your camera from your tripod and point at whatever you want—a sunlit cloud, a patch of bright blue sky, granite reflecting direct sunlight, or whatever you think is the brightest thing in the scene.
Shooting in raw output mode, I know I can retain detail all the way up to (about) +3 stops (over a middle tone), though going this bright often washes out color (overexposes or “clips” one or more of the camera’s three RGB color channels). I usually have pretty good success setting the brightest thing in my frame to +2 or +2 1/3 over a middle tone.
After shooting, check the RGB histogram on your LCD. If you see the highlights of any of the channels clipped, shorten your shutter speed (faster) and re-shoot. If your shadows are cut off on the left, and you have room to increase exposure (move the histogram to the right) without clipping any of the highlights on the right, lengthen your shutter speed and re-shoot. And if you can’t find an exposure setting that doesn’t clip (cut off the histogram) on both the shadow (left) and highlight (right) sides, you’ve probably exceeded your camera’s dynamic range and need to resort to multi-exposure blending, a graduated neutral density filter, or simply accept black shadows or white highlights.
Don’t forget that if you’re shooting in raw mode, you have a little margin for error beyond what the histogram shows, so if you’re close, you may still be okay. In these situations, I generally expose to spare the highlights and try to deal with the shadows in post.
Metering: The modern (easier) way
Learning to spot meter on the brightest thing in the frame is a great way to master exposure, but live-view histograms have simplified exposure significantly. Live-view metering is easier on mirrorless cameras (you get a histogram in your viewfinder), but it can be done on any DSLR that offers a histogram on the live-view screen. If you don’t know how to read a histogram (it’s not hard), this will help.
- Bring up your camera’s pre-capture histogram—for mirrorless cameras, you can view it in the viewfinder or LCD screen; for DSLR camera’s, you’ll find it on the LCD screen only.
- Set your ISO to whatever your camera’s native ISO is (100 for most, but not all, cameras). If you don’t know your camera’s native ISO, just google it (it’s not a secret).
- Determine the f-stop that provides the depth of field you need—if DOF doesn’t matter, choose an f-stop in the f/8 to f/11 range. Lenses tend to be sharper in their mid-range f-stops, and once you get over f/11, you risk introducing image-softening diffraction
- Adjust the shutter speed until the histogram looks good. See below for how to handle a shutter speed that causes (undesirable) motion blur.
- Click.
It’s that simple.
Let’s review
That’s a lot of explanation for a very simple process. What it all boils down to is three (and occasionally four) steps:
- Start with your camera’s best ISO.
- Choose the f-stop that gives you the depth you want; if depth isn’t a concern, just go with your lens’s sharpest f-stop, usually in the f/8 to f/11 range. Use f11 if you’re not sure.
- Check your pre-capture histogram and adjust the shutter speed until it looks right.
- If you can’t achieve the shutter speed that freezes or allows the motion you want, adjust the ISO accordingly.
Some manual exposure examples

First Light, Mt. Whitney, Alabama Hills, Eastern Sierra
81mm, ISO 200, f8, 1/20 second
The extreme dynamic range in this spectacular Eastern Sierra sunrise provided very little margin for error, so I really needed to nail the exposure. I probably could have gotten by with ISO 100, but the wind was howling on this frigid January morning, so to reduce the chance for vibration I opted for ISO 200. Depth of field wasn’t a concern, so I went with f8, the largest aperture in my lens’s f8-f11 prime sharpness zone. To hold the color in the brightly lit clouds, while still allowing enough light to capture some shadow detail, I spot-metered the brightest part of the sunlit cloud and dialed my shutter speed until the viewfinder meter indicator pointed to +2 1/3, as bright as I could make the clouds without blowing them out. After capture, a quick check of the histogram confirmed that I’d maxed my highlights without overexposing them, while retaining just enough shadow detail. Mission accomplished.

Champagne Glass Poppies, Merced River Canyon, California
100mm, ISO 100, f2.8, 1/1000 second
My primary objective when composing these poppies was to blur the background poppies into a smear of color with minimal DOF. A thin layer of clouds subdued the sun slightly, but it was still bright enough to comfortably allow ISO 100 at my wide open f2.8 aperture. I spot-metered on the brightest part of the closest poppy and dialed my shutter speed until my viewfinder indicator pointed at +1 2/3, then composed, very carefully focused on the leading edge of the foreground poppy, and gently squeezed my remote release trigger. While my luminosity histogram indicated I’d captured all the highlight detail, a check of the RGB histogram revealed a clipped red channel, so I dialed my shutter speed up 2/3 of a stop (faster) and re-shot.

Crescent Moon and Half Dome Silhouette, Yosemite
400mm, ISO 800, f8, 5 seconds
The sky, just starting to brighten ahead of the rising sun, was still quite dark when the moon peeked above Half Dome. My goal was to underexpose the sky enough to create a silhouette that emphasized Half Dome’s outline, the sky’s rich twilight blue, and the moon’s delicate shape. Too bright and I’d loose color; too dark and I’d lose contrast. To avoid motion blur in the moon, I dialed up to ISO 800; because Half Dome was eight miles away, DOF wasn’t a concern (even at 400mm) and I opted for f8. Pointing my spot meter at the sky just behind Half Dome, I dialed my shutter speed until the viewfinder indicator pointed at + 1/3 (in this case a 5 second shutter speed).

Golden Sunset, Lake Wakatipu, New Zealand
29mm, ISO 100, f/18, 1/125 second
The first three examples above used the old spot-metering approach. While that’s not essential (you don’t need to do it if you don’t want to), I do think mastering it builds a stronger foundation for truly mastering metering.
For this New Zealand image, I dialed a small aperture to get a sunstar, then pushed my shutter speed until the histogram just started to clip on the highlights (right) side. My foreground looked extremely dark on my LCD, but I knew from looking at the shadows (left) side of the histogram that I’d be able to recover them in Lightroom/Photoshop.
Workshop Schedule || Purchase Prints || Instagram
Managing the Light: A Gallery of Tricky Exposures


Excellent article, Gary. Thanks for sharing this.
My pleasure, Sam, thanks for visiting.
Thanks for the tips
Great article Gary, I will copy it and put on Word document to keep as a reference point for future.
Pingback: Not easy, but simple « Eloquent Nature by Gary Hart
Gary,
THis is the second time I read this and always learn something. However you said that your RGB histogram revealed a clipped yellow channel. Help me out here as I just checked the camera histogram and I see no indication of a yellow channel. What am I missing. Camera 5D Mark3. Thanks agin and always read your posts and forward them.
Tom Gibson
Thanks, Tom. That’s a typo–thanks for catching it. There is no yellow channel–the yellows are recorded by the red channel.
Enjoyed the article. Gary. I use manual when I have a difficult situation that does not work well with the other modes, but you have boiled it down to a science. One tip that I might mention. Listening to Scott Bourne on his podcast, I learded that Canon Cameras have a repution for excelling when the ISO is set to multiples of 160. Therefore, I generally set the ISO on my 5D to 160, 320, 640, etc. Don’t know if you are aware of this or if you have ever tried it, but I find that it seems to give me consistent results.
Hello Gary, nicely done article.
Since my English ins’t perfect I want a better understanding regarding the (Sunrise, Lone Pine Peak and Mt. Whitney, Alabama Hills, Eastern Sierra (81mm, ISO 200, f8, 1/20 second) exposure. So basicaly what you did is : Set the ISO 200, Aperture to f/8, you pointed the camera to the brightest part of the clouds above the peak and while the camera is still pointed towards the clouds you set up the shutter speed until you got an exposure of + 2-1/3 and with this done you recomposed the scene and took the shot. Am I right?
That’s exactly right, Gaspar. And of course it’s important to understand that this approach will only work when spot metering in manual mode.
Thank you for the quick reply Gary. It was really helpful and more than that, the fact that you come up with real examples regarding how and where you pointed the meter on a specific scene is something I never found on any other photography tips blog or article. Of course it is the photographer’s decision what he wants to transmit with a photo, but getting a general idea about how you exposed certain photographs, for me at least it gave me a solid starting point in terms of exposure.
Thanks again!
Hi Gary. Thanks for this article. I almost always learn something new when reading your articles. I started shooting in “manual” mode about 2 years ago and use it probably 90% of the time now. I find that I rarely meter now, rather I shoot in Live view and adjust my exposure according to what I see in the LCD screen. I always check my histograms, and often bracket. Am I missing anything? Would you recommend doing anything differently? I’m interested in your take on this. Thanks.
Thanks for reading, Tim—glad you find my posts helpful. While I’m with you on shunning conventional metering (I’m mirrorless, so I’m full-time live view), variations in LCD brightness and ambient light make the LCD an extremely unreliable gauge of true exposure, so I never, ever base my exposure decisions on the way the image looks on the LCD. Instead, I only trust the histogram combined with my experience with the camera to know how far I can push my exposure. It sounds like you might almost be doing that, so my advice would be to completely ignore the way the image looks and 100 percent trust your histogram (including the RGB histogram). I’m also a big advocate for blinking highlights (highlight alert), in particular knowing how far you can push the exposure beyond the point where the highlights blink before they become unrecoverable in post processing.
Thanks for the quick response! I pay attention to the “blinkies” too. I am shooting with a Canon EOS 760 which I haven’t had for very long. I’m still learning the camera and how far I can push highlights. Is there a method to this, or is it just experimentation, and/or trial and error? Thanks again. I absolutely love your work, by the way !
Great educational summary of those three basic elements of photography! You are an excellent teacher as well as photographer!