Eloquent Images by Gary Hart
Insight, information, and inspiration for the inquisitive nature photographer
Customize your camera
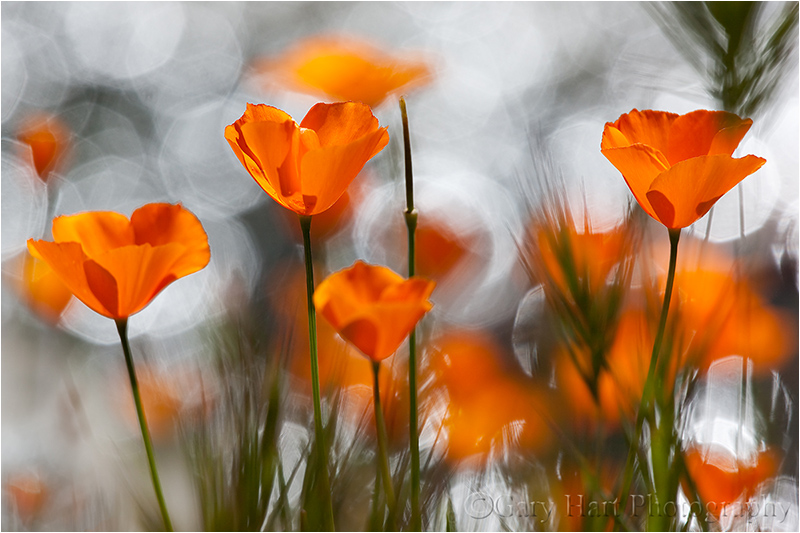
Sparkling Poppies, Merced River Canyon
Canon EOS-1Ds Mark III
1/200 second
F/8
ISO 200
200 mm
A recent mishap forced me to replace my Canon 5D Mark III (a story for a different day). A quality backup and good equipment insurance made my accident no more than a minor inconvenience, but setting up my new camera this morning reminded me of a few camera settings I consider equal parts essential and obscure (or taken for granted). So essential that I set them once and they simply become part of my in-the-field workflow; so obscure that I have to hunt to find many of them in the menu system. What I share here is specific to Canon in general, and the 5DIII in particular, but much of it will apply to Nikon and other DSLR cameras as well. Some of my suggestions may seem obvious, but you may find some surprises too.
For everyone
- Set Date/Time and keep it accurate: Okay, maybe this one isn’t too obscure, but I think the time and date are important to get and keep right, rather than something set once and forget. In fact, when Daylight Saving Time starts/ends, I (try to) make a point of going in and making the appropriate adjustment. The same applies to travel through time zones. Why is all this important? Because often I like to know what time the Rainbow starts on Bridalveil fall in April, or when the light leaves Delicate Arch in October—when my calendar and clock is right, all I need to do is return to a past image and check its capture date/time. I can also figure the altitude (angle above the horizon) of any location by checking the time of an image of the sun or moon rising/setting at that location on a given date, then refer to an app or website for the sun’s/moon’s altitude at that time.
- Enable Highlight Alert (“blinking highlights” that flash when blown): I can think of no reason to not turn Highlight Alert on, but remarkably, on many cameras it’s off by default. Blown highlights are death to an image, but sometimes we overlook them until it’s too late. And sometimes whatever’s blown is too small to even register on the histogram—not a big deal if it’s a patch of snow on a distant peak, but a huge deal if blown highlights are in the rising full moon that’s the focal point of your entire scene. Not sure your whether your Highlight Alert is turned on? Take an extremely overexposed image and replay it on your camera’s LCD (don’t forget to cycle through all possible views)—if you don’t see any flashing, Highlight Alert is off.
- Disable Release shutter without card (or whatever it’s called on your camera): This is another no-brainer that comes set backward on all the Canon cameras I’ve owned (your results may vary). All it took for me to learn this lesson was losing an entire shoot with a new camera because I forgot to put a card in (true story). Maybe you have a reason to click your shutter with no card, but for most of us those times are few and far between.
- Reduce LCD brightness (and turn off auto-brightness): We all like our LCDs to be super bright because it makes our images easier to see in full sunlight, and images just look better when they’re brighter. The problem with a max-bright LCD is, no matter how well we understand histograms and tell ourselves to check it with every shot, there’s a natural tendency to base exposure decisions on the way the image looks on the LCD. A bright LCD fools us into thinking a too-dark image is just right. Not only do I see workshop participants doing this (all the time), I catch myself making this unconscious mistake too. So, if you’re frequently frustrated by images that look much darker on your monitor than they did on your LCD (don’t increase your monitor brightness!), it’s probably because your camera’s LCD is too bright. I actually believe that a too-bright LCD is the source of many “My prints are too dark” complaints—the LCD tells you an image is bright enough (because you didn’t check the histogram), but when you put it on the computer at home, it’s too dark. Rather than fixing the real problem by giving your images more light at capture (something the histogram would tell you, BTW), you simply make your monitor brighter. Of course the best solution is to always check and trust your histogram—if you train yourself to do this, your LCD can be whatever brightness you like.
- Turn image rotation on for the monitor, off for the camera LCD: I like to use my camera’s entire LCD to view my images (long side of the image, whether horizontal or vertical, matches the long side of the LCD), but Canon (and maybe Nikon and the rest) must think nobody ever turns their camera vertically, because my camera’s default behavior is to rotate a vertical image so its top aligns with the top of the camera (where view-finder is). While Canon’s default rotation is great for my always horizontal monitor, I can and do flip my camera quite easily. Turning off rotation for the camera’s LCD ensures that the long side of horizontal and vertical images always aligns with the LCD’s long side.
- Download the manual’s PDF and put in on your smartphone: Okay, not a camera menu option, but definitely one of the first things you should do when you get a new camera. For years I’ve loaded my camera’s manual onto my computer, but with my Dropbox app I can also access it on my iPhone. Because manuals are big, and often the times I most need it I’m in an area with poor or no wifi or cell service, I use the Dropbox Favorites selection to ensure that the manual is always with me.
- Save your custom settings: On the Canon cameras I’ve used there’s an option to save and restore all of your menu settings to/from a media card. Do it (you can use one of those old, small capacity cards rattling around in the bottom of your camera bag), then mark the card containing the settings and set the card aside. Not only will this make recovery easier the next time you drop your camera in a creek on Maui (for example), it’ll save lots of frustration when you get your camera back from a repair and find everything back to factory default.
For the serious landscape shooter
- Set back-button autofocus (and remove autofocus from the shutter button): For stationary subjects, there’s little reason to connect focus and the shutter click (if your subjects are in motion, for example if you shoot sports or wildlife shooting, you can make a strong case for keeping the autofocus connected to the shutter button). By removing autofocus from my shutter button and moving it to a different button on the back of my camera, I can completely separate the act of focus from the act of clicking a frame. When I want to autofocus, I simply point my camera’s focus point at the place in the scene on which I want to focus, press my focus button, compose, and click. (Setting this up is less than intuitive on Canon bodies—each time I get a new camera I have to figure it out again.) Here’s a primer on back-button focus, including instructions for the 1D and 5D bodies.
- Turn on Mirror Lock-up (to reduce vibration induced by the mirror snapping out of the way when you click your shutter): I suspect that modern damping mechanisms make mirror lock-up much less essential than it once was, and mirror vibration really is a problem only in the 1/10 to 1 second shutter speed range. But since Canon makes it a pain to turn mirror lock-up on and off, and I’m always on a tripod (if you’re hand-holding mirror lock-up is a total pain), I see no reason not to just leave it on and get used to clicking my shutter button twice (once to lock-up the mirror, and again to trip the shutter). Of course when you’re in Live-View mode, the mirror is already locked up, so this setting doesn’t matter if you always use Live-View.
- Write to two cards simultaneously (if your camera is among the majority without two card slots, you can skip this one): I’m kind of obsessive about backups, so when I got my 1DSIII, rather than use the second media card slot to store more images, I opted to write each image to both cards. And when I learned that the 5DIII would come with two slots, I was pleased that I wouldn’t have to compromise my peace of mind to save $3500. Has this feature saved me? I don’t use cheap media cards, so I’ve never had a complete card failure (it does happen), but I have lost a few images on one card due to localized corruption. The solution? Just pop in the second card with duplicates of all the day’s captures. My capture workflow goes something like this: In camera, write each image to a 32 GB CF and a 32 GB SD card. At the end of the day (this assumes on the road), I upload the day’s images from my SD card to my laptop hard disk and a to a portable external drive. I don’t delete anything until I run out of space; since I’m not a high volume shooter (on my nine-day trip to Maui, I filled less than half of a 32 GB card), an entire trip’s images usually stay on both media cards in my camera. In the rare event that I do fill a card, I clear the SD and replace the CF with a fresh one.
- Turn on ISO expansion: By default my camera’s ISO range is 100-12800. ISO 100 is my camera’s “native” (best) ISO, but when I want to slow my shutter, I like the option of dropping to ISO 50 before using a smaller (less than optimal) aperture. Unlike the film days, when ISO 50 gave you less noise, a DSLR’s ISO 50 is emulated and therefore not quite as good as its native ISO. I find that I lose about 1/3 stop of dynamic range at ISO 50. Expanding my ISO above 12800 is of little general value to me, but there are times when I find an extremely high ISO invaluable. For example, when photographing in the near absolute darkness of a moonless night, the meter, Live-View LCD, and viewfinder are of little value. Even though maxing my ISO gives me unsellable images, I can take sample frames that are clear enough to aid my exposure, focus, and composition choices.
- Turn on the RGB Histogram: Since the RGB (the three-color) histogram gives you three times as much info as the standard (luminosity) histogram, it’s the histogram you should be looking at. Fortunately, if you know how to read a luminosity histogram, you can read an RGB histogram (trust me). A luminosity histogram tells you whether or not you’ve lost detail in your image; the RGB histogram also tells you whether you’ve lost a color channel. For example, a luminosity histogram will tell you everything’s fine even if you’ve blown (clipped) two of the three color channels, leaving you to wonder later why your lovely blue sky or yellow poppy looks washed out.
- Set up the Custom Menu: My 5DIII has a custom menu screen that will hold all of the most commonly used menu selections so you don’t have to go hunting for them. When I press my menu button, this is always the first menu that appears. On my custom menu I have Battery Status, Format Card, Sensor Clean, VF grid display, Date/Time/Zone (see my very first point), and LCD brightness (to override my default setting when I want to check an image in bright sunlight). Many other cameras offer something similar. Since setting up my Custom Menu, I find that I do/check things I should be doing/checking much more frequently than I did when they required a hunt through my camera’s menu maze.
These are my settings, but I think they’ll benefit most landscape shooters. Do they make me a better photographer? Perhaps not, but they do reduce distractions that might make me a worse photographer. There are lots of other settings in your menus that might surprise you and benefit the way you shoot—the next time you have an hour or so, grab your camera and manual and go through the menus.
* * *
About this image
Over the years I’ve accumulated a number of go-to poppy spots scattered about the Sierra foothills. This location in the Merced River Canyon west of Yosemite, where a small creek drains into the river, I don’t get to as often as I’d like. But a couple of years ago I happened to hit it right at the peak of the poppy bloom and took full advantage of the opportunity. Bright sunlight and a breeze made exposure and composition tricky, but I soon became comfortable with my surroundings and started concentrating on tight compositions using my 70-200 with extension tubes.
As I generally do with poppies, my goal was extremely narrow depth of field that highlights a prominent poppy (or two or three) and blurs background poppies and other wildflowers to smudges of color. But, noticing reflecting sunlight creating ephemeral reflections on the creek’s rippling surface, I wondered how my camera would capture sparkling water.
Dropping to poppy level, I used a trio of poppies on about the same focal plane as my foreground and experimented with different f-stops to change the size of each glistening facet. The larger my aperture, the larger and less defined the sparkle. I loved the effect on my LCD, but it wasn’t until I processed my images at home that I decided on this f8 frame that more or less split the size/definition continuum in the middle.

This is amazing vision, Gary. And it IS a vision. Of beauty and dreams and light. Poppy on the right and poppy on the left seem to be “popping” right through my screen and the vibration effect on the others is like nothing I can ever remember seeing. This is just a tremendous composition! The sunlight is fantastic. I say poppies in the rain but never did get a chance to shoot any in the sun OR in the shade. But I took them home with me in my heart. Hopefully tornado watch is over as well…Thanks for the tips Gary..I am heading’ for the D800 now 🙂 Cheers
Thanks, Denny. You were here at the right time for the poppies, but I imagine you had other priorities. It’s supposed to be 85 degrees here today—hope things warm up back there for you soon.
Those sparkling poppies are amazing. Beautiful photo. Thanks for posting all these tips. I have A LOT to learn!!
Thank you, Ana. We all have a lot to learn—the key is to just learn the next thing and not think about everything else there is after it. 🙂
Excellent reminders about camera settings, Gary. Your poppy image is wonderful- the reflections make the shot special.
Thank you, Jane. Gotta love those poppies—so photogenic.
Great image and practical tips.
Best
CB
Thanks, Charlie.
Gary,
Excellent advice as always, but I’d like to point out one thing about setting up the camera for back button (AF) button release. I often use a remote cable release, which won’t autofocus my D800 if the camera is set to focus when the AF button is depressed. I don’t know about Canon, but this definitely won’t work on a Nikon D800. For manual (finger actuated) release, back button is definitely a great way to go.
See you in Hawaii,
Mike
Thanks, Mike. On all my Canon bodies, pressing the remote button is exactly the same as pressing the shutter release. Without back-button focus, the remote engages autofocus; without BBF, it doesn’t. If I read you right, it sounds like Nikon is different in this regard.
Gary,
I can’t vouch for all Nikon bodies, just the D800. I know that the D600 doesn’t have an AF-ON button, so you have to re-map another button to serve that function.
On the D800/D800e the default setting (with the autofocus method button on the front set to AF, of course) is to initiate autofocus when the shutter button OR the rear AF-ON button is depressed part way. In the menu, selection #a4 you can change that to be initiated only with the AF-ON button and get BFF, as you recommended. No doubt, when shooting handheld, that would be the preferred way to go.
Gorgeous photo, Gary. And thank you so much for the lesson on camera settings.
It’s my pleasure, Peggy.