Eloquent Images by Gary Hart
Insight, information, and inspiration for the inquisitive nature photographer
Playing With Depth
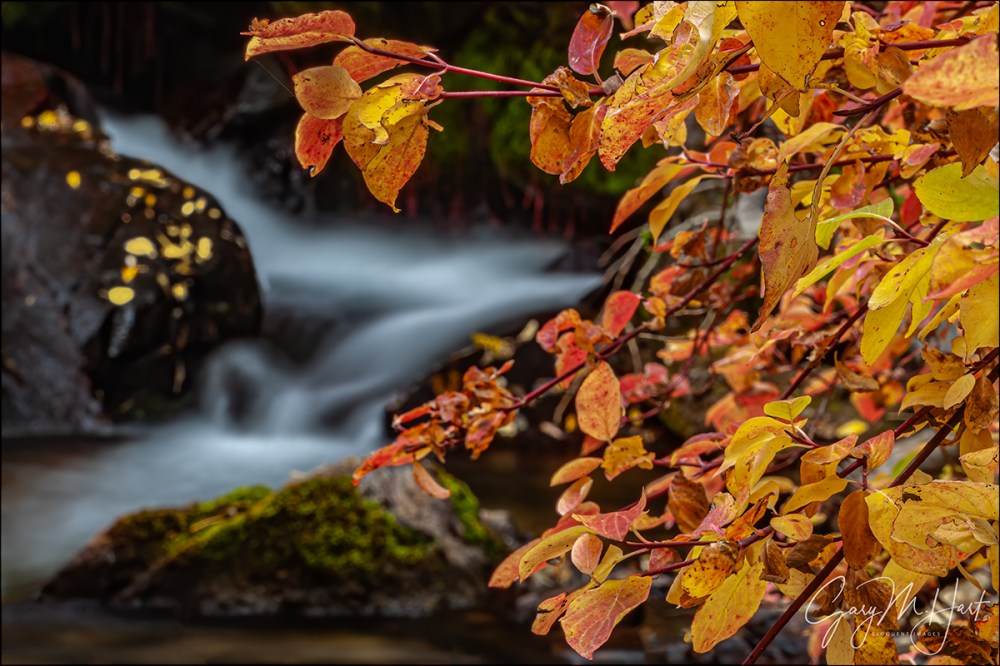
Creekside Color, Mill Creek, Eastern Sierra
Canon EOS-1Ds Mark II
Canon 70-200 f/4 L
4 seconds
F/32
ISO 200
Photography is the futile attempt to squeeze a three-dimensional world into a two-dimensional medium. But just because it’s impossible to truly capture depth in a photograph, don’t think you shouldn’t consider the missing dimension when crafting an image. For the photographer with total control over his or her camera’s exposure variables (which exposure variable to change and when to change it), this missing dimension provides an opportunity to reveal the world in unique ways, or to create an illusion of depth that recreates much of the thrill of being there.
The Illusion of Depth
Sometimes a scene holds so much near-to-far beauty that we want to capture every inch of it. While we can’t actually capture the depth our stereo vision enjoys, we can take steps to create the illusion of depth. Achieving this is largely about mindset—it’s about not simply settling for a primary subject no matter how striking it is. When you find a distant subject to feature in an image, scan the scene and position yourself to include a complementary fore-/middle-ground subjects. Likewise, when you want to feature a nearby object in an image, position yourself to include a complementary back-/middle-ground subjects.
Creative Selective Focus
Most photographers go to great lengths to achieve full front-to-back sharpness, an art in itself. But sometimes I like to solve the missing depth conundrum with what I call creative selective focus: An intentionally narrow depth of field with a carefully chosen focus point to flatten a scene’s myriad out-of-focus planes onto the same thin plane as the sharp subject. This technique can soften distractions into a blur of color and shape, or simply guide the viewer’s eye to the primary subject and soften the background to complementary context.
When I use creative selective focus to autumn leaves or spring flowers, I usually take the extreme background blur color and shape approach. In the images below, the soft background serves as a canvas for the primary subject.
But sometimes I like my soft background to have enough resolution to be more recognizable. When I take this approach, my goal is to signal the part of the scene I want to emphasize by making it sharp, and to use the soft but still recognizable background for context that tells the view something about the location.
A few years ago I wrote an article on this very topic for “Outdoor Photographer” magazine. You can read a slightly updated version of this article in my Photo Tips section: Selective Focus.
About this image: Creekside Color, Mill Creek, Eastern Sierra
With dense aspen groves, reflective beaver ponds, towering peaks, and even a waterfall, Lundy Canyon just north and west of Mono Lake, has long been one of my favorite fall color locations.
I spent this overcast autumn morning wandering the banks of Mills Creek. The thick growth here often makes this easier said than done, but the rewards of battling my way through trees and shrubs usually makes it worth the scrapes and scratches I always seem to go home with.
Even though it was less than 30 feet from the road, I heard this cascade long before I saw it. Once I got my eyes on it, I had to battle further to get a clear view. I especially liked the red leaves, a relative rarity in California, and wanted to feature them. Here I positioned myself so the leaves framed the creek, and turned my polarizer to reduce the leaves’ glossy sheen.
I used a range of f-stops for a variety of background sharpness options. This one used f/32 (maybe my all-time record for smallest aperture), which gave me enough DOF for to make the creek easily recognizable, but also resulted in a 4-second exposure. (Clearly wind was not a factor this morning.)
Here’s my Photo Tips article on using hyperfocal focus techniques to enhance your images’ illusion of depth: Depth of Field.
Playing With Depth


