Eloquent Images by Gary Hart
Insight, information, and inspiration for the inquisitive nature photographer
Mastering Focus (Hyperfocal and Otherwise)
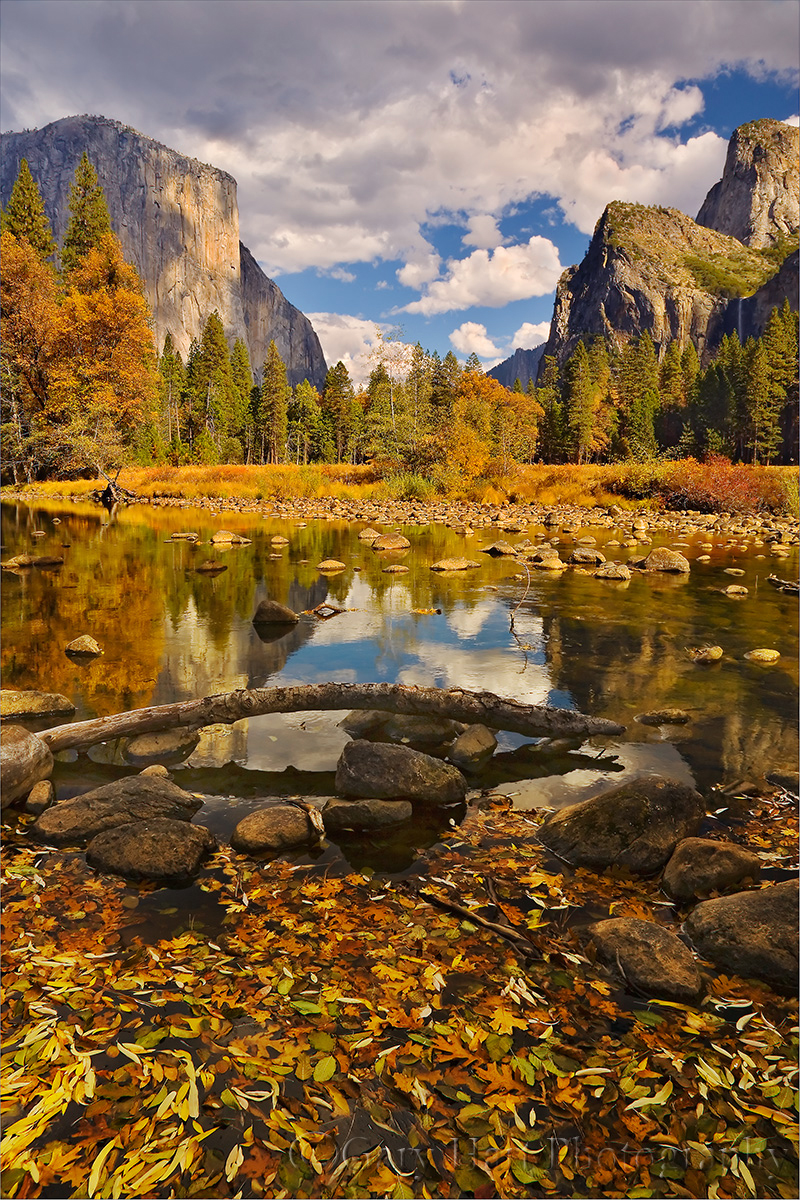
Floating Autumn Leaves, Valley View, Yosemite
Canon EOS-1Ds Mark II
Canon 24-105 f/4 L
1/15 second
F/16
ISO 100
What’s the point?
It seems like one of photography’s great mysteries is achieving proper focus: the camera settings, where to place the focus point, even the definition of sharpness are all sources of confusion and angst. If you’re a tourist just grabbing snapshots, everything in your frame is likely at infinity and you can just put your camera in full auto mode and click away. But if you’re a photographic artist trying to capture something unique with your mirrorless or DSLR camera and doing your best to have important visual elements objects at different distances throughout your frame, you need to stop letting your camera decide your focus point and exposure settings.
Of course the first creative focus decision is whether you even want the entire frame sharp. While some of my favorite images use selective focus to emphasize one element and blur the rest of the scene, most (but not all) of what I’ll say here is about using hyperfocal techniques to maximize depth of field (DOF). I cover creative selective focus in much greater detail in another Photo Tip article: Creative Selective Focus.
Beware the “expert”
I’m afraid that there’s some bad, albeit well-intended, advice out there that yields just enough success to deceive people into thinking they’ve got focus nailed, a misperception that often doesn’t manifest until an important shot is lost. I’m referring to the myth that you should focus 1/3 of the way into the scene, or 1/3 of the way into the frame (two very different things, each with its own set of problems).
For beginners, or photographers whose entire scene is at infinity, the 1/3 technique may be a useful rule of thumb. But taking the 1/3 approach to focus requires that you understand DOF and the art of focusing well enough to adjust your focus point when appropriate, and once you achieve that level of understanding, you may as well do it the right way from the start. That ability becomes especially important in those scenes where missing the focus point by just a few feet or inches can make or break and image.

Where to focus this? Of course 1/3 of the way into a scene that stretches for miles won’t work. And 1/3 of the way into a frame with a diagonal foreground won’t work either.
Back to the basics
Understanding a few basic focus truths will help you make focus decisions:
- A lens’s aperture is the opening that allows light to reach your sensor—the bigger this opening, the more light gets in, but also the smaller your DOF.
- Aperture is measured in f-stops, which is the lens’s focal length divided by the aperture’s diameter; the higher the f-number, the smaller the aperture and the greater the DOF. So f/8 is actually a bigger aperture (with less DOF) than f/11. This understanding becomes second nature, but if you’re just learning it’s helpful to think of f/stops this way: The higher the f-number, the greater the depth of field. Though they’re not exactly the same thing, photographers usually use f-stop and aperture interchangeably.
- Regardless of its current f-stop setting, a camera maximizes the light in its viewfinder by always showing you the scene at the lens’s widest aperture. All this extra light makes it easier to compose and focus, but unless your exposure is set for the widest aperture (which it shouldn’t be unless you have a very specific reason to limit your depth of field), the image you capture will have more DOF than you see in the viewfinder. The consequence is that you usually can’t see how much of your scene is in focus when you compose. Most cameras have a DOF preview button that temporarily closes the lens down to the f-stop you have set—this shows the scene at its actual DOF, but can also darken the viewfinder considerably (depending on how small your aperture is), making it far more difficult to see the scene.
- For any focus point, there’s only one (infinitely thin) plane of maximum sharpness, regardless of the focal length and f-stop—everything in front of and behind the plane containing your focus point (and parallel to the sensor) will be some degree of less than maximum sharpness. As long as the zone of less than perfect sharpness isn’t visible, it’s considered “acceptably sharp.” When that zone becomes visible, that portion of the image is officially “soft.” When photographers speak of sharpness in an image, they’re really talking about acceptable sharpness.
- The zone of acceptable sharpness extends a greater distance beyond the focus point than it does in front of the focus point. If you focus on that rock ten feet in front of you, rocks three feet in front of you may be out of focus, but a tree fifty feet away could be sharp. I’ll explain more about this later.
- While shorter focal lengths may appear to provide more depth of field, believe it or not, DOF doesn’t actually change with focal length. What does change is the size of everything in the image, so as your focal length increases, your functional or apparent DOF decreases. So you really aren’t gaining more absolute DOF with a shorter focal length, it just won’t be as visible. When photographers talk about DOF, they’re virtually always talking about apparent DOF—the way the image looks. (That’s the DOF definition I use here too.)
- The closer your focus point, the narrower your DOF (range of front-to-back sharpness). If you focus your 24mm lens on a butterfly sunning on a poppy six inches from your lens, your DOF is so narrow that it’s possible parts of the poppy will be out of focus; if you focus the same lens on a tree 100 feet away, the mountains behind the tree are sharp too.

Moonset, Mt. Whitney and Whitney Arch, Alabama Hills, California
With subjects throughout my frame, from close foreground to distant background, it’s impossible to get everything perfectly sharp. Here in the Alabama Hills near Lone Pine, California, I stopped down to f/16 and focused at the at the most distant part of the arch. This ensured that all of the arch would be perfectly sharp, while keeping Mt. Whitney and the rest of the background “sharp enough.”
Defining sharpness
Depth of field discussions are complicated by the fact that “sharp” is a moving target that varies with display size and viewing distance. But it’s safe to say that all things equal, the larger your ultimate output and closer the intended viewing distance, the more detail your original capture should contain.
To capture detail a lens focuses light on the sensor’s photosites. Remember using a magnifying glass to focus sunlight and ignite a leaf when you were a kid? The smaller (more concentrated) the point of sunlight, the sooner the smoke appeared. In a camera, the finer (smaller) a lens focuses light on each photosite, the more detail the image will contain at that location. So when we focus we’re trying to make the light striking each photosite as concentrated as possible.
In photography we call that small circle of light your lens makes for each photosite its “circle of confusion.” The larger the CoC, the less concentrated the light and the more blurred the image will appear. Of course if the CoC is too small to be seen as soft, either because the print is too small or the viewer is too far away, it really doesn’t matter. In other words, areas of an image with a large CoC (relatively soft) can still appear sharp if small enough or viewed from far enough away. That’s why sharpness can never be an absolute term, and we talk instead about acceptable sharpness that’s based on print size and viewing distance. It’s actually possible for the same image to be sharp for one use, but too soft for another.
So how much detail do you need? The threshold for acceptable sharpness is pretty low for an image that just ends up on an 8×10 calendar on the kitchen wall, but if you want that image large on the wall above the sofa, achieving acceptable sharpness requires much more detail. And as your print size increases (and/or viewing distance decreases), the CoC that delivers acceptable sharpness shrinks correspondingly.
Many factors determine the a camera’s ability to record detail. Sensor resolution of course—the more resolution your sensor has, the more important it becomes that to have a lens that can take advantage of that extra resolution. And the more detail you want to capture with that high resolution sensor and tack-sharp lens, the more important your depth of field and focus point decisions become.
Hyperfocal focus
The foundation of a sound approach to maximizing sharpness for a given viewing distance and image size is hyperfocal focusing, an approach that uses viewing distance, f-stop, focal length, and focus point to ensure acceptable sharpness.
The hyperfocal point is the focus point that provides the maximum depth of field for a given combination of sensor size, f/stop, and focal length. Another way to say it is that the hyperfocal point is the closest you can focus and still be acceptably sharp to infinity. When focused at the hyperfocal point, your scene will be acceptably sharp from halfway between your lens and focus point all the way to infinity. For example, if the hyperfocal point for your sensor (full frame, APS-C, 4/3, or whatever), focal length, and f-stop combinition is twelve feet away, focusing there will give you acceptable sharpness from six feet (half of twelve) to infinity—focusing closer will soften the distant scene; focusing farther will keep you sharp to infinity but extend the area of foreground softness.
Because the hyperfocal variable (sensor size, focal length, f-stop) combinations are too numerous to memorize, we usually refer to an external aid. That used to be awkward printed tables with long columns and rows displayed in microscopic print, the more precise the data, the smaller the print. Fortunately, those have been replaced by smartphone apps with more precise information in a much more accessible and readable form. We plug in all the variables and out pops the hyperfocal point distance and other useful information
It usually goes something like this:
- Identify the composition
- Determine the closest thing that must be sharp (right now I’m assuming you want sharpness to infinity)
- Dig the smartphone from one of the 10,000 pockets it could be in
- Open the hyperfocal app and plug in the sensor size (usually previously set by you as the default), f-stop, and a focus distance
- Up pops the hyperfocal distance (and usually other info of varying value)
You’re not as sharp as you think
Since people’s eyes start to glaze over when CoC comes up, they tend to use the default returned by the smartphone app. But just because the app tells you you’ve nailed focus, don’t assume that your work is done. An often overlooked aspect of hyperfocal focusing is that app makes assumptions that aren’t necessarily right, and in fact are probably wrong.
The CoC your app uses to determine acceptable sharpness is a function of sensor size, display size, and viewing distance. But most app’s hyperfocal tables assume that you’re creating an 8×10 print that will be viewed from a foot away—maybe valid 40 years ago, but not in this day of mega-prints. The result is a CoC three times larger than the eye’s ability to resolve.
That doesn’t invalidate hyperfocal focusing, but if you use published hyperfocal data from an app or table, your images’ DOF might not be as ideal as you think it is for your use. If you can’t specify a smaller CoC in your app, I suggest that you stop-down a stop or so more than the app/table indicates. On the other hand, stopping down to increase sharpness is an effort of diminishing returns, because diffraction increases as the aperture shrinks and eventually will soften the entire image—I try not to go more than a stop smaller than my data suggests.
Keeping it simple
As helpful as a hyperfocal app can be, whipping out a smartphone for instant in-the-field access to data is not really conducive to the creative process. I’m a big advocate of keeping photography as simple as possible, so while I’m a hyperfocal focus advocate in spirit, I don’t usually use hyperfocal data in the field. Instead I apply hyperfocal principles in the field whenever I think the margin of error gives me sufficient wiggle room.
Though I don’t often use the specific hyperfocal data in the field, I find it helps a lot to refer to hyperfocal tables when I’m sitting around with nothing to do. So if I find myself standing in line at the DMV, or sitting in a theater waiting for a movie (I’m a great date), I open my iPhone hyperfocal app and plug in random values just to get a sense of the DOF for a given f-stop and focal length combination. I may not remember the exact numbers later, but enough of the information sinks in that I accumulate a general sense of the hyperfocal DOF/camera-setting relationships.
Finally, something to do
Unless I think I have very little DOF margin for error in my composition, I rarely open my hyperfocal app in the field. Instead, once my composition is worked out and have determined the closest object I want sharp—the closest object with visual interest (shape, color, texture), regardless of whether it’s a primary subject.
- If I want to be sharp to infinity and my closest foreground object (that needs to be sharp) is close enough to hit with my hat, I need a fair amount of DOF. If my focal length is pretty wide, I might skip the hyperfocal app, stop down to f/16, and focus a little behind my foreground object. But if I’m at a fairly long focal length, or my closest object is within arm’s reach, I have very little margin for error and will almost certainly refer to my hyperfocal app.
- If I could hit my foreground object with a baseball and my focal length is 50mm (or so) or less, I’ll probably go with f/11 and just focus on my foreground object. But as my focal length increases, so does the likelihood that I’ll need to refer to my hyperfocal app.
- If it would take a gun to reach my closest object (picture a distant peak), I choose an f-stop between f/8 and f/11 and focus anywhere in the distance.
Of course these distances are very subjective and will vary with your focal length and composition (not to mention the strength of your pitching arm), but you get the idea. If you find yourself in a small margin for error focus situation without a hyperfocal app (or you just don’t want to take the time to use one), the single most important thing to remember is to focus behind your closest subject. Because you always have sharpness in front of your focus point, focusing on the closest subject gives you unnecessary sharpness at the expense of distant sharpness. By focusing a little behind your closest subject, you’re increasing the depth of your distant sharpness while (if you’re careful) keeping your foreground subject within the zone of sharpness in front of the focus point.
And finally, foreground softness, no matter how slight, is almost always a greater distraction than slight background softness. So, if it’s impossible to get all of your frame sharp, it’s usually best to ensure that the foreground is sharp.
Some examples

A hat’s toss away: The closest pool was about 6 feet from my lens. I stopped down to f/20 (smaller than I generally like to go) and focused on the back of the pool on the left, about 10 feet away.

A baseball throw away: The little clump of wildflowers (lower right) was about 35 feet away and the trees started another 35 feet beyond that. With a focal length of 55mm, I dialed to f/11 and focused on the most distant foreground tree, getting everything from the flowers to Half Dome sharp.

Honey, fetch my rifle: With everything here at infinity I knew could focus on the trees or moon confident that the entire frame would be sharp. In this case I opted for f/8 to minimize diffraction but still in my lens’s sharpest f-stop range, and focused on the tree.
Why not just automatically set my aperture to f/22 and be done with it? I thought you’d never ask. Without delving too far into the physics of light and optics, let’s just say that there’s a not so little light-bending problem called “diffraction” that robs your images of sharpness as your aperture shrinks—the smaller the aperture, the greater the diffraction. Then why not choose f/2.8 when everything’s at infinity? Because lenses tend to lose sharpness at their aperture extremes, and are generally sharper in their mid-range f-stops. So while diffraction and lens softness don’t sway me from choosing the f-stop that gives the DOF I want, I try to never choose an aperture bigger or smaller than I need.
Now that we’ve let the composition determine our f-stop, it’s (finally) time to actually choose the focus point. Believe it or not, with this foundation of understanding we just established, focus becomes pretty simple. Whenever possible, I try to have elements throughout my frame, often starting near my feet and extending far into the distance. When that’s the case I stop down focus on an object slightly behind my closest subject (the more distant my closest subject, the farther behind it I can focus).
When I’m not sure, or if I don’t think I can get the entire scene sharp, I err on the side of closer focus to ensure that the foreground is sharp. Sometimes before shooting I check my DOF with the DOF preview button, allowing time for my eye to adjust to the limited light. And when maximum DOF is essential and I know my margin for error is small, I don’t hesitate to refer to the DOF app on my iPhone.
A great thing about digital capture is the instant validation of the LCD—when I’m not sure, or when getting it perfect is absolutely essential, after capture I pop my image up on the LCD, magnify it to maximum, check the point or points that must be sharp, and adjust if necessary. Using this immediate feedback to make instant corrections really speeds the learning process.
Sometimes less is more
The depth of field you choose is your creative choice, and no law says you must maximize it. Use your camera’s limited depth of field to minimize or eliminate distractions, create a blur of background color, or simply to guide your viewer’s eye. Focusing on a near subject while letting the background go soft clearly communicates the primary subject while retaining enough background detail to establish context. And an extremely narrow depth of field can turn distant flowers or sky into a colorful canvas for your subject.
 In this image of a dogwood blossom in the rain, I positioned my camera to align Bridalveil Fall with the dogwood and used an extension tube to focus extremely close. The narrow depth of field caused by focusing so close turned Bridalveil Fall into a background blur (I used f/18 to the fall a little more recognizable), allowing viewers to feast their eyes on the dogwood’s and raindrop’s exquisite detail.
 An extension tube on a macro lens at f/2.8 gave me depth of field measured in fractions of an inch. The gold color in the background is more poppies, but they’re far enough away that they blur into nothing but color. The extremely narrow depth of field also eliminated weeds and rocks that would have otherwise been a distraction.
There’s no substitute for experience
No two photographers do everything exactly alike. Determining the DOF a composition requires, the f-stop and focal length that achieves the desired DOF, and where to place the point of maximum focus, are all part of the creative process that should never be left up to the camera. The sooner you grasp the underlying principles of DOF and focus, the sooner you’ll feel comfortable taking control and conveying your own unique vision.
About this image

Floating Autumn Leaves, Valley View, Yosemite
Yosemite may not be New England, but it can still put on a pretty good fall color display. A few years ago I arrived at Valley View on the west side of Yosemite Valley just about the time the fall color was peaking. I found the Merced River filled with reflections of El Capitan and Cathedral Rocks, framed by an accumulation of recently fallen leaves still rich with vivid fall color.
To emphasize the colorful foreground, I dropped my tripod low and framed up a vertical composition. I knew my hyperfocal distance at 24mm and f/11 would be 5 or 6 feet, but with the scene ranging from the closest leaves at about 3 feet away out to El Capitan at infinity, I also knew I’d need to be careful with my focus choices. For a little more margin for error I stopped down to f/16, then focused on the nearest rocks which were a little less than 6 feet away. As I usually do when I don’t have a lot of focus wiggle room, I magnified the resulting image on my LCD and moved the view from the foreground to the background to verify front-to-back sharpness.
Workshop Schedule || Purchase Prints
Playing with Depth: A Gallery of Focus
Click an image for a closer look and slide show. Refresh the screen to reorder the display.


Very good piece Gary. Found it very useful. Shared it on my FB page.
Perhaps a typo in this sentence:
> so as your focal length increases, so does your functional or apparent DOF.
Perhaps I missed the context, but seems to me that “increases” should be “decreases.”
Best, Greg >
Thanks, Greg. Always appreciate a share. 🙂 And good catch—I made a modification and conflated two points. The downside of being my own editor. 🙂
You have a wonderful ability to break down complex subjects and explain them clearly. I teach a two-day beginning photography course for a local art school. On the first day we concentrate on composition,without addressing camera controls, using the camera on auto. The second day I introduce the concept of taking control of the camera. Shutter speed is fairly straightforward and simple to demonstrate. Metering ,less so, but still easy enough to get the basic concept. Most complex of all, and most difficult to explain is aperture. This article provides clearly stated information, much of which is useable in my beginning level course. In addition I am able to use your blog to recommend as a source of further study (not easy to find on the web). Thanks for generously sharing your expertise.
Thanks so much, Ed. I enjoying breaking this stuff down for people. I’m afraid the world is transitioning to video and the art of clear technical writing is dying, so always appreciate hearing when other people get something out of my words. Video definitely has its place, but sometimes just simple words are more effective and easier to follow.
Wow what a helpful post! 🙂 (And such lovely pictures!) Thanks for the great tips
Thanks, M.B., you’re very welcome.
Gary –
Thank you for the “Mastering Focus (Hyperfocal and Otherwise) tutorial!
Brian
>
My pleasure, Brian!
Thanks Gary, one very helpful post clearly explained.
Thanks for reading, Lee — glad you found it helpful.
Pingback: Mastering Depth of Field for Creative Photography - Albert Mora. Official Website