Eloquent Images by Gary Hart
Insight, information, and inspiration for the inquisitive nature photographer
Garbage in, garbage out
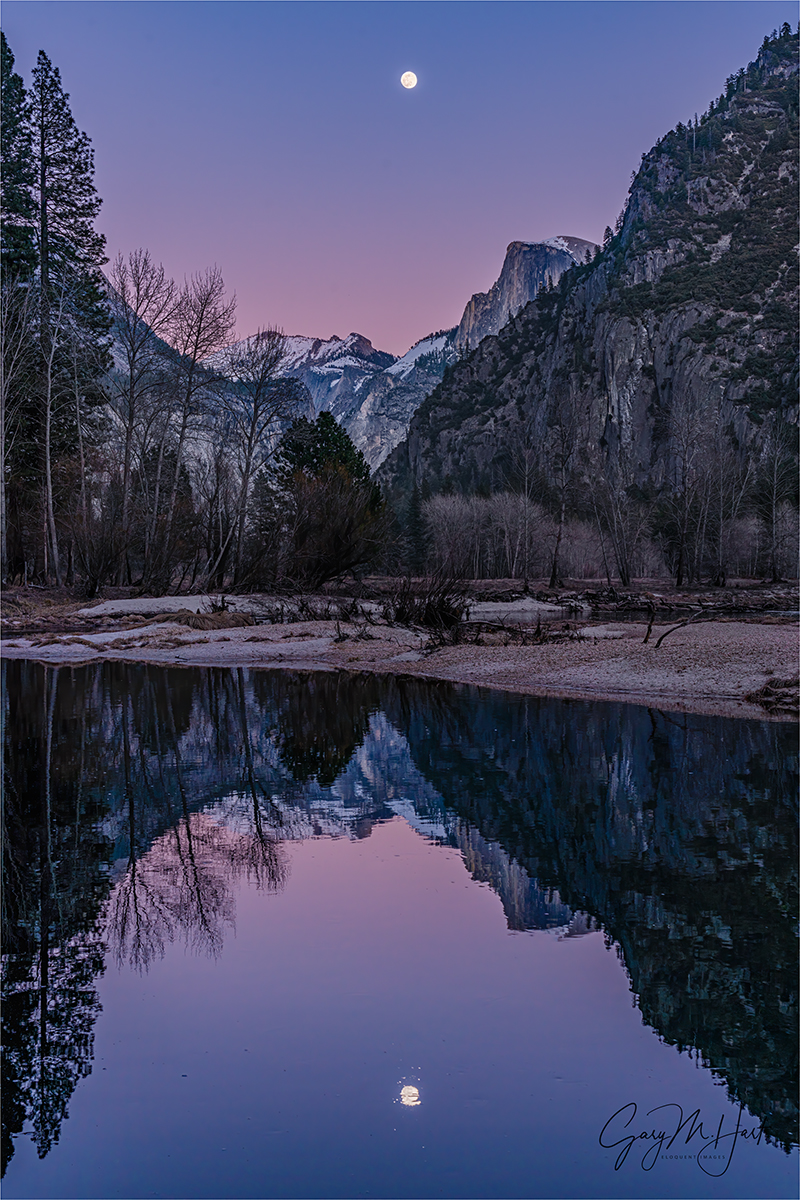
Magenta Moonrise, Half Dome and the Merced River, Yosemite
Sony a7RIV
Sony 24-105 G
1/13 second
F/11
ISO 100
True story: I once saw a guy taking 10-second exposures of the moonbow at the base of Yosemite Falls, hand-held. When I gently suggested that his image might be a little soft, he assured me that he would just sharpen it in Photoshop.
I won’t deny that digital capture and processing has given photographers more flexibility and control than ever, and processing can indeed correct a number of problems, but processing is not a panacea—if the image was garbage going in, it’ll be garbage going out. Processing software and skills are an essential part of good photography, but the best images are still created in the camera.
Just as Ansel Adams visualized the finished print before clicking the shutter, success in digital photography still starts with understanding how the camera’s vision differs from your own, and taking the steps necessary to leverage those differences at capture. While Adams was indeed a master in the darkroom, that skill would have been wasted without his intimate knowledge of his camera and film, combined with his understanding of exposure, that ensured the best possible negative and print once he got into the darkroom.
Of course (spoiler alert) photography has come a long way since Ansel Adams’ roamed the earth. Digital photographers now have more control than ever, and incredible capture tools that allow us to correct problems instantly. But I fear all this power has intimidated some photographers, and made others lazy. Fortunately, like many things that seem scary-complex going in, just scratching the surface a little starts to reveal a foundation of very simple principles.
One of the simplest things you can do is learn how to read a histogram, then train yourself to rely on it. It’s the relying on the histogram part where most photographers fall short. One of the most frequent mistakes I see inexperienced photographers make is basing their exposure decision on the way the picture looks on the back of their camera. The LCD is great for composition, but trusting it for exposure is a huge mistake.
Additionally, and here’s another thing that’s often overlooked: take the time to learn how your camera’s actual capture differs from what its histogram tells you. The histogram is based on a jpeg preview, but if you’re shooting raw, you almost always have more information than the histogram shows you. Each camera model is different, so you need to do a little observing or testing to determine how far you can push your camera’s histogram beyond its boundaries and still get usable data. Shooting this way, the jpeg that comes out of the camera may indeed show blown highlights or unrecoverable shadows, but they’ll come back like magic in Lightroom/Photoshop (or whatever your processing paradigm).
When I photographed this moon rising above Yosemite Valley last February, even though the color and exposure of the finished image you see here is pretty close to what my eyes saw, the image that appeared on my camera’s LCD screen looked nothing like this. The sky was washed out, and the reflection was lost in the shadows. But a quick check of my luminosity histogram told me that I’d captured all the scene’s detail, and verifying with the RGB histogram confirmed that I’d gotten all the color as well.
Usually a perfect histogram is all you need to get the exposure right, but in this case I also had make sure I had detail in the moon, which was by far the brightest thing in the scene. Normally I only use my camera’s highlight alert features (“zebras” pre-capture, blinking highlights post-capture) as a reminder to check my (nearly always more reliable) histogram, but here the moon was too small to register on the histogram. So as I added light, I closely monitored my highlight alert, bumping the exposure in 1/3-stop increments until the flashing appeared. But wait, there’s more! Just seeing the highlight alert wasn’t enough to tell me the moon was blown out. I know my Sony a7RIV well enough to know that I can push my exposure at least a stop beyond where the moon starts blinking and still recover the lunar details in post. This little piece of knowledge enables me to give my moon images the most light possible, ensuring less noise when I pull up the shadows.
In Lightroom I pulled down the highlights, pulled up the shadows, tweaked a few other things (color temperature, vibrance, clarity), then moved the image to Photoshop, where I did some noise reduction (Topaz DeNoise AI), dodging and burning, and (finally) sharpening. Voilà.
More Twilight Magic
Click an image for a closer look, and to view a slide show.


")


I long for two things: a day when I chicken cross the road without having its motives questioned, and a histogram that tells me everything that’s hitting the sensor. I hold little hope for either one. Beautiful image though.
Did you do any localized exposure adjustments to the moon in photoshop or Lightroom to further bring out the lunar detail? I understand that you avoided overexposing the moon to capture the detail, but with the overall darkness of the scene I wondered if the moon needed any focal exposure adjustment with a brush tool
Thanks, Gary…well I long for a Sony environment, much less two in my bag but that is your profession. I have two Fujis and love the colors but not the DR until now, sort of. After reading that you opened up 1 stop beyond what the blinkies indicated as overexposure, then recovered in LR. I was impressed.
It was close to sunset with nice soft light in our backyard. I took the first exposure based on when blinkies showed their head (which I always do). Then I opened up in 1/3 stop increments for 1 1/3 stops. Returning to LR I was able to recover all highlights for all stops beyond the base exposure.
lesson learned. For years I have been basing exposure on blinkies then checking the histogram to make sure that there are not any channels blown, especially red which is the hardest to recover. So I learned that I have been underexposing by a stop or more. Wow…..I know that the histogram is based on the.jpg in-camera processed image and knew I open up more but never tested how much more until I read your article.
I too truly dislike those who say, “Oh you can fix that in PS”. What it says to me is they do not know what they are talking about and do not care about crafting a fine image if they rely on software to do the heavy hitting or produce an image.
A simple thank you is not enough, well again.
Cheers~