New trick, old dog
Posted on November 25, 2014
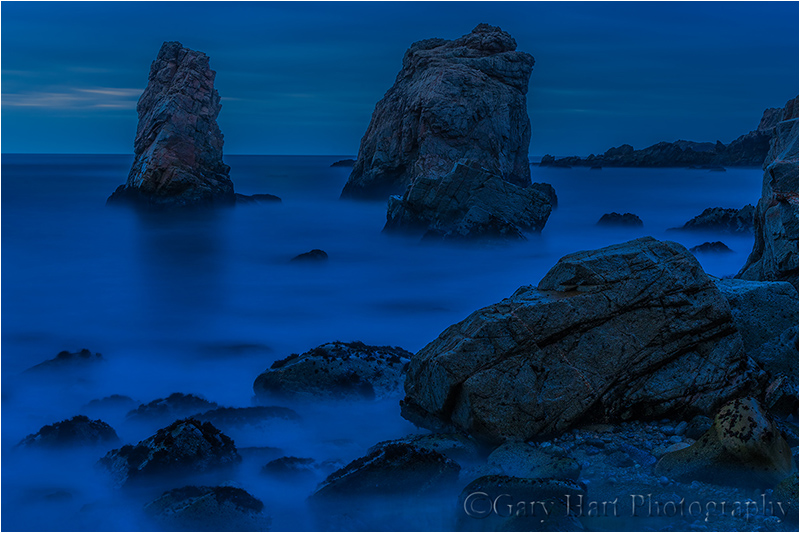
Nightfall, Big Sur Coast, California
Sony a7R
43 mm
4 minutes
F/16
ISO 200
Way back in 2008 when I got my first live-view camera, a Canon 1DS Mark III, I couldn’t understand what all the hubbub was about. I’d been looking through a viewfinder for thirty years and saw no reason to do things any differently. But when a 5D Mark III entered my life in early 2012, its improved live-view interface caused me to waver a bit—in particular the live-view focus capability, an on-screen level, a histogram that appeared before capture, and the ability to compose at odd angles without being tethered to the viewfinder. While I incorporated these capabilities into my workflow in the field when conditions dictated, for the most part I remained the same viewfinder shooter I’d always been.
Enter mirrorless
A few years ago, camera manufacturers, looking to replace point-and-shoot business rapidly succumbing to ubiquitous smartphones, realized that removing the mirror box from an SLR (single lens reflex: a mirror deflects the lens’s view up through the viewfinder, then flips the mirror up and out of the way of the sensor when the shutter fires) camera would allow them to put an SLR-size sensor in a much smaller body. These first mirrorless systems picked off many enthusiastic amateurs looking for better image quality than a smartphone or point-and-shoot without having to lug bulky gear. But the pros still considered mirrorless cameras fancy toys, or at best, a viable second camera.
Then, in late 2013, Sony released its full-frame, a7 mirrorless cameras and partnered with Zeiss for compatible lenses. Sony was the maker of the esteemed 36 MP Nikon D800 sensor (which they put in their mirrorless a7R body), and Zeiss has long been regarded one of the world’s finest lens makers. Suddenly, they had our attention.
Waffling….
While I was mildly intrigued by what Sony was doing, I remained committed to my Canon 5DIII. Given my significant investment in Canon glass, and confidence that Canon would be coming out with something better soon, I gave little serious thought to switching.
But, despite the consensus that Nikon and Sony cameras have surpassed Canon in image quality, we’ve reached the end of 2014 with nothing but cricket sounds coming from Canon’s corner of Tokyo. Contrasting those cricket sounds is the celebratory din from pros I respect who abandoned the Canon ship in favor of Sony, and are thrilled with Sony’s improved dynamic range, high ISO performance, and significantly higher resolution. Hmmm.
Budding relationship
Then my good friend Don Smith (and fellow long-time Canon shooter) made the Sony plunge, and I got to see the camera and its results up close on our trips to the Grand Tetons and Columbia River Gorge. Don couldn’t stop raving about the quality of the Sony image files, and I couldn’t get over the compactness of his camera bag.
So this month I did it. I pulled the trigger and went all-in on a Sony a7R and three lenses: a Sony 70-200 f4, and Sony/Zeiss 16-35 f4 and 24-70 f4 lenses. Hedging my bets, I also purchased the Metabones Mark IV adapter that enables me to use my Canon lenses on the a7R.
Was it love at first sight? Hardly. Like any new relationship, there are growing pains—in this case, it’s adjusting to a completely new way of shooting. I’ve always been a keep-it-simple, full control, totally manual (metering, focus) shooter—I just don’t want my camera making any decisions for me. Relying exclusively on an electronic viewfinder for composition, exposure, and focus is a paradigm shift that caught me off guard.
So the Sony and I are still negotiating certain aspects of our relationship. I will acknowledge that things like pre-capture focus-peaking (dots that highlight in-focus areas before I shoot) and exposure zebras (diagonal lines that appear where my image is over or under exposed) are potentially quite useful, but I still have trust issues—just because you tell me you’re sharp, doesn’t mean I have to believe you.
And I’ve always felt that spot metering was the way to go in manual exposure mode (it’s all I’ve ever used), but I’m coming to the conclusion that the way to go with the Sony is to let the meter see the entire scene and base my exposure settings on the pre-shot histogram. I wish it gave me the RGB histogram before the shot, but I’m willing to compromise for the sake of photographic harmony.
But there’s no denying the image quality, and for that alone, I’m quite confident that this relationship will last. Without doing a lot of pixel-peeping tests (I leave that stuff to other photographers while I’m out taking pictures), the dynamic range if the a7R just blows me away. I’m guessing that I get at least two more stops of dynamic range than I got with any of my Canon bodies, a game-changer for a landscape shooter.
This being such a new relationship, we haven’t spent a night together yet. And until we do, I’m not about to discard my Canon (does that make me a bad person?). I’m less concerned about the a7R’s night image quality than I am about my ability to compose and focus in low light using the electronic viewfinder. So stay tuned….
An evening out
While I haven’t done a full-on night shoot yet, I did stay out quite a bit past sunset on my first shoot. The image here is from that first date, a triple-date actually, to Soberanes Point in Big Sur with friends Don Smith and Mike Hall. While Don’s experience with his new a7R was the tipping point in my decision to switch, he was just a few weeks ahead of me, and we were both still trying to figure things out (and laughing about feeling like beginners).
When the sky darkened, the low-light shortcomings of the a7R’s electronic viewfinder became apparent, as feared. About 25 minutes after sunset (when I clicked this), I could still see enough with my 24-70 f4 to compose and focus, but just barely. Shortly thereafter I switched to my Canon-mount Zeiss f2 (with the Metabones adapter) and found the light gathering capability of the faster lens helped a lot. I’m guessing that until I get some fast Sony/Zeiss glass, I’ll be shooting night with my f2 and 2.8 Canon lenses and the Metabones adapter, but I’m less concerned than I was originally. Again, stay tuned….
Final thoughts
I’m slowly coming to terms with the electronic viewfinder and am pretty sure I’ll grow to like using it most of the time. Some of the a7R’s shortcomings—for example, the shutter is noisy, most things seem slightly more sluggish than I’m used to, and the autofocus doesn’t compare to my 5DIII (though some of the other Sony’s are much better, and I’m not a big autofocus person anyway)—are of little concern to me as a landscape shooter. And because it’s a battery hog, I carry four batteries (they’re small and light), though two is probably enough for a full day of heavy shooting, unless I’m adding a night shoot. And the user-manual feels more like an afterthought (I’m afraid this doesn’t make Sony unique), but there are plenty of resources available online, with more appearing every day.
In addition to the a7R’s improved dynamic range, which by itself is enough in my book to justify switching, I love the new weight of my camera bag. The body is much smaller than my 5DIII, the lenses are somewhat smaller (which also saves money on filters), the combination of which means I can use my smaller bag (F-Stop Guru) and lighter tripod (Gitzo 1531—if I had to do it now, I’d be buying the RRS TQC-14) and head (RRS BH-30) most of the time.
Having a smaller camera bag and tripod has air travel benefits as well—I won’t stress the airport check-in weigh-in as much (I pack my tripod and head in the suitcase), and won’t need to debate flight attendants who refuse to believe my larger camera bag (F-Stop Tilopa) will fit in the overhead compartment (it will, but there can be flight-long ramifications to proving a flight attendant wrong in front of a plane full of cranky travelers).
I think the a7R is best for a landscape shooter—I don’t think I’d make the a7R my primary camera if I had to photograph anything that moves. All pros and cons factored in, it may just be the best landscape camera. The strongest recommendation I can make to anyone making a change is to allow ample time to get up to speed with the new camera. This is more than just learning a new control interface and menu system—unless you’re already a fulltime live-view shooter, it’s an entirely new way of shooting. In other words, take it on a few dry runs before going out when every click counts.
As with any new relationship, there will be growing pains. But I think this one’s going to last.
Epilogue (January, 2015)
It’s been month and a half since I switched to the Sony a7R. And while I’m still getting comfortable with the full-time mirrorless paradigm, I have no significant complaints with the camera’s interface or handling (“It’s not you, it’s me”). The focus peaking is a godsend for a photographer like me, who obsessively seeks subjects from near to far in the frame. And I’m growing to appreciate the extreme customizability of the a7R’s buttons.
I do have a concern about the sturdiness of the the mount—all my lenses wobble a bit where they connect to the body, and with minimal pressure can be removed without pressing the unlock button (some more easily than others). I hope Sony makes fixing this a high priority, because while the body lenses are quite solid, this single flaw makes everything feel a little fragile.
But most important, I continue to be blown away by the quality of the images I get from this camera. The dynamic range is the stuff of dreams, and the sharpness and resolution continue to thrill me. I’ve grown to trust focus peaking, and find manual focusing so effortless that I never even attempt autofocus (nor do I miss using it). Perhaps the best indication of my level of commitment is that I just ordered a Sony a6000, giving my daughter my old Canon 5DIII. It looks like I’m all-in.
A (growing) Sony a7R gallery
Click an image for a closer look, and a slide show. Refresh your screen to reorder the display.


Seeing in the dark
Posted on November 21, 2014

Autumn Moonlight, El Capitan, Yosemite
Canon EOS-5D Mark III
16 mm
20 seconds
F/4
ISO 800
One of the great joys of the digital photography is the ease with which our cameras reveal the world after dark. Scenes that are merely shadow and shape to the human eye are recorded with unseen color and detail by a digital sensor, and stars too faint to compete with moonlight shine brightly.
After a lifetime of refusing to sap my enjoyment of the night sky by attempting to photograph it with film, about ten years ago (a year or two into my personal digital photography renaissance) I decided to take my camera out after dark in the Alabama Hills to photograph Mt. Whitney and the sawtooth Sierra crest. It took just a few frames to realize that this was a new paradigm, but I wasn’t quite hooked until I viewed my images later that night and found, among a host of similarly forgettable Mt. Whitney among snow-capped peak images, one image of the Big Dipper framed by stacked, moonlit boulders that stood out. Ever since I’ve chased opportunities to photograph my favorite scenes after dark—first solely by the light of the full moon, and more recently (as digital sensors improve) by starlight.

Big Dipper, Alabama Hills, California
As I incorporate night photography into most of my workshops, I have no qualms about guaranteeing success for all my moonlight shoots (barring equipment failure). This month’s Yosemite Autumn Moon workshop was no exception—after photographing a beautiful full moon rising above Half Dome at sunset, we broke for dinner, then returned to the wide open spaces of El Capitan Meadow beneath El Capitan for a moonlight shoot. One of my favorite things about these moonlight shoots is the way everyone is equal parts surprised and delighted by how simple it is, not to mention how beautiful their images are.
I’d spent time that afternoon getting the group up to speed on moonlight photography (it doesn’t take long), so after a brief refresher on the exposure settings and focus technique, everyone seemed to be managing just fine without me. Feeling just slightly unessential, I decided to try a few frames of my own. Struck immediately with how beautifully the autumn gold stood out, I shifted my position to align the most prominent tree with El Capitan. As with most of my night images, I went vertical to maximize the amount of sky in my frame. I also took care to compose wide enough to include Cassiopeia on the right side of the scene.
If you have a digital SLR and a relatively sturdy tripod, you have everything you need for night photography. I have a couple of articles in my Photo Tips section to guide you: It’s best to start with moonlight photography before attempting the much more challenging starlight photography.
A moonlight gallery
Click an image for a closer look, and to enjoy the slide show


Moon whisperer
Posted on November 14, 2014

Twilight Moonrise, El Capitan and Half Dome, Yosemite
Canon EOS SL1
.4 seconds
F/11
ISO 100
140 mm
Just when you start getting cocky, nature has a way of putting you back in your place. Case in point: last week’s full moon, which my workshop group photographed to great satisfaction from the side of Turtleback Dome, near the road just above the Wawona Tunnel.
I love photographing the moon, in all of its phases for sure, but especially in its full and crescent phases, when it hangs on the horizon in nature’s best light. I’ve developed a method that allows me to pretty much nail the time and location of the moon’s appearance from any location, and love sharing the moment with my workshop students. (Because my workflow has been in place for about ten years, I don’t use any of the excellent new software tools that automate the moon plotting process.)
Last week’s workshop was no exception, and after much plotting and re-plotting, I decided that rather than my usual Tunnel View vantage point, the view just west of the Wawona Tunnel would work better for this November’s full moon. Arriving about 30 minutes before “showtime,” I gathered everyone around and pointed a spot on Half Dome’s right side, about a third of the way above the tree-lined ridge, and told them the moon would appear right there between 4:45 and 4:50.
Sure enough, right at 4:47 there it was and I exhaled. We photographed the moon’s rise for about 30 minutes, until difference between the darkening valley and daylight-bright moon became too great for our cameras to capture lunar detail. Everyone was thrilled, and I was an instant genius—I believe I even heard “moon whisperer” on a few lips.
The workshop wrapped up the next evening, and I was still basking in my new-found moon whisperer status as I drove home down the Merced River Canyon with my daughter Ashley in the passenger seat. In a car behind us was workshop participant Laurie, who had never been down that road and wanted to follow me to the freeway in Merced.
Hungry, we stopped at one of my favorite spots, Yosemite Bug Rustic Mountain Resort in Midpines (check it out), for dinner. About an hour later, our stomachs full, we were walking back to the cars when someone pointed to a glow atop the mountain ridge above the resort. Ashley and I recognized it as the rising moon, but since this wasn’t a full disk, immediately entered into a friendly debate as to whether the moon was just peeking above the ridge, or had already risen and was disappearing behind a cloud.
We actually got quite scientific, escalating the passion with each point/counterpoint to make our cases (lest you think this was an unfair contest, I should add that Ashley’s a lawyer). Laurie remained silent. I’m not really sure how long we’d been debating when Laurie finally nudged us and pointed skyward, where, in full view of the entire Western Hemisphere, glowed the landscape illuminating spotlight of the actual full moon. Moon whisperer indeed.
(We never did figure out what the glow was.)
A full moon gallery
Click an image for a closer look, and to enjoy the slide show


Yosemite Valley: Worth getting up for
Posted on November 11, 2014

Autumn Glow, Cook’s Meadow, Yosemite
Canon EOS-5D Mark III
35 mm
.4 seconds
F/20
ISO 100
Yosemite isn’t an inherently great sunrise location. Because most of the views in Yosemite Valley face east, not only are you looking up from the bottom of a bowl, you’re composing toward the brightest part of the sky, at the shady side of your primary subjects (Half Dome, El Capitan, Yosemite and Bridalveil Falls). This is one reason I time my workshops to include one more sunset than sunrise. But I’ve come to appreciate Yosemite Valley mornings for its opportunities to create unique images that don’t resemble the beautiful but oft duplicated afternoon and sunset pictured captured when the iconic subjects are awash with warm, late light.
Over the years I’ve accumulated a number of favorite, go-to morning spots for Yosemite. I love the first light on El Capitan, which starts at the top about 15 minutes after the “official” (flat horizon) sunrise and gradually slides down the vertical granite, is a particular treat when reflected in the shaded Merced River. Other morning favorites include pre-sunrise silhouettes from Tunnel View (especially when I can include a rising crescent moon), the deep shade of Bridalveil Creek beneath Bridalveil Fall, and winter light on Yosemite Falls.
And then there’s Cook’s Meadow. Each spring you can photograph the fresh green of the meadow’s sentinel elm, Yosemite Falls booming with peak flow, and Half Dome reflected in still, vernal pools. In winter the tree is bare, exposing the twisting outline of its robust branches. The highlight each autumn is the few days when the tree is bathed in gold. On the chilliest fall mornings, sparkling hoarfrost often decorates the mounded meadow grass, and if you’re really lucky, when the air is most still, you’ll find the meadow hugged by an ephemeral mist that rises, falls, disappears, and reappears before your eyes.
On last week’s workshop’s opening morning, after a nice sunrise silhouette shoot at Tunnel View, I rushed my workshop group to Cook’s Meadow in time for the first light there. We hit the autumn big three: a hoarfrost blanket, the elm’s autumn gold still going strong, and even a few wisps of mist. The image here I captured toward the end of our shoot, just as the sun kissed the valley floor. My wide, horizontal composition emphasized the foreground, which was far more interesting than the bland (and contrail scarred) sky. I dialed in a small aperture to enhance the sunstar effect, and used a Singh-Ray 2-stop hard-transition neutral density filter to moderate the bright sky.
Within minutes the light was flat and the mist was gone, but the group was happy. Not a bad start to what turned out to be a great week of photography.
Workshop Schedule || Purchase Prints
A Yosemite Morning gallery
Click an image for a closer view, and to enjoy the slide show


If at first you don’t succeed…
Posted on November 7, 2014

Floating Leaves, Merced River, Yosemite
Canon EOS-5D Mark III
105 mm
.6 seconds
F/11
ISO 800
In early November of 2007 I took a picture that didn’t quite work out. That’s not so unusual, but somehow this one stuck with me, and I’ve spent seven years trying to recreate the moment I missed that night.
On that evening seven years ago, the sun was down and the scene I’d been working for nearly an hour, autumn leaves clinging to a log in the Merced River, was receding into the gathering gloom. The river darkened more rapidly than the leaves, and soon, with my polarizer turned to remove reflections from the river, the leaves appeared to be suspended in a black void.
I’d decided my scene lacked a visual anchor, a place for the eye to land, so I waited (and waited) for a leaf to drift into the top of my framed. On my LCD the result looked perfect, and I felt rewarded for my persistence. But back home on my large monitor, I could see that everything in the frame was sharp except my anchor point. If only I’d have bumped my ISO instead of my shutter speed….
Intrigued by the unrealized potential, I returned to this spot each autumn, but the stars never aligned—too much water (motion); dead (brown) leaves; no leaves; too many leaves; no anchor point—until this week. Not only did I find the drought-starved Merced utterly still, “my” log was perfectly adorned with a colorful leaf assortment anchored by an interlocked pair of heart-shaped cottonwood leaves.
I worked the scene until the darkness forced too much compromise with my exposure settings. In the meantime, I filled my card with horizontal and vertical, wide and tight, versions of the scene with the log both straight and diagonal. I also played with the polarizer, sometimes dialing up the reflection of overhanging trees. But I ultimately decided on the one you see her, which is pretty close to my original vision.
I can’t begin to express how happy photographing these quiet scenes makes me. I’ve done this long enough to know that it’s the dramatic landscapes and colorful sunsets that garner the most print sales and Facebook “Likes,” but nothing gives me more personal satisfaction than capturing these intimate interpretations of nature.
Workshop Schedule || Purchase Prints || Instagram
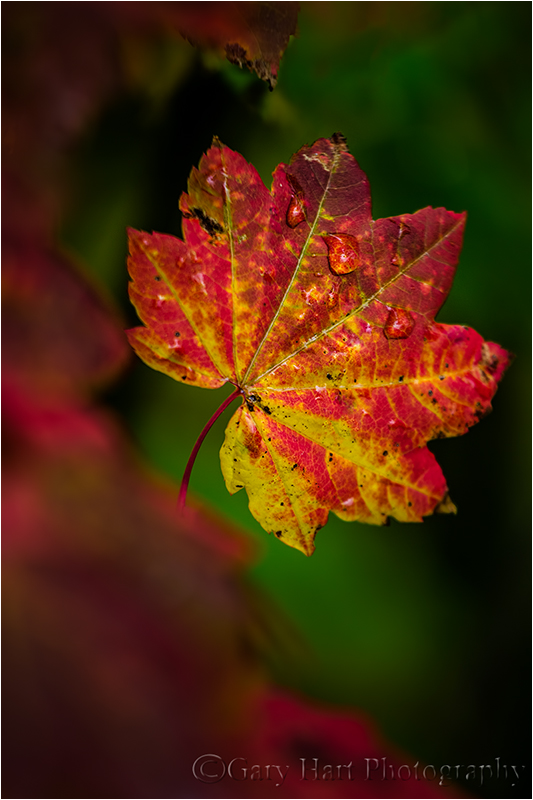
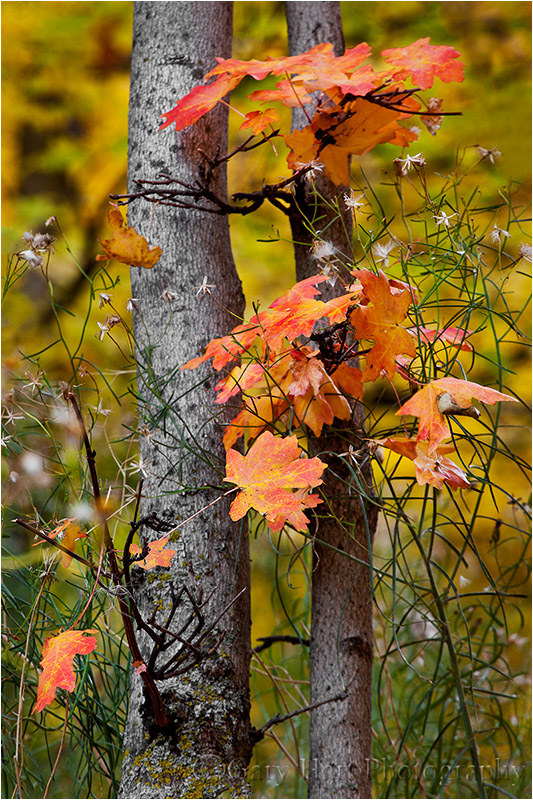
Autumn Intimates
Click any image to scroll through the gallery LARGE


Plan B
Posted on October 30, 2014

Bristlecone Moon, White Mountains, California
Canon EOS-5D Mark III
40 mm
1.3 seconds
F/16
ISO 100
I usually approach a scene with a plan, a preconceived idea of what I want to capture and how I want to do it. But some of my favorite images are “Plan B” shots that materialized when my original plan went awry due to weather, unexpected conditions (or my own stupidity).
In my recent Eastern Sierra workshop, the clouds I always hope for never materialized. Whenever this happens I try to use the clear skies for additional night photography, but I’ve always been a little reluctant to keep my groups out late in the bristlecones because: 1) it’s colder than many are prepared for (late September or early October and above 10,000 feet); 2) it’s an hour drive back to the hotel the night before a very early sunrise departure. But this year, after spelling out the negatives, I gave my group the option of staying out to shoot the bristlecones beneath the stars. My plan was to arrange for a car (or two) to take back those who didn’t want to stay, but it turned out everyone was all-in.
In most of my trips I know exactly where the moon will be and when, but for this trip I hadn’t done my usual plotting—I knew it would be a 40 percent crescent dropping toward the western horizon after sunset, but hadn’t really factored the moon into my plans. But as we waited for the stars to come out, I watched moon begin to stand out against the darkening twilight and saw an opportunity I hadn’t counted on.
Moving back as far as I could to maximize my focal length (so the moon would be as large as possible in my frame) required scrambling on a fairly steep slope of extremely loose, sharp rock (while a false step wouldn’t have sent me plummeting to my death, it would certainly have sent me plummeting to my extreme discomfort). Next I moved laterally to align the moon with the tree, and dropped as low as possible to ensure that the tree would stand out entirely against the sky (rather than blending into the distant mountains). Wanting sharpness from the foreground rocks all the way to the moon, I dialed my aperture to f/16 and focused on the tree (the absolute most important thing to be sharp).
With the dynamic range separating the daylight-bright moon and the tree’s deep shadows was almost too much for my camera to handle, I gave the scene enough light to just slightly overexpose the moon, making the shadows as bright possible. Once I got the raw file on my computer at home, in Lightroom/Photoshop I pulled back the highlights enough to restore detail in the moon, and bumped the shadows slightly to pull out a little more detail there.
As you can see, even at 40mm, the moon is a tiny white dot in a much larger scene. But I’ve always felt that the moon’s emotional tug gives it much more visual weight than its size would imply. Without the moon this would be an nice but ordinary bristlecone image—for me, adding the moon sweetens the result significantly.
A Plan B gallery (images that weren’t my original goal)
Click an image for a lager view, and to enjoy the slide show


Seven reasons photographers love rain
Posted on October 22, 2014
Hidden Leaf, Mt. Hood, Oregon
Canon EOS-5D Mark III
168 mm (plus 48mm of extension)
1/100 second
F/4
ISO 400
The difference between a photographer and a tourist is easily distinguished by his or her response to rain: When the rain starts, the photographer grabs a camera and bolts outside, while the tourist packs up and races for shelter.
Seven reasons photographers love rain
- Smooth, (virtually) shadowless light that eliminates the extreme contrast cameras struggle to handle, and enhances color saturation
- Clouds are vastly more interesting than blue skies
- The best stuff happens in the rain: rainbows, lightning, clinging water droplets
- Clean air means more vivid sunrises and sunsets
- Replenished lakes, rivers, streams, and waterfalls for days, weeks, or months of great photography (rain or not)
- Low light makes easier the long shutter speeds necessary for soft water effects
- (Last, but not least,) we have the landscape to ourselves
Case in point
This week Don Smith and I traveled to Hood River, Oregon for some autumn photography, and to do more prep and reconnaissance for next spring’s Columbia River Gorge photo workshops. It’s rained every day we’ve been here, and you won’t find two happier (albeit wetter) photographers. Not just because our California bones miss rain (they do), but because there is no better time to take pictures than a rainy day.
Monday morning Don and I drove to Lost Lake to scout it as a potential workshop location. Climbing from near sea level to over 3,000 feet in a steady rain, we passed through deciduous forests in varying stages of green, yellow, orange, and red. The fall color peaked at around 2,000 feet, dwindled as we climbed further, until by the time we reached the lake, most of the colorful leaves were on the ground or whisked away by mountain breezes. While Mt. Hood was completely obscured by rainclouds, we spent a couple of hours exploring near the lake before heading back down the mountain with no specific plan other than to stop somewhere and photograph the color we’d enjoyed on the drive up.
Partway down the mountain we pulled over beside an evergreen forest liberally mixed with yellow and red maples, donned our rain gear, and went to work. With dense, low clouds shrinking the view to just the immediate vicinity, grand panorama were out of the question and my 70-200 became my weapon of choice for its ability to isolate nearby leaves and limit depth of field.
An essential but frequently overlooked component of successful rainy day photograph is a (properly oriented!) polarizer to mitigate the ubiquitous, color-sapping sheen reflecting back from every exposed surface. This is a no-exception thing for me—I don’t care if it’s already dark and the polarizer robs me of two more stops of light, without it, images from wet scenes like this would be a complete failure. In this case I bumped my ISO to 400 (and would have as high as necessary if there had been more wind) before composing a single frame.
Beautiful as it was, a scene like this starts as a hodgepodge of disorganized color. Fortunately, it’s never long before individual elements start manifesting—the longer I stay, the more (and smaller) detail I see, until even the littlest thing stands out and I can’t believe it had been there all along. Knowing all this, I usually start at my lens’s wider range and gradually work tighter as the surroundings become more familiar.
And so it was with this little leaf, tucked into the forest behind several layers of dense and dripping branches, hiding from my gaze until nearly an hour into my visit. From the forest’s outskirts I zoomed to 200mm and composed a few frames through the tangle of branches, but it wasn’t long before I needed to be closer.
When I spy something interesting, it’s easy to crash through the forest like an angry grizzly (or frightened bison), but because I was extremely concerned about dislodging the fragile raindrops, I found myself deliberately stalking my prey, more like a stealthy cougar. (I could have just as easily compared my advance to a slithering snake, but for some reason this cougar analog resonated with me. Go figure.) When I made it so close that I was inside my lens’s focus range, I added an extension tube, and finally a second tube.
By this time I was just a few inches from the leaf, and while this ultra-close view was pretty cool, I felt my frame needed more that just a pretty leaf. Until this point I’d been pushing the nearby branches and leaves aside, out my view. But realizing that I was so close (the leaf closest brushed my lens), and my range of focus was so thin, that they would blur to a smear of red that cradled my subject.
With a paper-thin depth of field, finding the right focus point is essential. I also knew that I wouldn’t be able to get the entire leaf sharp, so I used live-view to focus on the center water drop (because that’s where I want my viewer’s eye to start).
Staying dry
The rain came and went for the duration of our stay, but never reached an intensity that made shooting difficult. In this case there wasn’t much wind, making my umbrella particularly useful for keeping raindrops off my lens. Nevertheless, without a little simple preparation, this image wouldn’t have been possible. I’ve learned never to take a photo trip without basic rain gear. For me that’s:
- A thin, waterproof shell that fits over whatever else I’m wearing (shirt, jacket, or whatever the temperature calls for)
- Waterproof pants that fit over my regular pants—I have an unlined pair for moderate temperatures, and a lined pair what I think it could get cold, and decide between when I pack
- Waterproof hiking boots
- Waterproof hat
- Wool or synthetic shirts, pants, and socks that will keep me comfortable when my rain gear causes me to perspire (no cotton!)
- Umbrella for my camera—because I’m dry (see above), I can dedicate the umbrella 100 percent to keeping raindrops off my lens
- Towel to dry things (especially my lens!) when they get wet—I often borrow one from my hotel, which isn’t a problem as long as I remember to return it
- Plastic garbage bag to drape over my camera when it’s on the tripod waiting for me to do something productive—if I forget a garbage bag, the hotel’s laundry or trash liner bags work fine
A rainy day gallery
Click an image for a closer look, and to enjoy the slide show


It’s all about relationships
Posted on October 18, 2014

Star Trails Above an Ancient Bristlecone, Schulman Grove, White Mountains
Canon EOS-5D Mark III
28 mm
31 minutes
F/5.6
ISO 100
Relationships
Think about how much our lives revolve around relationships: romance, family, friends, work, pets, and so on. It occurs to me that this human inclination toward relationships almost certainly influences the photographic choices we make, and the way our images touch others.
Whether it’s conscious or not, photographers convey relationships in their images. A pretty sunset is nice, but a pretty sunset over the Grand Canyon or Yosemite is especially nice. Likewise, why be satisfied with an image of a rushing mountain stream when we can accent the scene with an autumn leaf? And that tree up there on the hill? It sure would look great with a moon. These are relationships, two distinct subjects connected by a shared moment.
The more we can think in terms of relationships in nature, adding that extra element to our primary subject, or finding multiple elements and organizing them in a way that guides the eye through the frame, the more our images will reach people at the subconscious level that draws them closer and holds them longer.
On the other hand…
Some of my favorite images are of a solitary subject, and element in nature that stands alone in the scene—what’s up with that? I’ve decided (since this is my blog) that this the exception that proves the rule. As much as humans gravitate to relationships, what person doesn’t long for the peace of solitude from time to time? In the case the tree in the image below, it’s the absence of a relationship that draws us, or more accurately, it’s the tree’s relationship with an otherwise empty scene that appeals to the relationship overload we all experience from time to time.

Solitary Tree After Sunset, McGee Creek Canyon, Eastern Sierra
It’s the isolation of this small tree, its relationship with the void, that makes this image work for me.
Star Trails and Ancient Bristlecone: About this image
At 4,000+ years, the bristlecone pines of the White Mountains, east of Bishop, California, are among the oldest living things on Earth. They’re also among the most photogenic. Each year I take my Eastern Sierra photo workshop group to photograph the bristlecones of the Schulman Grove. Given the (rather gnarly) one hour drive would get us back to our hotel in Bishop quite late on the eve of a particularly early sunrise shoot, and night temperatures above 10,000 feet in late September are quite chilly, I’ve never kept the group out here for a night shoot. Until this year.
With clear skies and a 40 percent crescent moon, I couldn’t resist the opportunity to photograph these trees with just enough moonlight to reveal their weathered bark without washing out too many stars. Here was an opportunity to create the kind of relationship we all look for—juxtaposing these magnificent trees against an equally magnificent night sky. So after a nice sunset shoot, but before it became too dark, I had everyone find a composition they liked, lock it in on their tripod, and focus using the remaining light. When the stars started popping out, we began clicking—I started everyone the initial exposure settings, and helped them ensure that their images were sharp, but pretty soon most of them were managing quite fine without my help.
Our first frames were pinpoint stars, relatively short (30 seconds or less) exposures at wide-open apertures and very high ISOs. As the darkness became complete, we were equally thrilled number of stars and the amount of tree and rock detail the faint moonlight brought out in our images. Eventually most in the group wanted to recompose, which required re-focusing, no trivial task in the darkness. Normally an infinity focus on the moon will suffice at night, but the trees were so close, and our apertures so wide, that I felt it would be best to focus on a tree (to ensure its sharpness at the possible risk of slight softness in the stars). We found that by hitting the tree with an extremely bright light (or two), we could see just enough detail to manually focus. But just to be sure, I insisted that everyone verify their focus by scrutinizing a magnified image on their LCD.
When I was convinced that everyone had had success with pinpoint stars, I prepared them all for one final, long exposure star trail shot. Using the last pinpoint composition and focus (after verifying that it was indeed sharp), I did the math that would return the same exposure at 30 minutes that we’d been getting at 30 seconds—in this case, adding 6 stops of shutter speed meant subtracting 6 stops of ISO and aperture. When everyone was ready, we locked our shutters open in bulb mode, and then just kicked back and watched the sky.
My favorite part of these group shoots are these times when we can all just kick back together and appreciate the beauty of the moment, without the distraction of a camera. Overhead the Milky Way painted a faint white stripe through Cassiopeia, a couple of satellites danced faintly among the stars, and several meteors flashed. I didn’t even mind the occasional plane cutting the darkness (it didn’t hurt to know that Photoshop makes removing them quite simple now), and tried to guess its destination.
This shoot was certainly about finding the relationship between the these trees and the night sky they’ve basked beneath every night for thousands of years. But it was also about the stories and laughs we shared that night, cementing relationships between people who were strangers just a couple of days earlier—I know from experience some of these relationships will end with the workshop, but many will continue for years or even lifetimes.
A gallery of relationships in nature
Click an image for a closer look, and to enjoy the slide show


A small dose of mind-bending perspective
Posted on October 12, 2014

Earth and Sky, Kilauea Caldera, Hawaii
Canon EOS-5D Mark III
16 mm
20 seconds
F/2.8
ISO 3200
So what’s happening here? The orange glow at the bottom of this frame is light from 1,800° F lava bubbling in Halemaʻumaʻu Crater inside Hawaii’s Kilauea Caldera, reflecting off a low-hanging bank of clouds. The white band above the crater is light cast by billions of stars at the center our Milky Way galaxy. So dense and distant are the stars here, their individual points are lost to the surrounding glow. Partially obscuring the Milky Way’s glow are large swaths of interstellar dust, the leftovers of stellar explosions and the stuff of future stars. Completing the scene are stars in our own neighborhood of the Milky Way, stars close enough that we see them as discrete points of light that we imagine into mythical shapes—the constellations.
The Milky Way galaxy is home to every single star we see when we look up at night, and 300 billion more we can’t see—that’s nearly 50 stars for every man, woman, and child on Earth. Our Sun, the central cog in the solar system that includes Earth and the other planets wandering our night sky, is a minor player in a spiral arm near the outskirts of the Milky Way. But before you get too impressed with the size of the Milky Way, consider that it’s just one of 500 billion or so galaxies in the known Universe—that’s right, there are more galaxies in the Universe than stars in our galaxy.
Everything we see is the product of light—light created by the object itself (like the stars), or created elsewhere and reflected (like the planets). Light travels incredibly fast, fast enough that it can span even the two most distant points on Earth faster than humans can perceive, fast enough that we consider it instantaneous. But distances in space are so great that we don’t measure them in terrestrial units of distance like miles or kilometers. Instead, we measure interstellar distance by the time it takes for a beam of light to travel between two objects—one light-year is the distance light travels in one year.
The ramifications of cosmic distance are mind-bending. Imagine an Earth-like planet revolving the star closest to our solar system, about four light-years away. If we had a telescope with enough resolving power to see all the way down to the planet’s surface, we’d be watching that planet’s activity from four years ago. Likewise, if someone on that planet today (in 2014) were watching us, they’d see Lindsey Vonn claiming the gold in the Women’s Downhill at the Vancouver Winter Olympics, and maybe learn about the unfolding WikiLeaks scandal.
In this image, the caldera’s proximity makes it about as “right now” as anything in our Universe can be—the caldera and I are sharing the same instant in time. On the other hand, the light from the stars above the caldera is tens, hundreds, or thousands of years old—it’s new to me, but to the stars it’s old history. Not only that, every point of starlight here is a version of that star created in a different instant in time. It’s possible for the actual distance separating two stars to be so great, that we see light from the younger star that’s older than the light from the older star.
So what’s the point of all this mind bending? Perspective. It’s easy (essential?) for humans to overlook our place in this larger Universe as we negotiate the family, friends, work, play, eat, and sleep that defines our very own personal universes. I doubt we could cope otherwise. But when I start taking my life too seriously, it helps to appreciate my place in the larger Universe. Nothing does that better for me than quality time with the night sky.
About this image
My 2014 Hawaii Big Island photo workshop group made three trips to photograph the Kilauea Caldera beneath the Milky Way. On the first night we got a lot of clouds, with a handful of stars above, and just a little bit of Milky Way. Nice, but not the full Milky Way everyone hoped for. So I brought everyone back a couple nights later—this time we got about ten minutes of quality Milky Way photography before the clouds closed in. The following night we gave the caldera one more shot and were completely shut out by clouds. Such is the nature of night photography in general, and on Hawaii in particular. This image is from our second visit.
My concern that night was making sure everyone was successful, ASAP. I started with a test exposure to determine the exposure settings that would work best for that night (not only does each night’s ambient light vary with the volcanic haze, cloud cover, and airborne moisture, the caldera’s brightness varies daily too). Once I got the exposure down and called it out to the group, most of my time was spent helping people find and check their focus, and refine their compositions (“More sky! More sky!”). Bouncing around in the dark, I’d occasionally stop at my camera long enough to fire a frame, never staying long enough to see the image pop up on the LCD. I ended up with a half dozen or so frames, including this one from early in the shoot.
Join me on the Big Island next year
Learn more about starlight photography
A starlight gallery
Click an image for a larger view, and to enjoy the slide show


A simple how and when of fall color
Posted on October 6, 2014
Autumn Bouquet, Zion National Park
Canon EOS-1Ds Mark III
200 mm
4 seconds
F/16
ISO 200
Few things get a photographer’s heart racing more than the vivid yellows, oranges, and reds of autumn. And the excitement isn’t limited to photographers—to appreciate that reality, just try navigating New England backroads on a Sunday afternoon in October.
Innkeeper logic
But despite all the attention, the annual autumn extravaganza is fraught mystery and misconception. Showing up at at the spot that guy in your camera club told you was peaking at this time last year, you might find the very same trees displaying lime green mixed with just hints of yellow and orange, and hear the old guy behind the counter at the inn shake his head and tell you, “It hasn’t gotten cold enough yet—the color’s late this year.” Then, the next year, when you check into the same inn on the same weekend, you find just a handful of leaves clinging to exposed branches—this time as the old guy hands you the key he utters, “That freeze a few weeks ago got the color started early this year—you should have been here last week.”
While these explanations may sound reasonable, they’re not quite accurate. Because the why and when of fall color is complicated, observers resort to memory, anecdote, and lore to fill knowledge voids with partial truth and downright myth. Fortunately, science has given us a pretty good understanding of the fall color process.
It’s all about the sunlight
The leaves of deciduous trees contain a mix of green, yellow, and orange pigments. During the spring and summer growing season, the green chlorophyl pigment overpowers the orange and yellow pigments and the tree stays green. Even though this chlorophyl is quickly broken down by sunlight, the process of photosynthesis that sustains the tree, during the long days of summer it is continuously replaced.
As the days shrink toward autumn, things begin to change. Cells at the abscission layer at the base of the leaves’ stem (the knot where the leaf connects to the branch) begin the process that will eventually lead to the leaf dropping from the tree: thickening of cells in the abscission layer blocks the transfer of carbohydrates from the leaves to the branches and the movement of minerals to the leaves that had kept the tree thriving all summer. Without these minerals, the leaves’ production of chlorophyl dwindles and finally stops, leaving just the yellow and orange pigments. Voila—color!
Sunlight and weather
Contrary to popular belief, the timing of the onset of this fall color chain reaction is much more daylight-dependent than temperature- and weather-dependent—triggered by a genetically programmed day/night-duration threshold, and contrary to innkeeper-logic, the trees in any given region will commence their transition from green to color at about the same time each year (when the day length drops to a certain point).
Nevertheless, though it doesn’t trigger the process, weather does play a significant part in the intensity, duration, and demise of the color season. Because sunlight breaks down the green chlorophyl, cloudy days after the suspension of chlorophyl creation will slow the coloring process. And while the yellow and orange pigments are present and pretty much just hanging out, waiting all summer for the chlorophyl to relinquish control of the tree’s color, the red and purple pigments are manufactured from sugar stored in the leaves—the more sugar, the more vivid the red. Ample moisture, warm days, and cool (but not freezing) nights after the chlorophyl replacement has stopped are most conducive to the creation and retention of the sugars that form the red and purple pigments.
On the other hand, freezing temperatures destroy the color pigments, bringing a premature end to the color display. Drought can stress trees so much that they drop their leaves before the color has a chance to manifest. And wind and rain can wreak havoc with the fall display—go to bed one night beneath a canopy of red and gold, wake the next morning to find the trees bare and the ground blanketed with color. And of course all these weather factors come in an infinite number of variations, which makes each year’s color timing and intensity a little different from the last.
Despite our understanding of the fall color process, Mother Nature still holds some secrets pretty close to her vest—just when we think we’ve got it all figured out, she’ll surprise us. For example, last year’s Eastern Sierra fall color featured lots of black leaves that I attributed to California’s extreme drought conditions. With the drought persisting, and in fact intensifying, this year, I feared this fall would be even worse. So I was quite pleased to find everything going along right on schedule, with lots of yellow, more red than usual, and hardly a black leaf to be seen. Go figure.
About this image
My first visit to Zion National Park, three years ago, found the fall color peaking. I’d love to say this was through expert knowledge and careful planning, but it just happened that I’d been helping Don Smith with a workshop in Moab and we’d tacked on an extra day to play in Zion. We arrived early enough in the afternoon to explore and shoot for several hours before sunset, and were so thrilled by what we’d found that we decided to return for an hour the or so the next morning before heading home.
Though my time was limited, a couple of things made this morning’s shoot even more productive than previous afternoon’s. First was the familiarity I’d gained the day before. And second was the morning’s soft light and utter stillness. Anxious to get going, we started before sunrise and were the first people to enter the canyon that morning—without wind or human interference, the air was so still that it seemed even the river was whispering. In these conditions it’s easy to forget time, ignore the chill, and immerse myself in world devoid of human obligation and discomfort.
What struck me most about Zion’s color was the crimson maples, a color we just don’t get in California. While yellow was ubiquitous, red leaves were quite plentiful too, and I tuned my vision to identify any red I could highlight against the predominant yellow. Identifying this bunch of red leaves was just the beginning of my composition. Isolating a subject requires more than positioning it in the frame’s two-diminsional up-down/left-right planes; it also requires controlling the virtual third dimension, depth, by careful management of the background and depth-of-field. In this case I refined my find by moving left/right and up/down until I was satisfied with the way the background complemented the red leaves.
Equally important was finding the appropriate depth of field—too little DOF would mean not enough of the nearby red leaves, my subject, would be sharp; too much DOF much would risk resolving so much background that it would compete with my leaves. I decided to use my 70-200 lens, moving back far enough to include all of the red leaves at 200mm. That long focal length compressed the distance separating the foreground leaves and background trees (make the yellow trees seem closer to the red leaves). Because depth of field decreases with focal length, even at f16 background trees were soft enough.
A few other subtle but significant considerations went into this image. First, note the long shutter speed: the air was so still that I had no qualms about using ISO 200, f16, and a polarizer, even though it dropped my shutter speed to four seconds. Also, don’t underestimate the importance of a polarizer in shady or overcast scenes: color-robbing glare from leaves’ waxy sheen is reduced significantly by a properly oriented polarizer. And finally, in front of these leaves were a few fluffy white seed pods—I knew they were close enough that at 200mm they would be blurred to little puffs of white, and simply decided to shoot through them.
Read how to photograph fall color in my Fall Color Photo Tips article.
A fall color gallery
Click an image for a closer look, and to enjoy the slide show


