Eloquent Images by Gary Hart
Insight, information, and inspiration for the inquisitive nature photographer
To Polarize, or Not to Polarize
Posted on March 3, 2020
One of my most frequently asked questions during a workshop shoot is, “Should I use my polarizer here?” Of course that’s an impossible question to answer absolutely because as a creative choice, the polarizer decision is rarely absolute.
While many people believe the sole purpose of a polarizer is to make the sky darker (deeper blue), blue sky is just a byproduct of the polarizer’s function: to cut reflections. In fact, if someone could design a polarizer that only worked on the landscape and did nothing to the sky, that’s the one I’d be using because: 1) I generally don’t care for blue sky in my images, and 2) a polarizer doesn’t usually darken the sky uniformly.
Before going any farther, I should probably explain a little about what a polarizer does, and how it does it.
Put simply
A polarizer cuts reflections. It’s a piece of glass mounted on a threaded ring—the threaded ring screws onto a lens, while the glass part of the polarizer rotates independently, allowing the photographer to rotate the glass 360 degrees on the front of the lens. (Contrary to popular belief, a polarizer is a single piece of rotating glass, not one piece of glass rotating atop a second stationary piece of glass.) The polarizer is designed to rotate because its greatest (reflection cutting) effect is at 90 degrees to the light source; at all other angles polarization decreases as the angle moves away from 90 degrees; it becomes nonexistent at 0 and 180 degrees. By watching the scene through the viewfinder as you rotate the glass, you can see the polarization effect change.
On the surface, cutting reflections might not seem so desirable for someone who likes photographing reflections as much as I do, but reflections are a much bigger part of our visual experience than most people realize. Virtually every object reflects at least a little, and many things reflect a lot more than we’re aware. Worse still, these reflections often hide the very surface features and color we most want to photograph.
When reflections hide an object’s underlying beauty, a polarizer can restore some of that beauty. I use a polarizer when I want to capture the submerged rocks or sand hidden by the reflection atop a river or lake, the rich color overwhelmed by glare reflecting from foliage, and sometimes even the sky’s deep blue that has been washed out by light scattered by atmospheric molecules.
Put a little less simply…
In reality, reflections are merely collateral damage to your polarizer. What a polarizer really does is eliminate light that’s already been polarized. To understand what’s really going on with a polarizer, read on….
Essential terminology
- Oscillation is motion relative to a fixed point. For example, when you snap a whip, the whip “oscillates” along its length. Without external interference (e.g., friction from the atmosphere or other objects), motion in one direction along the whip will have an identical motion in the opposite direction (e.g., up=down, left right, and so on), and that motion will move forward along the whip.
- A wave is oscillation along or through a medium (such as air, water, or space). The bulge that moves up and down (oscillates) along a cracked whip is a wave. For the liberal arts folks, (in this context) wave is a noun, oscillate is a verb. A wave is measured by its wavelength and frequency—the higher the frequency, the shorter the wavelength.
- Frequency is the number of times a wave peak passes a discrete point in a given unit of time (usually one second: “per second”).
- Wavelength is the distance from one wave peak to the next at any instant frozen in time.
- A transverse wave oscillates perpendicular (90°) to its direction of motion. To imagine the motion of a transverse wave, picture an ocean wave, which oscillates up and down as it advances through the water. Now think about a bottle floating in the open ocean—bobbing up and down with each wave, its up/down motion is perpendicular to the wave’s forward motion, but when that wave has passed, the bottle is in the same place it was before the wave arrived. (Waves don’t move bobbing bottles across the ocean, wind and currents do.)
- Visible light is electromagnetic radiation that reaches our eyes as a transverse wave somewhere in the wavelength range the human eye can register, about 380 to 740 nanometers (really small).
- Sunlight (or more accurately, solar energy) reaches earth as a transverse wave with a very broad and continuous spectrum of wavelengths that include, among others, the visible spectrum (lucky for photographers), infrared (lucky for everyone), and ultraviolet (lucky for sunscreen vendors). The oscillation of solar energy’s transverse wave is infinitely more complicated than an ocean wave because light oscillates in an infinite number of directions perpendicular to its direction of motion. Huh? Think about the blades of a propeller—each is perpendicular to the shaft upon which the propeller rotates, so in theory you can have an infinite number of propeller blades pointing in an infinite number of directions, each perpendicular to the shaft. So a light wave oscillates not just up/down, but also left/right, and every other (perpendicular) angle in between.
Polarization
While an unpolarized light wave oscillates on every plane perpendicular to the wave’s motion, polarized light only oscillates on one perpendicular plane (up/down or left/right or 45°/225° and so on).
Polarization can be induced many ways, but photographers are most interested in light that has already been polarized by reflection from a nonmetallic surface (such as water or foliage), or light that has been scattered by molecules in our atmosphere. Light scattered by a reflective surface is polarized parallel to the reflective surface; light scattered by molecules in the atmosphere is polarized perpendicular to the direction of the light.
Polarization can also be induced artificially with a polarizing filter (“polarizer”), a filter coated with a material whose molecular structure allows most light to pass, but blocks light waves oscillating in a specific direction. When unpolarized light (most of the light that illuminates our lives) passes through a polarizer, the light that enters the lens to which it’s attached has been stripped of the waves oscillating in a certain direction and we (through the viewfinder) see a uniform darkening of the entire scene (usually one to two stops).
But that uniform darkening is not usually what we use a polarizer for. (I say usually because sometimes we use a polarizer to reduce light and stretch the shutter speed in lieu of a neutral density filter.) Photographers are most interested in their polarizers’ ability to eliminate reflective glare and darken the sky, which occurs when their polarizer’s rotating glass element matches the oscillation direction of light that has already been polarized by reflection or scattering, cancelling that light. By watching the scene as we rotate the filter’s polarizing element, photographers know that we’ve achieved maximum polarization (reflection reduction) when we rotate the polarizer until maximum darkening is achieved—voila!
The exception that proves the rule
Most photographers know that a polarizer has its greatest effect on the sky when it’s at right angles (90°) to the sun, and least effective when pointed directly into or away from the sun (0º or 180°). We also know that a rainbow, which is always centered on the “anti-solar point” (a line drawn from the sun through the back of your head and out between your eyes points to the anti-solar point) exactly 180° from the sun, can be erased by a polarizer. But how can it be that a polarizer is most effective at 90° to the sun, and a rainbow is 180° from the sun? To test your understanding of polarization, try to reason out why a rainbow is eliminated by a polarizer.
Did you figure it out? I won’t keep you in suspense: light entering a raindrop is split into its component colors by refraction; that light is reflected off the back of the raindrop and back to your eyes (there’s a little more bouncing around going on inside the raindrop, but this is the end result). Because a rainbow is reflected light, it’s polarized, which means that it can be eliminated by a properly oriented polarizer.
But back to the original question
Should I use a polarizer? I’m still not going to answer. What I will tell you is that I carry a polarizer for every lens in my bag, and when the sun’s out I virtually always have a polarizer on my lens. But my approach comes with some caveats:
- A polarizer cuts the amount of light reaching your sensor by 1 to 2 stops, which means if don’t use a tripod (shame on you), a polarizer requires a faster shutter speed.
- You must get in the habit of orienting the polarizer with each composition, or risk doing more harm than good to your image
While I use a polarizer on pretty much all of my daylight images, there are times I remove it:
- At night (duh), or whenever the scene is so dark that the polarizer’s cost to my exposure settings exceeds its benefit.
- On a wide lens with lots of blue sky, the polarizer’s effect on different areas of the sky can be both obvious and uncorrectable (I can dodge/burn minor differences). On the other hand, I almost always avoid wide shots with lots of blue sky, so this is rarely a consideration.
- When the sun is in my frame—for example, when I’m going for a sunstar—the extra glass a polarizer adds increases the likelihood of unsightly reflections.
- Photographing a full rainbow with a wide lens, a polarizer can eliminate or diminish part of the rainbow.
- When I put on a neutral density filter, my polarizer comes off because stacking filters causes vignetting, the less glass between my subject and sensor the better, and nature abhors stacked filters (every time you stack filters, the photography gods fuse them until you’ve learned your lesson).
- Any time I absolutely need the fastest shutter speed possible without increasing my ISO further, the polarizer comes off.
- I should probably add that I don’t have a polarizer for my Sony 12-24 lens because ultra-wide lenses like this aren’t threaded for filters. Using a polarizer on an ultra-wide lens requires an awkward, expensive system that provides minimal benefit due to the wide field of view.
One time when I absolutely, without exception, always (have I made my point?) use a polarizer is when there’s no sky in my frame. These are the times I’m using diffuse light to capture the color and texture of leaves, flowers, water, and rocks. All of these things reflect, sometimes subtly and sometimes not so subtly, and that reflection is rarely beneficial.
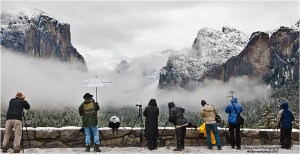
And finally, a common misconception about polarizers is that their use is either all or nothing (full polarization or minimal polarization). The amount of polarization I dial in depends on the effect I’m going for. For example, each of the four images at the top of this post was captured with the polarizer oriented at a point between maximum and minimum effect by watching the scene as I turned the polarizer, then waiting until I had the combination of reflection/no-reflection I wanted. This allowed me to reveal submerged nearby features while saving the reflection of the more distant subject.
So, when should you use a polarizer? I still can’t tell you, but at least now you have the knowledge to make the decision for yourself.
Managing Reflections With a Polarizer
Click an image for a closer look and to view a slide show.


How a polarizer works
Posted on October 5, 2017

Autumn Reflection, North Lake, Eastern Sierra
Canon EOS-1Ds Mark III
Canon 17-40L
1/5 second
F/16
ISO 200
Some people couldn’t care less how a polarizer works—they’re satisfied knowing what a polarizer does, and how to make it happen. But if you’re like me, you also need to understand why things behave the way they do.
Put simply…
A polarizer cuts reflections. On the surface that not might seem so desirable for someone who likes photographing reflections as much as I do, but reflections are a much bigger part of our visual experience than most people realize. Virtually every object reflects at least a little, and many things reflect a lot more than we’re aware. Worse still, these reflections often hide the very surface features and color we most love to photograph.
When reflections hide an object’s underlying beauty, a polarizer can restore some of that beauty. I use a polarizer when I want to capture the submerged rocks or sand hidden by the reflection atop a river or lake, the rich color overwhelmed by glare reflecting from foliage, or the sky’s deep blue washed out by light scattered by atmospheric molecules.
Put a little less simply…
In reality, reflections are merely collateral damage to your polarizer. What a polarizer really does is eliminate light that’s already been polarized. To understand what’s really going on with a polarizer, read on….
Essential terminology
- Oscillation is motion relative to a fixed point. For example, when you snap a whip, the whip “oscillates” along its length. Without external interference (e.g., friction from the atmosphere or other objects), motion in one direction along the whip will have an identical motion in the opposite direction (e.g., up=down, left right, and so on), and that motion will move forward along the whip.
- A wave is oscillation along or through a medium (such as air, water, or space). The bulge that moves up and down (oscillates) along a cracked whip is a wave. For the liberal arts folks, (in this context) wave is a noun, oscillate is a verb. A wave is measured by its wavelength and frequency—the higher the frequency, the shorter the wavelength.
- Frequency is the number of times a wave peak passes a discrete point in a given unit of time (usually one second: “per second”).
- Wavelength is the distance from one wave peak to the next at any instant frozen in time.
- A transverse wave oscillates perpendicular (90°) to its direction of motion. To imagine the motion of a transverse wave, picture an ocean wave, which oscillates up and down as it advances through the water. Now think about a bottle floating in the open ocean—bobbing up and down with each wave, its up/down motion is perpendicular to the wave’s forward motion, but when that wave has passed, the bottle is in the same place it was before the wave arrived. (Waves don’t move bobbing bottles across the ocean, wind and currents do.)
- Visible light is electromagnetic radiation that reaches our eyes as a transverse wave somewhere in the wavelength range the human eye can register, about 380 to 740 nanometers (really small).
- Sunlight (or more accurately, solar energy) reaches earth as a transverse wave with a very broad and continuous spectrum of wavelengths that include, among others, the visible spectrum (lucky for photographers), infrared (lucky for everyone), and ultraviolet (lucky for sunscreen vendors). The oscillation of solar energy’s transverse wave is infinitely more complicated than an ocean wave because light oscillates in an infinite number of directions perpendicular to its direction of motion. Huh? Think about the blades of a propeller—each is perpendicular to the shaft upon which the propeller rotates, so in theory you can have an infinite number of propeller blades pointing in an infinite number of directions, each perpendicular to the shaft. So a light wave oscillates not just up/down, but also left/right, and every other (perpendicular) angle in between.
Polarization
While an unpolarized light wave oscillates on every plane perpendicular to the wave’s motion, polarized light only oscillates on one perpendicular plane (up/down or left/right or 45°/225° and so on).
Polarization can be induced many ways, but photographers are most interested in light that has already been polarized by reflection from a nonmetallic surface (such as water or foliage), or light that has been scattered by molecules in our atmosphere. Light scattered by a reflective surface is polarized parallel to the reflective surface; light scattered by molecules in the atmosphere is polarized perpendicular to the direction of the light.
Polarization can also be induced artificially with a polarizing filter (“polarizer”), a filter coated with a material whose molecular structure allows most light to pass, but blocks light waves oscillating in a specific direction. When unpolarized light (most of the light that illuminates our lives) passes through a polarizer, the light that enters the lens to which it’s attached has been stripped of the waves oscillating in a certain direction and we (through the viewfinder) see a uniform darkening of the entire scene (usually one to two stops).
But that uniform darkening is not usually what we use a polarizer for. (I say usually because sometimes we use a polarizer to reduce light and stretch the shutter speed in lieu of a neutral density filter.) Photographers are most interested in their polarizers’ ability to eliminate reflective glare and darken the sky, which occurs when their polarizer’s rotating glass element matches the oscillation direction of light that has already been polarized by reflection or scattering, cancelling that light. By watching the scene as we rotate the polarizing element on the filter, photographers know that we’ve achieved maximum polarization (reflection reduction) when we rotate the polarizer until maximum darkening is achieved—voila!
The exception that proves the rule
Most photographers know that a polarizer has its greatest effect on the sky when it’s at right angles (90°) to the sun, and least effective when pointed directly into or away from the sun (0º or 180°). We also know that a rainbow, which is always centered on the “anti-solar point” (a line drawn from the sun through the back of your head and out between your eyes points to the anti-solar point) exactly 180° from the sun, can be erased by a polarizer. But how can it be that a polarizer is most effective at 90° to the sun, and a rainbow is 180° from the sun? To test your understanding of polarization, try to reason out why a rainbow is eliminated by a polarizer.
Did you figure it out? I won’t keep you in suspense: light entering a raindrop is split into its component colors by refraction; that light is reflected off the back of the raindrop and back to your eyes (there’s a little more bouncing around going on inside the raindrop, but this is the end result). Because a rainbow is reflected light, it’s polarized, which means that it can be eliminated by a properly oriented polarizer.
About this image
Long before achieving international fame as the background scene for Apple OS X High Sierra, North Lake near the top of Bishop Canyon in the Eastern Sierra has been beloved by photographers. Each autumn this little gem of a lake teams with photographers longing for even one of the following conditions: peak gold and red in the aspen, a glassy reflection, or a dusting of snow.
I visit North Lake multiple times each autumn, sometimes with my workshop groups, sometimes by myself. I’ve found pretty much every possible combination of conditions: snow/no-snow; early, peak, or late fall color; and a lake surface ranging from mirror smooth to churning whitecaps.
One sunrise early October of 2010 I hit the North Lake trifecta. Crossing my freezing fingers that the reflection would hold until I was ready, I lowered my tripod on the rocky shore and framed the aspen-draped peak and its vivid reflection. I used a couple of protruding rocks to anchor my foreground, slowly dialed my polarizer until the entire lake surface became a reflection, and clicked. But rather than settle for that shot, I reoriented my polarizer until the reflection virtually disappeared and a world of submerged granite rocks appeared. I clicked another frame and stood back to study the image on my LCD.
As much as I liked the rocky lakebed version, I knew there was no way I could pass on the best reflection I’d ever seen at North Lake. So I returned my eye to my viewfinder and very slowly dialed the polarizer again, watching the reflection reappear across the lake and advance toward me until the entire mountain unfolded in reverse atop the lake. Stopping just at that midway polarization point, I had the best of both worlds: my pristine reflection and an assortment of submerge rocks.
I Use Breakthrough Filters
Dialing In My Polarizer
Click an image for a closer look and slide show. Refresh the window to reorder the display.


, California")


Dialing it in
Posted on December 10, 2014

Rocks and Reflection, Valley View, Yosemite
Sony a7R
16 mm
1/3 second
F/11
ISO 200
I’m a big fan of the polarizer, so much so that each of my lenses wears a polarizer that never comes off in daylight. A couple of years ago “Outdoor Photographer” magazine published my article on using a polarizer, a slightly modified version of a blog post that appears in the Photo Tips section of this blog.
If you read that article, or pay much attention to what I write here, you know that while a polarizer can really crank up the blue in your sky, I’m not generally a fan of what the polarizer does to the sky. I find blue sky boring—making it more blue just distracts from my primary subject. And worse still, because polarization varies with the angle of view (maximum polarization occurs when composing perpendicular to the sunlight’s direction, minimum when you’re parallel to the sunlight), wide shots (in particular) display “differential polarization” that manifests as unnatural sky-color variation across the frame.
Where I find a polarizer most indispensable is terrestrial reflections. With a simple twist of a polarizer, a mirror reflection on still water is magically erased to reveal submerged rocks and leaves. More than the reflections we see on still water, a properly oriented polarizer removes distracting, color-robbing glare that jumps off of rocks and foliage. And you don’t need direct sunlight to enjoy a polarizer’s benefits—because reflections and glare exist in overcast and full shade conditions, a polarizer can significantly enhance those images as well.
But back to this differential polarization thing. As most know, a polarizer isn’t a filter that you simply slap on a lens and forget about. A rotates in its frame, changing the amount of polarization on the way—if you’re not orienting (rotating) your polarizer with each composition, you’re better off keeping it in your bag. Watching through your viewfinder as you rotate, you’ll see the scene darken and brighten—maximum polarization occurs when the scene is darkest. These changes may appear subtle at first, and in some cases will be barely visible, but the more you train your eye, the easier it becomes to detect even the most subtle polarization.
Since polarization varies with the angle of view, and any image encompasses a broad angle of view, the amount of polarization you see in any given image varies. While differential polarization is a real pain in images with a uniform surface (like a blue sky), understanding that a polarizer isn’t an all or nothing tool allows you to dial the reflection up in some parts of the scene, and down in others. Rather than automatically dialing the polarizer until the scene darkens (maximum polarization), or until the reflection pops out (minimum polarization), turn the polarizer slowly and watch the reflection advance and retreat as you turn.
That’s exactly what I did with the above image from last week’s Yosemite trip. The sunlit vestiges of a day-long rain swirled above Valley View and reflected in the drought-starved Merced River (one storm does not a drought break). Here I opted for a wide, vertical composition that left room for both foreground and sky tightly framed by El Capitan on the left and Cathedral Rocks and Bridalveil Fall on the right.
Faced with a crisp reflection and a submerged jigsaw of river-worn granite, I refused to choose one or the other. Instead, I composed my scene with a group of exposed rocks to anchor my immediate foreground, then carefully dialed away enough reflection to reveal the rounded rocks, while saving the portion of the reflection that duplicated the Yosemite icons.
I use Singh-Ray filters (polarizers and graduated neutral density)
A selective polarization gallery
Click an image for a closer look, and to enjoy the slide show


If at first you don’t succeed…
Posted on November 7, 2014

Floating Leaves, Merced River, Yosemite
Canon EOS-5D Mark III
105 mm
.6 seconds
F/11
ISO 800
In early November of 2007 I took a picture that didn’t quite work out. That’s not so unusual, but somehow this one stuck with me, and I’ve spent seven years trying to recreate the moment I missed that night.
On that evening seven years ago, the sun was down and the scene I’d been working for nearly an hour, autumn leaves clinging to a log in the Merced River, was receding into the gathering gloom. The river darkened more rapidly than the leaves, and soon, with my polarizer turned to remove reflections from the river, the leaves appeared to be suspended in a black void.
I’d decided my scene lacked a visual anchor, a place for the eye to land, so I waited (and waited) for a leaf to drift into the top of my framed. On my LCD the result looked perfect, and I felt rewarded for my persistence. But back home on my large monitor, I could see that everything in the frame was sharp except my anchor point. If only I’d have bumped my ISO instead of my shutter speed….
Intrigued by the unrealized potential, I returned to this spot each autumn, but the stars never aligned—too much water (motion); dead (brown) leaves; no leaves; too many leaves; no anchor point—until this week. Not only did I find the drought-starved Merced utterly still, “my” log was perfectly adorned with a colorful leaf assortment anchored by an interlocked pair of heart-shaped cottonwood leaves.
I worked the scene until the darkness forced too much compromise with my exposure settings. In the meantime, I filled my card with horizontal and vertical, wide and tight, versions of the scene with the log both straight and diagonal. I also played with the polarizer, sometimes dialing up the reflection of overhanging trees. But I ultimately decided on the one you see her, which is pretty close to my original vision.
I can’t begin to express how happy photographing these quiet scenes makes me. I’ve done this long enough to know that it’s the dramatic landscapes and colorful sunsets that garner the most print sales and Facebook “Likes,” but nothing gives me more personal satisfaction than capturing these intimate interpretations of nature.
Workshop Schedule || Purchase Prints || Instagram
Autumn Intimates
Click any image to scroll through the gallery LARGE


Reflections on the polarizer
Posted on December 1, 2011

Autumn Reflection, North Lake, Eastern Sierra
Canon EOS-1Ds Mark III
1/5 second
F/16.0
ISO 200
22 mm
Polarizer 101
Photographers who think a polarizer is only for darkening the sky miss opportunities to saturate color and and emphasize texture in shade or overcast. Even worse, some photographers screw on a polarizer without understanding how it works, mistakenly believing that merely having it attached is sufficient.
The amount of polarization any composition calls for is a creative decision that can make or break an image. And unfortunately, a mis-oriented polarizer is worse than no polarizer. With no Photoshop substitute to help you recover, your only option is to get the polarization right at capture.
This won’t be on the test
So what does a polarizer do?
It helps some people to understand that a wave of light oscillates perpendicular to its direction of motion–picture the way a wave in the middle of the ocean rises and falls as it advances: the wave moves forward, but the water moves up and down. In very simple terms, by removing light that oscillates in a specific direction, a polarizing filter removes reflection. Polarization (reflection reduction) is most pronounced when your lens points 90 degrees (perpendicular) to the direction of the sun (or other light source); its least effective when the lens points directly toward or away from the sun.
A circular polarizer (what you want for today’s digital SLR cameras) screws to the front of your lens. Rotating the polarizer’s outer element relative to its fixed, inner element, varies the orientation and amount of polarization. You can see its effect (sometimes large, sometimes small) through your viewfinder or on your live-view LCD.
What a polarizer does for you
With reflections minimized by a polarizer, pale blue sky is transformed to a deep blue, the natural color and texture of rocks and foliage pops, and clouds that were barely visible suddenly snap into prominence. Or, imagine mountains reflected in a still alpine lake: As you rotate your polarize, the reflection is replaced by rocks and leaves dotting the lakebed; keep turning and the reflection returns.
So what’s the catch?
Lost light
A polarizer costs you one to two stops of exposure, depending on the polarizer and the amount of polarization you dial in. Since aperture manages depth, landscape photographers usually compensate for the lost light with a longer shutter speed–one more reason to use a tripod.
Differential polarization
Because a polarizer’s effect varies with the direction of the light, and wide lenses cover such a broad field of view, light strikes different parts of a wide scene from different angles. The result is “differential polarization”: parts of the scene that are more polarized than others.
Differential polarization is particularly troublesome in the sky, appearing as an unnatural transition from light to dark blue across a single frame. This effect can often be reduced, but rarely eliminated, with careful dodging and burning in Photoshop. Better yet, avoid images with lots of (boring) blue sky.
Vignetting
A standard polarizer is comprised of a circle of polarized glass mounted in a frame that screws into, and rotates relative to, the fixed lens beneath. Many also include an outer ring with threads for attaching other filters. The field of view of ultra-wide lenses can be so great that, at their wider focal lengths, they include the polarizer’s frame: vignetting. Polarizer vignetting manifests as dark edges on your images, particularly at the corners.
Most of the best polarizer manufacturers offer a low-profile version that mitigates vignetting. Low profile polarizers are more money (oh well), usually require a special lens cap (usually just a minor annoyance), and don’t have external threads (not an issue for me).
Where’s the rainbow?
A polarizer oriented to minimize reflections will completely erase a rainbow. So if you’re shooting a photographing a rainbow, turn your polarizer until you see the rainbow at its brightest. And if you’re photographing scene that could get a rainbow, pull away from your viewfinder from time-to-time just to be sure that you’re not missing something special.
Me and my polarizer(s)
Always on
Since I’m all about simplicity in the field, and determining whether or not I need a polarizer and then installing or removing it as needed is more trouble than it’s worth, each lens has its own polarizer that never comes off during daylight hours. I remove my polarizer only when I need more light; but remember, I’m always on a tripod, so unless it’s night, or I’m dealing with wind or water motion, the light lost to the polarizer isn’t a concern for me.
But. Shooting with no polarizer is better than using an incorrectly oriented polarizer. If you’re going to follow my “always on” polarizer approach, you must be diligent about rotating the polarizer and checking its effect on each composition, or risk doing more harm than good to your image.
Protection
Like many photographers, I always use a filter as protection for my front lens element; unlike many photographers, I don’t use UV or skylight filters. While it’s possible to stack a polarizer with a UV or skylight filter, I don’t. Instead, (because it never comes off) my polarizer doubles as protection for the front lens element.
Given that my polarizers are in the $200 range, this gets a little expensive when a filter “takes one for the team,” but it’s cheaper than replacing an entire lens, and more desirable than stacking superfluous glass between my subject and my sensor, not to mention the vignetting stacking causes. On the other hand, I will use a graduated neutral density filter with a polarizer, because GNDs perform a specific (not superfluous) function.
The polarizer and lens hoods
To those photographers who complain that it’s a real pain to rotate a polarizer with a lens hood in the way, I have a simple solution: remove the lens hood. I never use a lens hood. Ever. This is blasphemy to many photographers, but I hate lens hoods, which always seem to be in the way (see my “simplicity in the field” comment above). But (there’s that word again), jettisoning the lens hood must come with the understanding that lens flare is real and sometimes impossible to correct after the fact.
When there’s a chance direct sunlight will strike my front lens element, I check to see if shielding the lens helps. With my composition ready (on my tripod!), I peer through my viewfinder and shield my lens with my hand or hat (or whatever’s handy). If the scene becomes darker and more contrasty, and/or random fragments of light disappear, when my lens is shaded, I know I have lens flare and need to manually shield my lens while exposing. Of course if the sun is part of the composition, no shading in the world will eliminate lens flare.
Polarizer techniques
Polarizer on a budget
All scenes don’t benefit equally from a polarizer, and photographers on a budget can’t always afford one for every lens. If you’re only going to go with one polarizer, buy one for your largest lens–as long as you’re on a tripod, it’s not hard to hold (and rotate) a larger polarizer in front of a smaller lens.
Does this scene call for a polarizer?
To determine the polarizer’s effect, rotate the outer element 360 degrees as you peer through your viewfinder (or while viewing the LCD in live-view). Often just holding the polarizer to your eye and rotating it slowly is enough to determine its benefit. Either way, if you can’t see a change, you probably don’t need to worry about a polarizer.
Because a polarizer can also enhance reflections (and glare), whenever the polarizer is on, you must, must, must test its effect with every composition (and especially after switching from horizontal to vertical orientation). Unless I’m trying to maximize a reflection, I rotate the polarizer until the scene appears darkest. If there’s no apparent change, I watch specific objects that might have a slight sheen (water, a leaf, or a rock) as I rotate the polarizer–I almost always can find some change.
It’s not just for the sky
As nice as the the effect on the sky is, it’s the polarizer’s more subtle ability to reduce glare in overcast or shade that I find irreplaceable. Peering through your viewfinder (or watching your LCD if you’re using live-view), lock your eyes on a reflective surface and rotate the polarizer. The effect is most obvious on water, or wet rocks and leaves, but even when completely dry, most rocks and leaves have a discernible sheen. As you rotate the polarizer, harsh glare is replaced by natural color and texture; continue rotating and the glare reappears. The glare is minimized when the scene is darkest.
Regardless of the effect, there’s no rule that requires you to turn the polarizer to one extreme or anther (maximum or minimum reflection). Rotate the outer element slowly and watch the scene change, stopping when you achieve the desired effect.
In the North Lake autumn reflection scene at the top of the page, I was able to find a midpoint in the polarization that kept the best part of the reflection (the mountains and trees), while still revealing the submerged granite rocks at my feet.

Floating Leaves, Merced River, Yosemite
In the above image of autumn leaves floating in the Merced River, I used my polarizer to completely dial down the reflection, creating the illusion of leaves suspended in empty space. Polarizing away the reflection also helped the leaves’ color stand out by eliminating distracting glare.

Redbud, Merced River
An emergency neutral density filter
A polarizer can also be used as a two-stop neutral density filter by dialing it to maximum polarization (minimum light). In this image of a redbud above the surging Merced River, even at ISO 100 and f32, I couldn’t reach the 3/4 second shutter speed that would give me the motion blur I wanted. But the two stops of light I lost to my polarizer was just enough to get me where I wanted to be.
If you’re serious about your photography
Use only quality polarizers; you don’t need to spend a fortune, but neither should you skimp. Not only does the quality of the optics affect the quality of your results, I’ve also seen many poorly made polarizers simply fall apart for no apparent reason.
I advise buying polarizers that are commensurate with your glass–in other words, if you have top-of-the-line lenses, it makes no sense to use anything but top-of-the-line polarizers. I use Heliopan, Rodenstock, and Singh-Ray (I refuse to purchase anything from B+W until they fix their low profile lens cap, a problem they’ve know about for years).
My personal recipe for using a polarizer
- Always on during the day (but if you do this, you must check the orientation with each composition)
- No other filters except a graduated neutral density filter, when needed
- Compose my shot and lock it in place on my tripod
- Turn the polarizer to get the effect I want
- Expose the scene
- Check for lens flare and shield if necessary
- Click
Just do it
Like anything else in photography, using a polarizer is an acquired skill that improves with use. You don’t need to immediately jump in with both feet, but I suspect once you tune in to the polarizer’s benefits, you’ll have a hard time photographing nature without one.

