Eloquent Images by Gary Hart
Insight, information, and inspiration for the inquisitive nature photographer
I’m Not Crazy, I Swear…
Posted on October 16, 2024

Comet Tsuchinshan–ATLAS and Mt. Whitney, Alabama Hills, California
Sony α1
Sony 100-400 GM
5 seconds
f/5.6
ISO 3200
Crazy is as crazy does
In college, my best friend and I drove from San Francisco to San Diego so he could attend a dental appointment he’d scheduled before his recent move back to the Bay Area. We drove all night, 10 hours, arriving at 7:55 a.m. for his 8:00 a.m. appointment (more luck than impeccable timing). I dozed in the car while he went in; he was out in less than an hour, and we drove straight home. I remember very little of the trip, except that each of us got a speeding ticket for our troubles. Every time I’ve told that story, I’ve dismissed it with a chuckle as the foolishness of youth. Now I’m not so sure that youth had much to do with it at all.
I’m having second thoughts on the whole foolishness of youth thing because on Monday, my (non-photographer) wife and I drove nearly 8 hours to Lone Pine so I could photograph Comet Tsuchinshan–ATLAS setting behind Mt. Whitney. We arrived at my chosen location in the Alabama Hills about 15 minutes after the 6:20 sunset, then waited impatiently for the sky to darken enough for the comet to appear. I started photographing at around 7:00, and was done when the comet’s head dropped below Mt. Whitney at 7:30. After spending the night in Lone Pine, we left for home first thing the next morning, pulling into the garage just as the sun set. For those who don’t want to do the math, that’s 16 hours on the road for 30 minutes of photography.
In my defense, for this trip I had the good sense (and financial wherewithal) to get a room in Lone Pine Monday night, and didn’t get pulled over once. That this might have been a crazy idea never occurred to me until I was back at the hotel, and that was only in the context of how the story might sound to others—in my mind this trip was worth every mile, and I have the pictures to prove it.
I say that fully aware that my comet pictures will no doubt be lost in the flood of other Comet Tsuchinshan–ATLAS images we’ll see over the next few weeks, many no doubt far more spectacular than mine. My excitement with the fruits of this trip is entirely personal, and to say I’m thrilled to have witnessed and photographed another comet would be an understatement—especially in light of last month’s Image of the Month e-mail citing comets as one of the three most beautiful celestial subjects I’ve ever witnessed. And of those three, comets feel the most personal to me.
Let me explain
When I was ten, my best friend Rob and I spent most of our daylight hours preparing for our spy careers—crafting and trading coded messages, surreptitiously monitoring classmates, and identifying “secret passages” that would allow us to navigate our neighborhood without being observed. But after dark our attention turned skyward. That’s when we’d set up my telescope (a castoff generously gifted by an astronomer friend from my dad’s Kiwanis Club) on Rob’s front lawn (his house had a better view of the sky than mine) to scan the heavens hoping that we might discover something: a comet, quasar, supernova, black hole, UFO—it didn’t really matter. And repeated failures didn’t deter us.
Nevertheless, our celestial discoveries, while not Earth-changing, were personally significant. Through that telescope we saw Jupiter’s moons, Saturn’s rings, and the changing phases of Venus. We also learned to appreciate the vastness of the universe with the observation that, despite their immense size, stars never appeared larger than a pinpoint, no matter how much magnification we threw at them.
To better understand what we saw, Rob and I turned to illustrated astronomy books. Pictures of planets, galaxies, and nebula amazed us, but we were particularly drawn to the comets: Arend-Roland, Ikeya–Seki, and of course the patriarch of comets, Halley’s Comet (which we learned was scheduled to return in 1986, an impossible wait that might as well have been infinity). With their glowing comas and sweeping tails, it was difficult to imagine that anything that beautiful could be real. When it came time to choose a subject for the annual California Science Fair, comets were an easy choice. And while we didn’t set the world on fire with our project presentation, Rob and I were awarded a ribbon of some color (it wasn’t blue), good enough to land us a spot in the San Joaquin County Fair. (Edit: Uncovering the picture, I see now that our ribbon was yellow.)

Here I am with the fifth grade science project that started it all. (This is only half of the creative team—somewhere there’s a picture that includes Rob.)
The next milestone in my comet obsession occurred a few years later, after my family had moved to Berkeley and baseball had taken over my life. One chilly winter morning my dad woke me and urged me outside to view what I now know was Comet Bennett. Mesmerized, my smoldering comet interest flamed instantly, expanding to include all things astronomy. It stayed with me through high school (when I wasn’t playing baseball), to the point that I actually entered college with an astronomy major that I stuck with for several semesters, until the (unavoidable) quantification of the concepts I loved sapped the joy from me.
While I went on to pursue other things, my affinity for astronomy continued, and comets in particular remained special. Of course with affection comes disappointment: In 1973 Kohoutek fizzled spectacularly, a failure that somewhat prepared me for Halley’s anticlimax in 1986.
By the time Halley’s arrived, word had come down that it was poorly positioned for its typical display (“the worst viewing conditions in 2,000 years”), making it barely visible this time around, but I can’t wait until 2061! (No really—I can’t wait that long. Literally.) Nevertheless, venturing far from the city lights one moonless January night, I found great pleasure locating without aid (after much effort), Halley’s faint smudge in Aquarius.
After many years with no naked-eye comets of note, 1996 arrived with the promise of two great comets. While cautiously optimistic, Kohoutek’s scars prevented me from getting sucked in by the media frenzy. So imagine my excitement when, in early 1996, Comet Hyakutake briefly approached the brightness of Saturn, with a tail stretching more than twenty degrees (forty times the apparent width of a full moon).
But as beautiful as it was, Hyakutake proved to be a mere warm-up for Comet Hale-Bopp, which became visible to the naked eye in mid-1996 and remained visible until December 1997—an unprecedented eighteen months. By spring of 1997 Hale-Bopp had become brighter than Sirius (the brightest star in the sky), its tail approaching 50 degrees. I was in comet heaven. But alas, family and career had preempted my photography pursuits and I didn’t photograph Hale-Bopp.
Comet opportunities again quieted after Hale-Bopp. Then, in early 2007, Comet McNaught caught everyone off-guard, intensifying unexpectedly to briefly outshine Sirius, trailing a thirty-five degree, fan-shaped tail. McNaught put on a much better show in the Southern Hemisphere; in the Northern Hemisphere, because of its proximity in the sky to the sun, it provided a very small window of visibility, and was easily lost in the bright twilight. This, along with its sudden brightening, prevented McNaught from becoming the media event Hale-Bopp was. I only found out about it by accident, on the last day it would be easily visible in the Northern Hemisphere. By then digital capture had rekindled my photography interest (understatement), so despite virtually no time to prepare, I grabbed my camera and headed to the foothills east of Sacramento, where I managed to capture the McNaught image I share in the gallery below—my first successful comet capture.
Following McNaught, I vowed not to be caught off guard by a comet again. After enduring the frustration of promising (over-hyped?) comets disintegrated by the sun (you broke my heart, Comet ISON), and seeing others’ images of spectacular Southern Hemisphere-only comets (I’m looking at you, Comet Lovejoy), my heart jumped when I came across a website proclaiming the approach of Comet PANSTARRS (a.k.a, C/2011 L4 in less glamorous astro-nerd parlance), discovered not by an individual, but by the Pan-STARRS automated telescope array atop Haleakala on Maui.
Researching further, I learned that PANSTARRS could (fingers crossed) hang low in the western sky at magnitudes brighter than Saturn, for about a week right around its perihelion (closest approach to the Sun) in March 2013, remaining visible as it rises but dims over the following few weeks. Checking my calendar to see if I had any conflicts that week, I realized I’d be on Maui for my workshop during PANSTARRS’ perihelion! Turns out my first viewing of PANSTARRS was atop Haleakala, almost literally in the shadow of the telescope that discovered it. I also got to photograph a rapidly fading PANSTARRS above Grand Canyon on its way back to the farthest reaches of the Solar System.
Then, in 2020, came Comet NEOWISE to brighten our pandemic summer. I was able to make two trips to Yosemite and another to Grand Canyon to photograph NEOWISE (the Yosemite trips were for NEOWISE only).
One more time
Comet Tsuchinshan–ATLAS has been on my radar for at least a year, but not something I monitored closely until September, when it became clear that it was brightening as, or better than, expected. By the end of September I knew that the best Northern Hemisphere views of Tsuchinshan–ATLAS would be in mid-October, but since I was already in the Alabama Hills at the end of September, just a couple of days after the comet’s perihelion, I went out to look for it in the pre-sunrise eastern sky (opposite the gorgeous Sierra view to the west). No luck, but that morning only solidified my resolve to give it another shot when it brightened and returned to the post-sunset sky.
At that point I had no detailed plan, and hadn’t even plotted its location in the sky beyond knowing it would be a little above the western horizon shortly after sunset in mid-October. My criteria were a nice west-facing view, distant enough to permit me to use a moderate telephoto lens. After ruling out the California coast (no good telephoto subjects) and Yosemite Valley (no good west-facing views), I soon realized I’d be returning to the east side of the High Sierra.
At that point I started working on more precise coordinates and immediately eliminated my first (and closest) candidate, Olmsted Point, because the setting comet didn’t align with Half Dome. My next choice was Minaret Vista (near Mammoth), a spectacular view of the jagged Minaret range and nearby Mt. Ritter and Mt. Banner. This was a little more promising—the alignment wasn’t perfect, but it was workable. Then I looked at the Alabama Hills and Mt. Whitney and knew instantly I’d be reprising the long drive back down 395 to Lone Pine.
Though its intrinsic magnitude faded each day after its September 27 perihelion, Tsuchinshan–ATLAS’s apparent magnitude (visible brightness viewed from Earth) continued to increase until its closest approach to Earth on October 12. While its magnitude would never be greater than it was on October 12, the comet was still too close to the sun to stand out against sunset’s vestigial glow. But each night it climbed in the sky, a few degrees farther from the sun, toward darker sky.
Though Tsuchinshan–ATLAS would continue rising into increasingly dark skies through the rest of October, and each night would offer a longer viewing window than the prior night, I chose October 14 as the best combination of overall brightness and dark sky. An added bonus for my aspirations to photograph the comet with Mt. Whitney and the Sierra Crest would be the 90% waxing gibbous moon rising behind me, already high enough by sunset to nicely illuminate the peaks after dark, but still far enough away not to significantly wash out the sky surrounding the comet.
At my chosen spot, I set up two tripods and cameras, one armed with my Sony a7RV and 24-105 lens, the other with my Sony a1 and 100-400 lens. I selected that first location because it put the comet almost directly above Mt. Whitney, 16 degrees above the horizon, at 7 p.m. But since the Sierra crest rises about 10 degrees above the horizon when viewed from the Alabama Hills, I knew going in that the comet’s head would slip behind the mountains at 7:30, slamming shut my window of opportunity after only 30 minutes.
When it first appeared, Tsuchinshan–ATLAS was high enough that I mostly used my 24-105 lens. But as it dropped and moved slightly north (to the right), away from Whitney, we hopped in the car and raced about a mile south, to the location I’d chosen knowing that Tsuchinshan–ATLAS would align perfectly with Whitney as it dropped below the peaks. Most of my images from this location were captured with my 100-400 lens.
I manually focused on the comet’s head, or on a nearby relatively bright star, then checked my focus after each image. The scene continued darkening as I shot, and to avoid too much star motion I increased my ISO rather than extending my shutter speed.
As I photographed, I could barely contain my excitement at the image previews on my cameras’ LCD screens. Tsuchinshan–ATLAS and its long tail were clearly visible to my eyes, but the cameras’ ability to accumulate light made it much brighter than what we saw. The image I share today is one of my final images of the night. Even with a shutter speed of only 5 seconds, at a focal length of right around 200mm, if you look closely you’ll still see a little star motion.
My giddiness persisted on the drive back to Lone Pine and into our very nice (and hard earned) dinner. When our server expressed interest in the comet, I went out to the car and grabbed my camera to share my images with her. Whether or not the enthusiasm she showed was genuine, she received a generous tip for indulging me. And even though I usually wait until I’m home to process my images on my large monitor, I couldn’t help staying up well past lights-out to process this one image, just to reassure myself that I hadn’t messed something up (focus is always my biggest concern during a night shoot).
And finally…
FYI, neither Rob nor I became spies, but we have stayed in touch over the years. In fact, the original plan was for him to join me on this adventure, but circumstances interfered and he had to stay home. But we still have hopes for the next comet, which could be years away, or as soon as late this month….
Workshop Schedule || Purchase Prints || Instagram
My Comet History
Click any image to scroll through the gallery LARGE


No Sky? No Problem…
Posted on October 10, 2024

Autumn Symmetry, North Lake, Eastern Sierra
Sony a7R V
Sony 24-105 f/4 G
ISO 100
f/16
13 seconds
Anyone who has been in one of my photo workshops will confirm that I’m kind of obsessed with skies. Not just the good skies, but the bad ones too. While the sky can add a lot to an image, it can detract just as much. Viewing images online and in my workshop image reviews, it seems that many people pay outsize attention to the landscape, while ignoring the sky. But since all the components of an image need to work together, the way you handle the sky is just as important as the way you handle the landscape that you’re most likely there to photograph.
From rainbows, to dramatic clouds, to vivid sunrises and sunsets, great skies are easy, regardless of the landscape. But what do you do when the sky is bland and boring? The rule of thumb I’ve always followed and taught is that amount of sky you put in an image should be based on the relative appeal of the sky versus the landscape: determine which has the most visual appeal and by how much, then allocate your frame’s sky/landscape real estate percentage accordingly. I’m not suggesting that you whip out a calculator and do actual math in the field, but you get the idea.
Every autumn I visit North Lake, east of Bishop in the Eastern Sierra, hoping to catch the peak fall color there. Prepping for this post, I started reviewing my North Lake images from the 20 or so years that I’ve been visiting, and was immediately struck by the variety of the images taken from more or less the same location (somewhere along a 50-foot stretch of shoreline). The variety is both in the compositions and the conditions, but the compositions are largely determined by those conditions.
The annual variables at North Lake include the state of the fall color in the aspen across the lake (early, late, peak), the reflection (from serene mirror to windy chop), the level of the lake (and the rocks that are visible), the clouds and color in the sky, and the crowds (how much freedom is there for me and my workshop group to set up where we want).
Here’s a handful of North Lake images captured over the years. Without plunging too deep into the weeds, it’s pretty clear to me how the conditions on each day influenced my composition and exposure decisions.


Autumn Symmetry, North Lake, Eastern Sierra
The morning I captured the image I share today was impacted by a combination of scene variables, some positive, others negative. On the positive side, the color was as good as good as it can get there, and the reflection was really nice all morning. On the negative side, despite arriving an hour before sunrise, there were already a number of cars in the parking lot, which I knew would mean my group and I would be settling for whatever spaces were available, as well as limited ability explore (giving up a nice spot to search for something better risks finding nothing, while losing the nice spot you just left). And the sky sucked. (If you know me at all, you know that means there were no clouds.)
Rather than take the easy path up the road directly to the lakeshore (no more than 100 yards from the parking lot), I guided my group into the woods and along the creek to the lake—no farther, but the trail was a little muddy and slightly overgrown in spots. My rationale was that, since the most popular spots to set up were likely taken, this route would let them see that there are other very nice options that most visitors never make it to.
At the lake I found enough room for several in my group to set up in the “popular” area with the foreground rocks, and guided the rest just a few feet farther to a somewhat sheltered mini-cove on the other side of a large boulder. Just because the other spot is more popular doesn’t mean it’s better—this second spot, being more sheltered, means it’s more likely to have a reflection, even when the rest of the lake is shuffled by a breeze, and the foreground tall (and photogenic) grass aligns nicely with the peaks (the Autumn Morning, North Lake, Eastern Sierra image in the gallery above was taken from this spot).
Once everyone in my group was set up and happy, I squeezed into a remaining opening at the small reflective cove and went to work. In the fading twilight, I started to work out a plan, quickly deciding that this morning I would not take a single picture that includes the sky. This isn’t the approach I’d recommend for first-time North Lake visitors because excluding all of the sky also means excluding the beautiful peaks surrounding the lake. But I have so many images of the peaks here, many with much nicer skies, and didn’t really feel like I needed any more.
So I had a blast all morning playing with a variety of compositions that completely ignored the sky, ending up with about 2 dozen images to choose from when I got home. Below are the Lightroom thumbnails from that morning. (You can see that while I didn’t include the sky or peaks, more than half of the morning’s captures did include their reflections)

Not only do the Lightroom thumbnails show my compositional options this morning, they also reveal a little of my process. In general, my first capture is a “proof of concept,” and if I like what I see I start making refinements until I’m satisfied. And even though some of these thumbnails look identical, I can assure you that each one is at least a slight adjustment of the one preceding it.
I chose the composition I share today because I love the symmetry, the strong diagonals, and the way it emphasizes my favorite features of this beautiful little lake—but nothing else.
I return to the Eastern Sierra and North Lake next fall
Workshop Schedule || Purchase Prints || Instagram
No Sky, No Problem…


, California")


Danger in Paradise
Posted on September 21, 2024
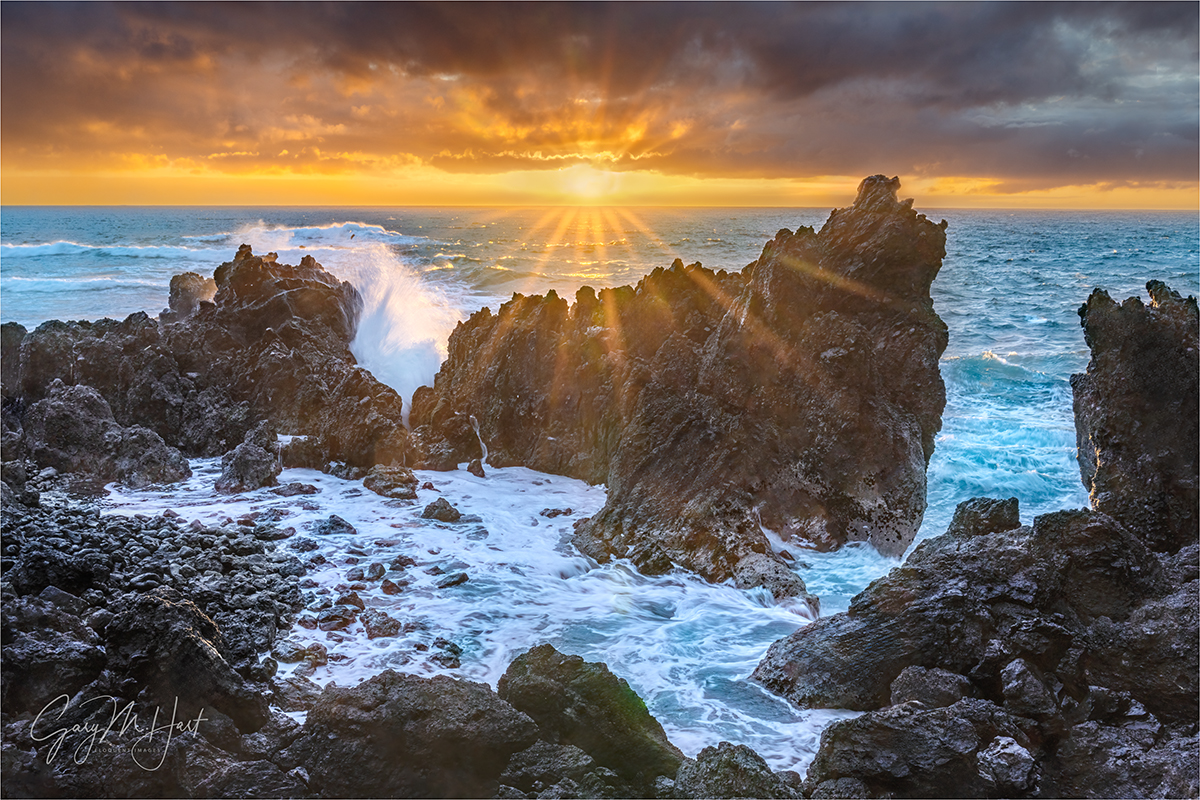
Sunrise, Laupahoehoe Point Sunstar, Hawaii
Sony a7R V
Sony 24-105 f/4 G
ISO 100
f/18
1/13 seconds
Battered for millennia by earthquakes, floods, volcanic eruptions, and tropical cyclones, it’s no wonder Hawaii’s residents keep one eye on the ocean, the other on the mountains—all while closely monitoring the sky overhead. I’ve visited each of Hawaii’s major islands many times (okay, so technically, on Oahu I haven’t been outside the airport, which is its own sort of disaster), and have personally experienced a veritable smorgasbord of these natural events. (Yet somehow I keep returning—go figure.)
The Hawaii earthquakes I’ve felt have been relatively minor jiggles to my earthquake-hardened California bones, but each served as a reminder that Hawaii has a history of large earthquakes, with magnitudes at least into the high 7s. Active volcanism makes the Big Island particularly vulnerable: as recently as 2018 it was shaken by a magnitude 6.9 earthquake; in 1975 a magnitude 7.7 quake rocked the Puna Coast just south and west of Hilo. Moving north, the Hawaiian Islands’ earthquake risk decreases: Maui has experienced a couple of magnitude 6 quakes in historic times (just offshore), while Oahu only gets a moderate jostling from time to time (but does get a pretty good jolt from the strongest Big Island quakes)—only Kauai, the oldest island, is (relatively) seismically stable.
Hawaii’s volcanoes are sexier than its earthquakes, actually attracting visitors (you don’t see too many people rushing toward an earthquake). I missed the recent Mauna Loa eruption, but have witnessed numerous Kilauea eruptions, in many forms: many time I’ve enjoyed standing on the rim at night to view the glow and smoke emanating from the lava lake bubbling just out of sight on the caldera floor far below; last year, I stood on the edge of (the recently seismically remodeled) Kilauea caldera with my workshop group and peered down at dozens of towering lava fountains less than a mile away. In 2010, Don Smith and I hiked close enough to a Kilauea lava flow that we felt its heat and heard trees explode. But despite their dramatic aesthetic appeal, Hawaii’s volcanoes are still too powerful to be taken lightly. While most of its eruptions lack the explosiveness of many more dangerous volcanoes around the world, as recently as 2018 Hawaii’s effusive lava flows have wiped out entire towns, destroying hundreds of homes on their way to the ocean.
And then there are the tropical cyclones that lash the islands several times each decade. By far the most significant storm damage to a Hawaiian island was inflicted by Hurricane Iniki in 1992, striking Kauai as a Category 4 storm with winds up to 140 miles per hour. While I’ve never experienced anything that extreme on my visits, in September of 2018, each of my two workshops was altered by a different hurricane: first on the Big Island when, a few days before that workshop started, a close brush with Category 5 Hurricane Lane deposited up to 58 inches of rain that flooded many of my locations. I departed Hawaii for Maui and my second workshop, only to have Hurricane Olivia (downgraded to a tropical storm just before landfall) force me to relocate the workshop’s two nights in Hana, and find replacement locations for those days.
I’ve also learned firsthand that it doesn’t take a hurricane to generate floods in Hawaii. In 2016 I was on Maui when just regular old torrential rainfall caused a 500-year flood in the Iao Valley and Central Maui, destroying homes and swamping cars. While driving through Central Maui after the water receded, I saw cars still mired in water to their doors.
Even given this history of disasters, compounded by my own personal experience with some of Hawaii’s most extreme natural elements, I would argue that Hawaii’s greatest natural risk is tsunamis. Despite their relative rarity, tsunamis have killed more people than all other Hawaiian natural disasters combined. The islands’ position smack in the middle of the Pacific Ring of Fire, which happens to be the source of nearly 3/4 of Earth’s tsunamis, means Hawaiians need to think in terms of when, not if, the next tsunami hits, and plan accordingly.
Unlike conventional waves, which are wind-generated and affect only the ocean’s surface, a tsunami is formed when a cataclysmic event displaces water from the ocean surface all the way down to the ocean floor. Potential ocean-moving events include submarine landslides, volcanic eruptions, and meteor impacts. But by far the most frequent force behind a tsunami is subduction earthquakes, when one tectonic plate thrusts beneath another and displaces the overlying plate and all the water above it.
In the simplest terms possible, the energy of an ocean wave is the product of its amplitude (maximum height) and wavelength (the distance between amplitudes). In the open ocean, with deep water and no obstructions, a tsunami’s energy is almost entirely committed to spreading outward at 400-600 miles per hour (around the speed of a commercial airliner). At those speeds, a tsunami’s wavelength could be 100 miles, with amplitudes of a foot or two. In fact, with an open ocean amplitude of just a foot or so, when a tsunami passes beneath a boat, the boat’s occupants feel nothing.
But as a tsunami approaches land, it starts dragging on the ocean floor, eventually slowing to around 30 miles per hour. Since the next waves in line are still racing through open ocean at hundreds of miles per hour, when the wave in front of them slams on the brakes, water begins piling up as most of the forward energy is suddenly transformed into wave-building energy: A massive wave is born.
As we’ve seen in recent, and not so recent, history, the power and suddenness of a tsunami can be catastrophic. The Indian Ocean tsunami of 2004 killed over 230,000 people, some as far away as 3,000 miles. The 2011 Japan tsunami killed 10,000 people in Japan, and was directly responsible for the meltdown at the Fukushima nuclear power plant. (It also caused some minor damage in Hawaii, among other places.)
Hawaii’s long tsunami history includes many small and moderate events, and a handful that can be labeled major (and tragic). Since the beginning of the 20th century, three especially significant tsunamis stand out:
- April 1, 1946: Generated by a magnitude 8.5 in the Aleutian Islands, this tsunami is considered as Hawaii’s most significant for the 159 lives it took, and the major damage dealt to every Hawaiian island.
- May 23, 1960: Generated by a magnitude 9.5 earthquake near Chile—the largest earthquake ever measured and more than 30 times stronger than the 1946 Aleutian earthquake. Despite the lessons of 1946, many lives were lost by Hilo residents who didn’t heed warnings.
- November 29, 1975: Generated by a magnitude 7.7 earthquake south of Hilo. on the east flank of Kilauea—though its damage was mostly limited to Hawaii’s southeast coast, this tsunami arrived too quickly following the quake for its victims to flea to safety.
I’m reminded of Hawaii’s tsunami history each time I visit Laupahoehoe Point on the Big Island’s east coast. This is where the 1946 tsunami took the lives of 24 residents, including 16 students and 5 teachers who were waiting at the local schoolhouse for school to start. Adding to the tragedy, warnings of the approaching peril were ignored as April Fools’ Day jokes.
Based on the inexplicable inability to warn people thousands of miles, and many hours, from the tsunami’s source, the US Tsunami Warning Center was formed. Another response to this tragedy was the significant upgrade of local building practices. For example, the 8-story Hilo Hawaiian Hotel, where my Big Island workshops are based, is right on Hilo Bay (you could literally hit the water with a rock from our balconies) and potentially ground-zero for the next tsunami. Constructed in 1975 atop (extremely reinforced) concrete columns, significant sections of the Hilo Hawaiian’s bottom two floors are completely open to the elements, with no walls on either side, designed specifically to allow any large wave to sweep right through rather than push against the structure. Throughout Hilo are tsunami warning sirens that are tested once each month, and evacuation routes are clearly signed.
In 2015 I actually got a firsthand look at how seriously tsunamis are taken in Hilo when, while there for a workshop, a magnitude 8.3 earthquake near Chile triggered a Pacific tsunami warning. Fortunately, today’s satellite technology and ocean buoy network enables much better tsunami tracking than was available in 1946 and 1960, so not only did we get many hours notice, by the time the wave reached Hawaii it was measured in inches and the warning had been long suspended (and I enjoyed a peaceful sleep rather than spending the night in an evacuation shelter).
About this image
Sunrise, Laupahoehoe Point Sunstar, Hawaii
In most of my workshops, our first sunrise is at Laupahoehoe Point. Before we start, I emphasize to my group the location’s tsunami history, and point out some of the tsunami damage still visible. In fact, the location where we photograph is just a few hundred feet from the location of the teachers’ cottages that were swept away in the 1946 tsunami.
You may (or may not) notice that I have several very similar images of this scene. That’s partly because it in fact provides a very nice composition that I always enjoy photographing, but mostly because we’re at Laupahoehoe at the beginning of the workshop, making it especially important that I stay tethered to my group. Which means the variety I get at Laupahoehoe Point is more about conditions than compositional inspiration.
This morning was especially nice for a couple of reasons: first, recent hurricane near-misses had seriously stirred up the Hawaiian surf; second, getting a break in the clouds right on the horizon isn’t especially common in Hawaii. Seeing the opening this morning, I was able to anticipate the opportunity for a nice sunstar and believed I was ready for it.
Unfortunately, I made a couple of mistakes because I’d spent most of the morning working with my group. The first was that I thought I was using my 16-35 f/2.8 lens that provides a much better sunstar than the 24-105 f/4 lens I was actually using. The second mistake was forgetting to remove the ND filter I’d been using earlier in the morning to smooth the waves. After helping people in my group prepare for their sunstar opportunity, I rushed to my camera and started clicking as soon as the sun appeared, realizing with the first click that I’d need to wait out the 20-second exposure my camera had started. Fortunately, it all worked out, and I was actually able to get a couple of frames like this one, capturing the instant of an explosive wave’s impact.
At the risk of stating the obvious, another thing I want to point out is how hard it is to photograph directly into the sun. When I got around to processing this image at home, not only did I have serious dynamic range problems to deal with, I also had tons of nasty lens flare blobs to clean up. Fixing lens flare was mostly just a tedious process with the Remove tool; the dynamic range was a matter of processing the sky and foreground separately. Since I no longer use graduated neutral density filters, and I never blend multiple exposures, my margin for exposure error was extremely small, but by monitoring my histogram and pushing my highlights to the limits of recoverability when I captured the image, I ended up with shadows that still contained enough clean detail to work with.
Workshop Schedule || Purchase Prints || Instagram
Lots More Sunstars


")


Full Circle
Posted on September 7, 2024

Sunset Mirror, Lake Manly (Badwater), Death Valley
Sony a7R V
Sony 24-105 f/4 G
ISO 100
f/11
1/15 seconds
For many people of my generation, their earliest memories of landscape photography are some version of Dad pulling the family wagon up to an iconic vista and beelining (camera flapping around his neck) to the railed viewpoint to snap a few frames—if you were lucky, he’d take long enough for you to use the bathroom. In most cases these pictures would be quickly forgotten—until 50 years later when, while searching through Mom and Dad’s garage/attic/basement/closets arguing with siblings about what stays and goes, you come upon shoe boxes stuffed with prints or slides of scenes that you feel absolutely no connection to.
I think the fact that I became a landscape photographer has something to do with an intermediate step that most people missed: when my dad’s slides came back from the lab, he would meticulously peruse and purge, then label and organize the survivors, before sequestering the family in our darkened living room until the each Kodak Carousel had completed its cycle. Sometimes we’d have to sit through multiple shows of the same pictures as friends and family visited.
I won’t pretend that my brothers and I loved these shows, or (let’s be honest) that we enjoyed them in any way. But in hindsight, I think on some level the message came through each time we visited Yosemite, the beach, or drove across the country (have tent trailer — will travel), that the beauty we experienced was worth preserving.
Learning that pictures could possess an actual aesthetic value that others could enjoy also helped me register that a camera could be much more than a mere outdoor accessory. Which probably explains why, when I became old enough to start creating outdoor memories of my own, preserving on film the beauty that moved me just seemed the natural thing to do.
Of course when I first picked up a camera, I naively believed that the only ingredients necessary for a successful picture were a camera and a pretty scene. That might have something to do with the fact that Dad’s photo stops were rarely timed for light or conditions, because vacations and photography don’t mix: the best time for photography is the worst time to be outside. Despite prioritizing family over photography like the good father he was, I appreciate now that he really did know his way around a camera, and how to frame a scene.
(Like many blog posts, I started with a point I wanted to land on, and now have ended up following a most circuitous route getting there. But here we are.)
I’m thinking about the influences that got me to where I am today, and need to give Dad a twofer on this one: prioritizing family over photography, while still modeling a photographer’s aesthetic. My own pursuit of photography started after childhood, but long before I married and had children, and while it went somewhat dormant during my daughters’ formative years (limited mostly to snaps of family moments), the interest came roaring back when the girls spread their wings and rendered my wife and me empty nesters—an event that (fortuitously) coincided with the advent of digital capture.
Acquainting myself with the new digital paradigm, I couldn’t help reliving some of my father’s enthusiasm for photography and the cutting-edge technology of his time (autofocus, through-the-lens automatic metering), that (I realize now) coincided with my parents’ own sudden empty-nester status. Digital photography was perfect for me—similar enough to film photography that there wasn’t lots to relearn, but with an infusion of the technical world I’d spent nearly 20 years in. Also like my father’s experience, the new-found freedom to research, study, and explore taught me (among other things) the importance of light on the landscape, and that I must prioritize the conditions when scheduling my photo trips.
Since virtually every family vacation of my childhood was a camping trip somewhere scenic, it made sense that my first instinct was to return to the locations of my strongest childhood memories. While a few vacations were rigorously planned interstate adventures with a different stop each night (I’m having flashbacks to KOA campgrounds and AAA TripTiks), more frequently we’d pick a picturesque setting and set up camp for a week or two, relaxing and enjoying day-trips to nearby sights. These are the locations that especially drew me with my new digital camera.
My strongest childhood memories of vacations were our summer Yosemite trips, but a couple of times Dad got a week off during Christmas break and Death Valley was the logical destination. So after I’d harvested Yosemite’s low hanging visual fruit, Death Valley was the next logical step for my burgeoning photography aspirations.
As a kid I was more interested in Death Valley’s mining and ghost town attractions, but returning as a photographer, it was the uniquely beautiful geology that got my juices flowing. In my previous blog post, I wrote about the proximity of the highest point in the 48 contiguous United States (Mt. Whitney) to the lowest point in the Northern Hemisphere, so I guess it makes sense to circle back to Death Valley.
That lowest point is Badwater, which also happens to be a personal Death Valley favorite. So what’s going on here? When you’re lower than all surrounding terrain, not only does water tend to find you, it can only exit via evaporation. In an inherently arid environment like Death Valley, inundation usually outpaces evaporation, leaving behind only minerals carried by the water but too heavy to evaporate. The predominant residual mineral at Badwater is salt, with a little more accumulating with each evaporation. As the mud beneath the salt layer dries, polygonal cracks form, creating openings that can accumulate extra salt. Death Valley’s intense summer heat causes this salt to expand and form corresponding polygonal shapes that stretch for miles atop the otherwise flat surface.
Extending miles in the shadow of 11,000 foot Telescope Peak, Badwater is always photographable, but its year-to-year variation is a source of great angst and celebration. Some winters I find these shapes filled with water, sparkling like faceted jewels; or when dry their color can range from muddy brown to as white as a bleached sheet. But by far my favorite happens when recent rains have flooded Badwater Basin to form Lake Manly, a shallow ephemeral lake that turns the entire basin into a giant mirror. During my 2005 visit, I watched a kayaker glide across the lake.
To explain a little more about Lake Manly, here’s an excerpt from my February 14, 2024 blog post:

Sweet Sunset, Lake Manly and Badwater Basin, Death Valley
The origins of Lake Manly in Badwater Basin date back nearly 200,000 years. In its earliest millennia, Lake Manly was much deeper, far more expansive, and persisted year-round. But in recent millennia, it has become an ephemeral lake, usually dry and filling only when rare intense storms generate enough runoff. The life of these recent versions of Lake Manly is measured in weeks or months.
The current version of Lake Manly formed when Tropical Storm (and former hurricane) Hilary saturated Death Valley with more than a year’s worth of rain (2.2 inches) in one day. Because Death Valley isn’t equipped to handle so much water at once, Hilary brought flooding that washed out roads, displaced rocks, carved new channels, and reshaped canyons. And with no outlet for all this water, after doing its damage, this runoff had to come to rest somewhere—and where better than the lowest place in North America?
At its peak volume last August, the newest incarnation of Lake Manly was 7 miles long and 4 miles wide, but no more than 2 feet deep. By late January its surface area had shrunk to half its original size, and the lake’s depth was measured in inches.
Despite its diminished size, Lake Manly was more than big enough to provide spectacular, valley-wide reflections for my workshop group. In addition to photographing mountain and sky reflections from the valley floor, we also enjoyed beautiful sunset reflections from Dante’s View, more than 5000 feet above Badwater.
I captured today’s blog image on the same evening as the image I shared in that February post. Because the sky is important as the foreground in a landscape image, my compositions this evening followed the rapidly scooting clouds, capturing the changing color as I went. I shifted my position on the lakeshore (and have the muddy boots to prove it) to ensure the best foreground/clouds relationship, and continued moving and tracking the clouds until they encountered a nearly full moon rising above the looming Amargosa Range.
On those childhood visits to these special places, rolling my eyes Dad’s goofy obsession and the inevitable boring slideshow in store, I had no appreciation for the foundation that was being laid, or for the full circle journey I was embarking on.
2026 Death Valley Winter Moon Photo Workshop
Workshop Schedule || Purchase Prints || Instagram
Death Valley


, Death Valley")


Every. Single. Thing.
Posted on August 23, 2024

Sunset Reflection, North Lake, Eastern Sierra (2008)
Canon EOS-1Ds Mark III
Canon 17-40 f/4 L
10 seconds
F/11
ISO 200
A few days ago, while browsing old images looking for something else, I came upon this one from a solitary sunset visit to North Lake above Bishop almost 16 years ago. It’s a great reminder to appreciate my past efforts, and to not forget that, even though some images from my distant photography past evoke a “What was I thinking?” face palm, I really did have an idea of what I was doing—even if my execution wasn’t always perfect.
One of the earliest lessons I learned on this path to where I am as a photographer today, a lesson I work hard to impart on my workshop students, is the photographer’s responsibility for each square inch (and pixel) in the frame. Not just the beautiful elements, but everything else as well. Every. Single. Thing.
It’s always heartening to see the genesis of that approach in my older images. Rather than just framing and clicking the obvious, I can see signs that I took the time and effort to assemble the best possible image. That assembly process might start weeks or months before I arrive (planning for a moonrise, fall color, the Milky Way, and so on), or it could simply be a matter of making the best of whatever situation I’m presented when I arrive.
Either way, once it’s time to take out the camera and get to work, before clicking the shutter I try to make a point of surveying the scene to identify its most compelling elements. Once I’m comfortable with the possibilities, I position myself to create the ideal relationships between the various elements, then frame the scene to eliminate distractions, and finally, choose the exposure variables that achieve the motion, depth, and light that create the effect I want. And while my execution still isn’t always perfect (and will always have room for improvement), I think this image in particular illustrates my assembly process.
I’ve been visiting North Lake in autumn for nearly 20 years, both on my own and in my workshops. Most of these visits come at sunrise, but this time, by myself in Bishop with an evening between workshops, I decided to explore some of my favorite spots near the top of Bishop Creek Canyon. I pulled into North Lake and was surprised to find it completely devoid of photographers—a refreshing difference from the customary autumn sunrise photographer crowds that usually outnumber the mosquitos.
Early enough to anticipate the sunset conditions and plan my composition, I was especially excited by the western sky above the peaks, which was smeared with broken clouds that just might (fingers crossed) color up when the sun’s last rays slipped through. Without the swarm of photographers I was accustomed to here, I took full advantage of the freedom to roam the lakeshore in search of a composition that would do the (potential) sunset justice. Rather than simply settle for the standard version of this inherently beautiful scene that might be further enhanced by a nice sunset, I wanted a composition that assembled the best of the scene’s various features—colorful sunset sky, serrated peaks, golden aspen, crisp reflection, small granite boulders—into coherent relationships that allowed everything to work together that might be a little different.

Autumn Reflection, North Lake, Eastern Sierra
I eventually rock-hopped to this mini granite archipelago near the lake’s outlet and found what I was looking for. Since I’d always gone horizontal at North Lake to feature the arc of peaks framing the aspen-lined lake, this time I decided to emphasize the foreground rocks and reflection with a vertical composition. (I’ve since had great success with vertical frames at North Lake, but this is the one that really opened my eyes to the vertical possibilities here—see the image on the right from two years later.)
First I positioned myself so the line of small granite rocks formed a diagonal along the bottom half of the frame, enhancing the scene’s illusion of depth. Next, I lowered my camera (on a tripod, of course) to minimize the empty patch of lake between the rocks and reflection.
As much as I like my images to have uncluttered borders, in nature it’s often impossible to avoid cutting something off, or to prevent a small piece of an object outside the frame from jutting in (like a rock or branch). In this case, from my chosen location, including the foreground rocks I considered essential meant cutting off other rocks. When I run into these situations where a clean border is impossible, I at least need to make my border choice very deliberate. In this case, I took care to include all of the rocks at the bottom, but chose to cut the rocks on the left boldly, right down the middle, so they don’t look like an afterthought (or a never-thought).
As much as I liked the mountain, aspen, and sunset parts of the reflection, I found the reflection of the sky above the colorful clouds pretty dull. So I dialed my polarizer just enough to erase the bland part and reveal the (more interesting) submerged rocks near the lakeshore, taking care not to lose the best part of the reflection.
Of course, including the nearby rocks added another layer of complication: ensuring that everything, from the foreground rocks to the distant mountains, was sharp. Because every image has only one perfectly sharp plane of focus, in a scene like this, finding the right focus point and f-stop is essential.
Of the various techniques photographers apply to ensure proper focus, Hyperfocal focusing is the most reliable. Hyperfocal focusing determines the combination of focal length, f-stop, sensor size, and focus point that ensures the ideal position and depth of the frame’s zone of “acceptable” sharpness. Since identifying the precise hyperfocal point (the point of maximum depth of field) requires plugging variables into a chart (the old fashioned way) or smartphone app (the smart way), many photographers foolishly decide it’s not worth the effort. But, like most things that start out difficult, regularly applying hyperfocal focus technique soon reveals its underlying simplicity. (I rarely have to check my app anymore, usually relying instead on experience-based seat-of-the-pants hyperfocal focusing.)
Today, with my mirrorless cameras, I am able to precisely position my focus point using a magnified viewfinder view, and I completely trust my camera’s autofocus. But because the evening of this image was back in my DSLR days, when I never completely trusted autofocus when the margin for error was small, I know I manually focused it.
So where did I focus? Well, even though I no longer remember, I’d bet money that it was on first small rock beyond the trio of rocks at the bottom. I think that because, 1) that just seems like where I’d instinctively focus, and 2) my hyperfocal app tells me that the hyperfocal distance for this image’s settings (thank you EXIF data) was a little less than 3 feet, and that rock was about 3 feet away. Since close scrutiny at 100 percent confirms that the image is sharp from front to back, I’m pretty confident that’s where I focused.
The final piece of the puzzle was exposure. At the time I was shooting with a dynamic range limited (compared to my Sony Alpha cameras) Canon 1DSIII, so I’m pretty sure I used a 3-stop soft graduated neutral density filter to subdue the bright sky. (FYI, I no longer carry a GND.) This always requires a little extra work in Photoshop because I hate, hate, hate the GND transition’s darkening effect on the landscape immediately beneath the sky, which always requires a little dodging and burning to eliminate.
There really was a lot going on in this scene, and I’m pretty pleased that I was able to make everything work together. Of course that doesn’t always happen, but I find the more I’m able to consider every single thing in a scene, the happier I am with my results.
Workshop Schedule || Purchase Prints || Instagram
Image Building
Click any image to scroll through the gallery LARGE


, Yosemite")


Grand Canyon Lightning 2024: Part 2
Posted on August 16, 2024

Bent, Grand Canyon Lightning
Sony a7R V
Sony 24-105 f/4 G
ISO 50
f/18
1/6 second
When I returned from my Grand Canyon Monsoon photo workshop earlier this month, I was so excited about this year’s last-day lightning experience that I immediately processed a few images and sat down to blog about them. But when my blog started approaching 4000 words, I thought for everyone’s sanity (both yours and mine), it might not be a bad idea to split my ramblings into two blogs. In the first one I detailed, among other things, the story of the actual shoot that produced nearly 60 lightning images on the day the workshop ended. I also wrote about the Southwest monsoon in general, and the genesis of my lightning chasing obsession.
Now I’ll move on to some of the science of lightning, and my thoughts on including lightning in an image. Without further adieu…
Here’s Part 2
When you’ve been writing a weekly photo blog for over 13 years, at some point you’re bound to run out of new things to say. When that happens, the goal becomes finding fresh ways to express potentially stale thoughts. So forgive me if you’ve heard this before, but it bears repeating: Landscape photography captures the relationship between Nature’s enduring and ephemeral elements.
In the simplest terms possible, Nature’s enduring elements are those landscape features we travel to view and photograph, confident in the knowledge that they’ll be waiting for us when we arrive: mountains, lakes, rocks, trees, waterfalls, and so on. On the other hand, Nature’s ephemeral phenomena include the always changing light and weather, celestial events, and seasonal variations that play in, on, and above the landscape—never-guaranteed phenomena we might hope (and plan) to find when we arrive at our enduring destinations, but also those conditions that simply surprise (or disappoint) us. Regardless of how they converge, the landscape photographer’s job is to combine the best of Nature’s enduring and ephemeral elements in the most compelling way possible.
Pretty straightforward, right? For some things perhaps, but maybe not so much for others. I’d put lightning in the not-so-much category: for starters, we never know where it will strike next, or if it will even strike at all. And even when it does happen, lightning comes and goes faster than our shutter fingers can respond. But, like most of Nature’s most fickle ephemeral phenomena (alliteration anyone?), the more I understand lightning, the better my success.
Where my lightning pursuit is concerned, it doesn’t hurt that I’ve always been something of a weather nerd, starting in my early teens with an inexplicable fascination with the weather forecast segment of KGO-TV’s (Channel 7 in San Francisco) nightly news (thank you, Pete Giddings), continuing with meteorology classes in college, as well as my ongoing consumption of weather articles, books, blogs, and podcasts.
Despite this general interest in meteorology, I never really took the time to study lightning closely until I started trying to photograph it. I knew the basics, but the deeper I looked, the more fascinated I became. And not coincidentally, the more lightning success I had.
For starters, a lightning bolt is an atmospheric manifestation of the truism that opposites attract. When two oppositely charged objects come in close proximity, an equalizing spark is produced. For example, when you get shocked touching a doorknob, on a very small scale, you’ve been struck by lightning.
On the atmospheric scale, understanding the mechanism isn’t too difficult to get your mind around if you remember a few basic facts:
- Warm air rises because it’s less dense than cold air. And cold air falls because it’s more dense.
- This warm air rising, cold air falling thing is the underlying engine of convection: air that’s warmer than its surroundings rises, until it cools enough be colder than its surroundings.
- Since warm air holds more moisture (water vapor) than cold air, anything that makes air cooler (like rising through the atmosphere) squeezes its moisture out, which causes its contained water vapor to condense and form clouds.
- The greater the temperature difference between the warmer lower layers of the atmosphere, and colder higher layers, the more unstable the atmosphere is said to be. This instability drives the convection process that leads to thunderstorms.
- Warm air will continue rising until it is no longer warmer than the surrounding air, potentially ascending high enough for the water vapor it carries to condense and freeze. Or until it encounters an inversion.
- An inversion is a cap (layer) of warmer air sitting atop cooler air, an aberration that puts the brakes on the rising warm air.
Of course weather phenomena are rarely simple, but in general the ingredients for lightning are moist air (high humidity), an unstable airmass atmosphere uncapped by inversion, and surface heating to initiate the convection process. With these ingredients in place, adjacent columns of ascending and descending air generate collisions between the contained water molecules.
When ascending and descending water molecules collide, negatively charged electrons stripped by the collision attach to descending molecules, giving them a net negative charge; the remaining molecules, now with a missing electron and a net positive charge, are lighter and continue upward. This electron imbalance is called ionization. The result is a polarized cloud that’s positive on top and negative at the bottom. The most powerful convective updrafts carry water droplets high enough that they freeze, shifting the ionization process into overdrive with ice particle collisions.
Since nature really, really wants to correct a charge imbalance, and always takes the easiest path, if the easiest path to electrical equilibrium is between the cloud top and cloud bottom, we get intra-cloud lightning; if it’s between two different clouds, we get inter-cloud lightning. And when the net charge beneath the cloud is positive while the cloud bottom is negative, we get cloud-to-ground lightning. (This describes negative lightning; positive lightning, where the cloud/ground charges are reversed, is also possible, but less common.)
In addition to the vertical motion within a thunderstorm, there is also horizontal motion that moves a cell across the landscape. This movement feels a little more random because it’s driven by invisible winds in the middle levels of the atmosphere. But keeping an eye on a storm can at least enable a general understanding of the direction it’s moving—important information when you want to photograph lightning (also when you want to stay alive).
With lightning comes thunder, the sound of air expanding explosively when heated by a 50,000-degree jolt of electricity. While lightning’s flash zips to our retinas at more than 186,000 miles per second, thunder lumbers along at the speed of sound, a pedestrian 750 miles per hour—nearly a million times slower than light.
Knowing that the thunder occurs at the same instant as the lightning flash, and the speed at which both travel, we can calculate the approximate distance of the lightning strike. While we see the lightning pretty much instantaneously, thunder takes about 5 seconds to cover a mile. So dividing by 5 the number of seconds between the instant of the lightning’s flash and the arrival of the thunder’s crash gives you the lightning’s approximate distance in miles (divide by 3 for kilometers).
Technically, if you’re close enough to hear the thunder, you’re close enough (probably within 10 miles) to be struck by the next lightning bolt. But watching lightning at Grand Canyon over the last dozen years, I’ve become pretty comfortable reading the conditions and determining when the storm’s too close. I still err on the side of safety, shutting down a shoot sooner than many in the group might like, but I haven’t lost anyone yet, so I must be doing something right. (And seriously, I know people understand when I terminate a shoot because lightning is too close, and it frustrates me just as much as it does them.)
Understanding thunderstorms in general, and lightning creation in particular, has helped me more accurately determine where to point my camera for the best chance of success. Given the number of Grand Canyon vistas with views extending dozens of miles up, down, and across the canyon, at the beginning I’d just point my camera and Lightning Trigger in the direction of any cloud that was producing rain. But now I know that all rainclouds aren’t created equal, and that the clouds most likely to produce lightning are the darkest and tallest. The darker a cloud, the more moisture it contains, and the greater the potential for ionizing collisions. The taller a cloud, the more likely it is to contain the ice that supercharges the ionization process.
And since lightning often precedes thunderstorm’s motion, striking the rim (or inside the canyon) in front of the falling rain I’d previously targeted my compositions on, I’ve become better able to anticipate where the next bolt might strike and adjust my composition proactively.
On the day I captured this (and nearly 60 other) lightning images, with ample monsoon moisture from the Gulf of Mexico and an uncapped atmosphere, all that was needed was warming sunlight to kick off the convection process that sends the moisture skyward. The morning started cloudless, and from my vantage point at Grand Canyon Lodge (right on the North Rim), by midmorning I could see billowing clouds far to the south. Even though the workshop had ended that morning, about half the group had stayed, so I summoned them with a text message.
We started seeing lightning less than an hour later. During the three or so hours of activity, it was fun watching various cells bloom, mature, and peter out. During most of that period of activity there was overlap, as one cell was diminishing, another was starting up—sometimes in the same general direction, other times over a completely different part of the canyon. The overall trend of the storms’ motion was east-to-west, across the canyon, along the South Rim.
I’ve said it before, but it bears repeating that I think the absolute best way to really appreciate lightning is to spend time closely scrutinizing a still image. With a lifespan measured in milliseconds, a lightning bolt is the epitome of ephemeral—whether in person or in a video, it’s a memory before we fully register that lightning just fired. We have a general idea of its location and overall shape, but it’s not until we’re presented with a frozen instant of that lightning bolt’s peak energy that we fully understand the details of what took place.
It doesn’t take long to realize that each strike has its own personality, distinctly different from all others. Examining my images later, I always look to process the lightning images with the most personality. One bolt’s most striking (pun unavoidable) feature might be the circuitous route it followed to get from cloud to ground, or the network of related simultaneous bolts associated with it, or the numerous spiderweb filaments it produced, or maybe the sheer power and brilliance it displayed.
Thinking in terms of matching these ephemeral features with the enduring canyon, on a macro scale the enduring aspect was determined when I decided to visit Grand Canyon during monsoon season. But my decisions for how to combine the landscape ephemeral lightning have evolved, influenced now by the knowledge I’ve gained, and also by shifting priorities. With so many in my images lightning portfolio, my goal is no longer to capture lightning no matter what (by simply pointing in the direction most likely to get lightning, regardless of the scene there)—now I can now afford to factor the better composition into my framing decisions. While that shift might reduce the number of strikes I capture, it increases the chance of getting strikes I especially like.


Above is a series of four strikes from the afternoon’s most active cell, captured over a 12 minute span. Despite similar origin and landing locations, you can see that each bolt is unique. I remember them in a very general sense because each induced from the group reflexive, giddy exclamations that far surpassed the standard “Ooooh!” every lightning bolt elicits. Despite retaining a vague memory of their shapes and paths, I love that I was able to freeze each one for detailed examination.
JOIN ME FOR NEXT YEAR’S GRAND CANYON LIGHTNING CHASE
Workshop Schedule || Purchase Prints || Instagram
Lots More Lightning
Click any image to scroll through the gallery LARGE


Grand Canyon Lightning 2024: Part 1
Posted on August 11, 2024

Fire in the Hole, Grand Canyon Lightning
Sony a7R V
Sony 24-105 f/4 G
ISO 50
f/18
1/6 second
Back at it—the chase is on
Every year I schedule one or two (and one time three) photo workshops for the peak weeks of the Southwest US monsoon. Despite the summer crowds (which I’ve become pretty good at avoiding), I’d argue that monsoon season is the best time to photograph Grand Canyon. Given the monsoon’s frequent mix of thunderstorms and sunlight, adding colorful sunrises/sunsets and rainbows to Grand Canyon’s splendor are always a real possibility. And photographing the Milky Way above Grand Canyon is a true highlight for everyone. But despite these undeniable visual treats, more than anything else, foremost in almost everyone’s mind is lightning.
Each time I start with a new workshop group (that is clearly brimming with lightning aspirations), I’m reminded of the first time I tried chasing lightning—both the extreme disappointment of failure, and (especially) the ultimate euphoria of success. So even with hundreds (thousands?) of lightning images to my name, reviving these memories help me live vicariously through the joy and disappointment of my workshop students.
Though (or maybe because) I’ve never lived anywhere that got much lightning, I’ve been fascinated by lightning since I was a child. (Lightning is so rare here, when Californians hear thunder, instead of sheltering safely like sane people, we run outside so we don’t miss anything.) So I guess it makes sense that ever since I picked up a camera, I’ve dreamed of photographing lightning.
In the beginning…
In 2012, Don Smith and I drove to Grand Canyon to try and make that happen. I mean, how hard could it be? Armed with our cameras and virgin Lightning Triggers, on that first trip we endured enough frustration—lots of lightning that for a variety of rookie reasons, we couldn’t seem to capture—our initial dreams of dozens of lightning images became prayers for just one.

Lightning Strike, Zoroaster Temple and Brahma Temple, Grand Canyon (2012)
Those prayers were answered many times over toward the end of the visit, when a surge in monsoon thunderstorms on and near the South Rim coincided with just enough of a bump in experience (and humility) to equal success. On our last day, so thrilled were we by our South Rim lightning experience, that instead of heading straight home as planned, we detoured four hours in the opposite direction to the North Rim. There, in just a few hours, we captured even more new lightning, more than enough to energize our long drive back to California. I was hooked.
After those beginner’s ups and downs, my lightning success has increased each year. Of course when no lightning happens, there isn’t much I can do about it, but learning to interpret the forecasts (including the fairly technical NWS forecast discussions), understanding the patterns of monsoon storm development and behavior in and around Grand Canyon, increased familiarity with my Lightning Trigger, and (finally) finding an app that reliably alerts me about lightning far outside my range of vision, has significantly increased my lightning success rate.
Lightning Trigger love
For daytime lightning, I can’t overstate the importance of a reliable lightning sensor with range. First, don’t even think about trying to photograph lightning in daylight without a device that detects the lightning and triggers your camera. I know people try the see-and-react technique, but success with this approach is mostly luck—if you do get a bolt, it was almost certainly not the one that made you press the shutter, it was a secondary or tertiary (or later) bolt that followed the initial one. And one of the most common mistakes I see aspiring daylight lightning shooters make is adding an extreme neutral density filter to achieve the long exposures that yield so much success at night. But night lightning shows up because of the extreme contrast between the brilliant lightning against black surroundings; that contrast disappears in daylight, so you end up with a many-second/minute exposure with lightning bolts that last a minuscule fraction of a second, rendering the lightning faint or (more likely) invisible.
Fortunately, the lightning sensor Don and I started with has turned out to be the best, saving us lots of frustration, research, and money. You’ll find many lightning sensor options, most of which I’ve encountered in a workshop, but the only one that I’ve seen work reliably is the Lightning Trigger (though people use the name as a generic, this is the only one that can use it legally). There are fancier sensors, and cheaper sensors, but I’ve found none that combine reliability and range as well as the Lightning Trigger. (I’m not saying that the others don’t work, I’m saying that I’ve never seen any that work as well as the Lightning Trigger, so even though I get no kickback or other benefit from pushing it, the Lightning Trigger is the only lightning sensor I recommend.)
Playing the odds
On a textbook monsoon day, the storms start firing south of the canyon (around Flagstaff and Williams) mid-/late-morning, and move northward as the sun ascends, usually arriving at the canyon late morning or early afternoon. While waiting for the storms to arrive, I rely on my Lightning Tracker Pro app to monitor the approaching activity and get ahead of it, especially when I’m on the South Rim, where my groups stay about 10 minutes from the rim. (It’s easier on the North Rim because our cabins are right at the rim.)
Chasing lightning means obsessive monitoring of weather forecasts. And counterintuitively, my workshop groups have the most success not when the forecast calls for lots of thunderstorms, but when the thunderstorm odds are in the 20 to 40 percent range. That’s because Grand Canyon has a multitude of the vistas with broad, distant views up, down, and across the canyon. These views, combined with the Lightning Trigger’s incredible range (I’ve used mine to capture daylight lightning more than 50 miles away), enables us to safely photograph distant storms—storms usually so far away that we don’t hear the thunder.
So a 20 percent chance of thunderstorms means that (very roughly) 20 percent of the forecast area will get lightning, so it’s usually not difficult to stand on the rim and find lightning happening somewhere within the Lightning Trigger’s range. On the other hand, when the forecast calls for a 50 percent or higher chance of thunderstorms, we do indeed get much more rain and lightning, but usually there’s too much to photograph safely because you never want to be photographing the storm you’re in.
Let’s go fishing
As thrilling as chasing lightning might sound, it’s really about 95 percent arms folded, toe-tapping, just-plain-standing-around-scanning-the-horizon, suddenly interrupted by random bursts of pandemonium. Often, (and despite years of experience) after all that anticipation-infused waiting, the response to the first lightning bolt is either: 1) Crap, the lightning is way over there; or 2) CRAP! The lightning is right here! What ensues is a Keystone Cops frenzy of camera bag flinging, tire screeching, gear tossing, tripod expanding, camera cursing, Lightning Trigger fumbling bedlam. Followed by more waiting. And waiting. And waiting….
I’ve always found the waiting part of lightning photography a lot like fishing—spiced up by the understanding that these fish have the ability to strike you dead without warning. Both fishing and lightning chasing are an intoxicating mix of serene communing with nature, with an undercurrent of giddy anticipation. And whether you’re fishing or trying to photograph lightning, a strike is far from a guarantee that you’ll reel anything in.
Just as fish somehow slip the hook, seeing a lightning bolt is no guarantee that my camera recorded it. Some of my lightning “the one that got away” stories, especially when I was just starting, turned out to be something I did wrong (and my list of stupid mistakes is too long, and embarrassing, to detail in public), but usually it’s simply because lightning can sometimes come and go before even the fastest camera can respond.
One frustration that I’ve learned to deal with is that when a Lightning Trigger is attached and turned on, the camera is in its shutter half-pressed mode (to allow the absolute fastest response), which disables many/most (varies with the camera) controls and the LCD image review—and I guarantee that the surest way to ensure another lightning strike is to turn off your Lightning Trigger to review the last frame, because the instant you do, a spectacular triple-strike will fire right in the middle of your frame. Guaranteed. (This is an extension of the axiom every photographer knows: The best way to make something you’ve been waiting for happen, is to put away your camera gear.) And though there’s no way to prove it, I think we all know that each time we pull the line out of the water to make sure the worm is still there, the “big one” swims right by.
Better late than never
This year I only did one Grand Canyon Monsoon workshop, and true to form, nearly got carpal tunnel scrolling through the weather forecasts in the weeks leading up to the trip. One week in advance, the conditions looked promising, but as the workshop approached, I was alarmed to see it trending drier with each forecast. By the time we started, the NWS was promising clear skies from start to finish.
I’ve seen forecasts like this before, and while they often do come true, I’ve also seen them change on a dime. I also found hope in the forecasts for Flagstaff and Williams to the south (that’s right, I don’t just obsessively scroll the Grand Canyon forecasts, but the nearby forecasts as well), which had thunderstorm chances in the 20-30 percent range all week. This told me that the moisture was nearby, and only a very slight change would send it the 70 or so miles north to Grand Canyon.
The evening of the workshop’s first day (Monday), a few clouds were added to the Thursday forecast—no rain, but at least the moisture was moving in the right direction. Then, in the forecast released Tuesday evening, we were “promised” a 20 percent chance of rain on Friday. With each subsequent forecast (they’re updated several times a day), it appeared things were trending in the right direction for the end of the week and beyond. Unfortunately, the workshop ended Friday morning. So I encouraged everyone with flexibility in their schedule to extend their stay at least through Friday afternoon, and about half the group was able to do it—including Curt (the photographer assisting me) and me.
This workshop enjoyed beautiful sunrises and sunsets, including a real jaw-dropper at Cape Royal on Thursday evening, plus a pretty great Milky Way shoot the night before. And a few in the group stayed up late on Thursday night and got some nice, though fairly distant, night lightning from the Grand Canyon Lodge deck. But those of us who opted to stay an extra day hung our lightning hopes on the Friday and Saturday forecasts.
Much to the consternation of those who added a night hoping for lightning, Friday morning dawned cloudless. But I reassured everyone that this is actually a good thing (it really is), because clear skies maximize the surface heating that fuels the convection thunderstorms require. Though the workshop officially ended after that morning’s sunrise shoot, I promised them I’d be around and happy to help. For starters, I created a text thread that enabled me keep them up to date on the thunderstorm development.
Then I camped out in the Grand Canyon Lodge Sun Room, keeping one (or more) eye on the spectacular view across the canyon to the South Rim and beyond. Late morning my lightning app started reporting strikes north of Williams, less than 60 miles due south. A little before 1:00 p.m. clusters of towering cumulus started blooming just south of the rim, and I knew the lightning wouldn’t be far behind—right on schedule. I texted the group that it’s go-time, then started setting up.
I captured my first lightning strike at 1:15, and between then and 4:00 p.m. captured a total of 59 frames with lightning. I know the others who stayed also captured many nice strikes. Though first bolts were relatively distant, things started to get really good a little before 2:00. I can’t express how much fun it is to be set up and ready, waiting for the next strike, and hearing the exclamations from the group when one hits.
The first strikes started behind the South Rim, a little east (left) of straight across, more or less in the direction of (and beyond) Grandview Point. Gradually the activity moved to the right and closer, approaching the rim, with the strikes increasing in frequency, proximity, and size as they moved. The quantity and volume of the exclamations increased correspondingly. In the nearly two hours of peak activity, the best stuff happened south and southwest of our position.
The two things that I wish for most in a lightning image is a bolt that lands inside the canyon, and capturing a bolt’s actual point of impact. This image checks both boxes. You can clearly see the lightning strike several hundred feet below the rim, and while it might not be clear in this downsized jpeg, my full-size original clearly shows the red/orange point of impact, as well as a fainter branch landing even farther down.
Another thing I love about this image in particular (and one other very similar capture titled “Rim Shot” in the gallery below), is the distance it traveled, and the circuitous route it took. Those familiar with Grand Canyon might be interested to know that this bolt emerges from the clouds more or less above Pima Point on Hermit’s Rest Road, and after more random direction changes than a frightened squirrel, finally smacks the wall a few hundred feet below Yavapai Point, about 5 horizontal miles away. Pretty cool.
Epilogue
Given our successful Friday, Curt and I hit the road for home Saturday morning. But I did keep in contact with others, and the reports were that the Saturday lightning was at least as good as Friday.
In a few days I’ll post Part 2, with more images from this day, plus an updated explanation of the science of lightning.
Join me for next year’s Grand Canyon lightning chase
Lots of Lightning
Click any image to scroll through the gallery LARGE


New Zealand Rocks
Posted on July 22, 2024

New Zealand Rocks, Lake Pukaki
Sony α1
Sony 16-35 GM
13 second2
F/18
ISO 50
(Yes it does.)
This New Zealand winter morning dawned damp and gray, with a layer of low clouds hindering the light and obscuring the peaks. Not awful for photography, but far from the spectacular color and light photographers hope for. My workshop partner Don Smith was battling a nasty (non-Covid) virus, so I was solo with the group on the morning we visited an obscure beach on the south shore of Lake Pukaki. It wasn’t lost on me that last year I was the one who had to miss this Lake Pukaki sunrise shoot with some kind of food poisoning. I don’t know what it is about this spot, but I’m pretty sure that in all our years of doing New Zealand workshops, these are the only two times Don or I have had to call in sick to a shoot.
Our destination was a beach we’d found many years ago—we like it not only for the foreground rocks and view of snowy peaks across the lake, but also for the pristine water that is often calm enough for glassy reflections. Another appeal is that it’s one of our discoveries—not that we’re the only ones who visit here, but despite its obvious appeal, this spot hasn’t yet made anyone’s list of New Zealand’s must-photograph destinations.
Don and I always try to offer our workshop groups a mix of photo locations, from popular to unknown. We certainly need to take our groups to all the beautiful New Zealand scenes that inspired them to travel around the world in the first place (I’m looking at you, Wanaka Tree), but we want to balance those by providing opportunities to capture New Zealand scenes that feel more uniquely their own.
Driving out in the dark this morning, I remembered our visit here a couple of years ago, when we almost couldn’t find this unmarked location because (it turned out) a few landmark trees had been removed. And since I’d missed last year’s visit here, I was afraid I wouldn’t remember how to get there, but our driver Steve was pretty confident he knew where to go, and we did indeed find it without trouble.
Pulling up in the faint light of the approaching sunrise, I could see nearby shrubs swaying in a strong breeze, dashing my hope for a reflection that might compensate for the flat sky. After giving the group a brief orientation, I guided them down to the lake and encouraged everyone to take advantage of the plentiful boulders—both the few protruding from the water, and the many clearly visible just beneath the surface.
There’s no trail from the parking area to the lake—you just have to pick your way across dry lakebed covered with more boulders. Usually this walk is just a few yards from the unpaved road where we park, but with the lake lower than usual, the lakeshore was more than 100 yards away—still not far, but definitely farther than I’d seen before. As this realization sank in, I could also see that the lower water had exposed even more rocks than usual—a small bonus.
Having arrived at the water more than a half hour before sunrise, darkness still ruled. As everyone extracted gear and set up tripods, it seemed like a good time to remind them that they are under no obligation to expose their images as dark as their eyes see the scene, and that this is a perfect opportunity to soften the churn atop the lake with long exposures. Some in the group immediately chose their own foreground rock or rocks and went straight to work, while I spent a little time going over hyperfocal focus techniques with a few people concerned about front-to-back sharpness.
Most photographers understand that stopping down (small aperture) increases depth of field, and that the wider the focal length, the greater the depth of field as well. By far the trickiest factor in maximizing front-to-back sharpness is choosing the correct focus point—focus too far, and nearby subjects will be soft; focus too close, and distant subjects will be soft.
Some photographers use seat of the pants hacks that are (slightly) better than nothing, such as focusing 1/3 of the way into the frame or 1/3 of the way into the scene (these aren’t the same thing), but they provide a false sense of focus-security while too often being wrong. The most reliable way to maximize depth of field is to use a hyperfocal app or table (remember those?) that identifies the hyperfocal point: the closest you can focus and still be sharp all the way out to infinity. But that’s not always convenient.
Lacking a hyperfocal app (or, more likely, too lazy to pull my phone out and check it), I usually start with a rough (experience based) idea of what the hyperfocal distance is for my chosen focal length and f-stop. (The more you check your hyperfocal app and apply its results, the more accurate your rough ideas will be.) Armed with that knowledge, I determine the closest thing that must be sharp (CTTMBS). If it’s clearly farther away than my estimated hyperfocal distance, my focus point doesn’t really matter (as long as it’s farther than the CTTMBS) and I just focus on the most convenient distant object.
When I think my CTTMBS is fairly close to my hyperfocal distance, but I still feel like there’s a comfortable amount of wiggle room, I just pick a spot behind CTTMBS and focus there. (Because focusing on the CTTMBS gives me worthless sharpness in front of it, at the cost of essential distant sharpness.) At that point the decision becomes, how far behind? I usually find something about 50% beyond my CTTMBS. In other words, if the CTTMBS is 10 feet away, I’ll focus about 15 feet distant; if it’s 4 feet away, I’ll pick a spot about 6 feet away.
Any time I’m not 100 percent confident with my focus point choice, I magnify the image preview in my (mirrorless) viewfinder (if you’re shooting with a DSLR, you’ll need to use the preview on your LCD, but I find that less than ideal for critical sharpness decisions), checking both my CTTMBS and a distant object.
When I’m not comfortable guessing the focus point, or when my review reveals an area of the image isn’t sharp, I suck it up and check my hyperfocal app. (And it’s possible that the CTTMBS is so close, I just can’t get there from here and the only way to achieve front-to-back sharpness is focus stacking—something my one-click paradigm doesn’t allow me to do, but there’s absolutely nothing wrong with it if you choose to focus stack.)
I was comfortable with my seat of the pants approach this morning. I started by identifying a group of exposed and submerged rocks that made a strong foreground for the lake and distant mountains, then positioned myself to emphasize a coherent and balanced pattern in the rocks’ relationships to one another.
By the time I was ready to start shooting, it was still dark enough to do multi-second exposures without a neutral density filter. I spent a lot of time with this group of rocks and my 16-35 lens, gradually moving closer and dropping lower as I became more familiar with the scene. Closer and wider allowed me to fill the foreground with the rocks; lower reduced the amount of open lake in the middle of my frame. When I felt like I’d exhausted the possibilities, I moved on to other nearby rock relationships.
As we all worked, the sky that had looked completely socked in when we started, began opening up, first revealing the peaks, and soon thereafter coloring the clouds with warm sunlight. With this, what had been a nice but unspectacular morning of photography took a more dramatic turn, and I rushed back to my original rock grouping that remained my favorite foreground subject.
Armed with prior knowledge, I went straight to the version of the composition I liked best on my initial pass. I dropped my camera (on my tripod, of course) down to about 18 inches above the water, and moved it to about 3 feet from the closest rock (tripod in about 4 inches of water). This close, the focal length that filled the frame left/right with rocks was around 24mm, which I knew at f/16 would give me a hyperfocal distance of around 4 feet. To increase my margin for error, I stopped down to f/18, then focused at the front of the second-closest rock (right of the nearest rock).
By this time the sky was bright enough that the only way to achieve a shutter speed long enough to smooth the choppy water was to replace my regular polarizer with my Breakthrough Filters 6-Stop Dark polarizer. This, combined with f/18 and ISO 50, enabled a more than adequate 13-second exposure—that, it turned out, also picked up slight motion blur in the clouds.
If you’ve made it this far (kudos to you), before leaving (and after checking out my gallery, of course), take the time to study this image and appreciate the color and clarity of the water. If you thought this was unique to Lake Pukaki, you’d be wrong—in this workshop our groups get to enjoy many large New Zealand South Island glacial lakes—Lake Wakatipu, Lake Te Anau, Lake Wanaka and its sister, Lake Hawea, Tasman Lake, Lake Tekapo, and Lake Pukaki—and they’re all some version of the color and clarity you see here.
Don and I return to New Zealand next year
Front to Back
Click any image to scroll through the gallery LARGE


Channeling the Donner Party
Posted on July 18, 2024

Star Spangled Night, Milky Way and Tasman Lake, New Zealand
Sony a7R V
Sony 14mm f/1.8 GM
ISO 4000
f/1.8
20 seconds
Landscape photographers know suffering. With no control over the weather and light, we’re often forced to sacrifice comfort, sometimes even safety, in pursuit of our subjects. Cold, exhaustion, sleep deprivation, hunger—it all goes with the territory. But in the long run the successes, though never guaranteed, far outweigh the sacrifices.
So, when my wife and I scaled the short but steep trail (336 stairs—I counted) to the Tasman Lake overlook in New Zealand earlier this month, we knew it would be cold, and found out quickly that the route was treacherously icy as well. But we persevered and were rewarded with a lake view beneath the southern night sky that was almost beyond comprehension for our Northern Hemisphere brains.
Did I mention the cold? When I’m taking pictures, though I’m very much aware of the temperature, no matter how extreme, it never bothers me. For anyone with me who isn’t shooting? Not so much. But Sonya braved the frigid temps for 30 minutes—long enough to appreciate the majesty of the moment, and for me to get some nice pictures. Mission accomplished.
One of the things about planning a photo shoot in difficult conditions is anticipation and planning—not just for the shoot itself, but for all the other factors supporting it. In addition to the knowledge that the Milky Way would indeed be shining above the lake, and the moon wouldn’t be present to wash out the essential darkness, we also anticipated the possibility of an icy trail and carried a pair of Yaktrax for improved footing, made sure our lights were in working order, and had all the appropriate cold weather gear. And knowing that afternoon that we’d be driving into Aoraki / Mt. Cook National Park and possibly staying well past dark, I had the foresight (patting myself on the back) to check into our hotel in Twizel and make arrangements for dinner before embarking on our adventure.
Calling Twizel a sleepy town would be an understatement. Because our hotel locks the registration area and sends the staff home at 8:00 p.m., and most restaurants in town also close their doors at 8:00, at hotel check-in I inquired about a place in town to eat after 8:00. The woman at the front desk sent us to (raved about, in fact) a restaurant nearby. But not wanting to take her word that it would be open after 8:00, we drove over to talk to someone at the restaurant in person. When I explained to Carol, the nice lady who greeted us at the restaurant, that I wasn’t sure what time we’d be there, she said she’d just put us down for between 8:00 and 9:00. Great!
We were already getting hungry by the time we drove into the park and started our hike, but sucked it up like good photographers (well one of us at least—the other just sucked it up like a good human with a crazy partner). After our successful ascent and stay at the top, our prime emphasis on the descent was not falling on our butts, but rattling around the back of our minds was our extreme cold and hunger, and (especially) the relief waiting for us back in Twizel.
Back in town we beelined to the restaurant. Having checked the menu in advance, our mouths already watered in anticipation. It was still relatively full, but everyone was in the bar area watching the All Blacks vs. England rugby game (rugby is a religion in New Zealand, and the All Blacks are the deity of choice). There was no sign of Carol, any hostess or server, so I approached the bar and told the bartender we have a dinner reservation. He just stared at me like I’d asked where I could park my camel, finally saying with an implicit duh, “We stopped serving dinner at 8:00.” Dropping Carol’s name was met with a blank stare and a shrug. When I asked where else we might find dinner after 8:00 p.m., he just chuckled and said, “This is Twizel.”
By now it was after 8:45 and very clear that pleading with the bartender would be a waste of time, so we zipped over to town centre hoping to find something open. The only place with any sign of life was the local pub, so we parked and rushed in. Everyone here was watching the rugby game too, and try as we might, we couldn’t get enough of anyone’s attention to ask about dinner. Fortunately (or so it seemed), about then the game ended (All Blacks 16 — England 15) and the rugby zombies snapped out of their trances.
At least this time when we asked about dinner we got a little sympathy, but still no dinner. Walking back out into the cold and suddenly desperate, we remembered a gas station as we entered town—maybe we could at least find snacks there? Then we noticed a liquor store next door to the pub, a potential snack oasis in a frozen desert? Not so much. As we approached the entrance, a woman came out the front door and told us they’d just closed.
Turns out the gas station was fully automated, with no minimart, unlike pretty much every gas station in the US. So we limped back to the hotel, hoping maybe to find vending machines that would sustain us until breakfast. But with the lobby area locked tight, we had to enter through a side door that only provided access to the rooms, but none of the hotel’s other (meager) amenities.
By then we were so hungry we’d temporarily forgotten how cold we were. That is, until we turned the key in our door and walked into what surely must be a cryogenic chamber with beds. We were already accustomed to the unheated hotel hallways with temperatures that rival the temps outside (you can see your breath in a New Zealand hotel hallway in winter), but this was an entirely new level of cold. Before doing anything else, I went searching for the heater and finally found mounted to the wall a box with vents and a couple of knobs, about the size of a toaster. Surely this couldn’t be the heater?
It was in fact the heater. A heater, it turns out, that also doubles as a white noise machine. Genius! So we cranked it, keeping our outdoor clothes on while unpacking and rummaging for scraps of food in our luggage. Eventually Sonya struck pay dirt, excavating two pieces of hard candy from the bottom of her purse—dinner!
By 10:00 p.m. it had become pretty clear that the heater, despite achieving impressive decibel levels, was never going to generate enough warmth to make the room comfortable, and decided our best defense would be bed. While this did nothing for the hunger, perhaps sleep would mitigate our discomfort.
It’s amazing what being awake in a dark room does to the mind. Freezing cold, starving (okay, perhaps a bit of hyperbole but you get the idea), my thoughts kept drifting to the Donner Party. I discovered new empathy in their plight, but only the knowledge that Sonya is mostly vegetarian and doesn’t eat red meat allowed me to eventually drift off to sleep with both eyes closed.
Somehow, we survived the night.
(I should add that this is the only bad hotel experience I’ve ever had in New Zealand. Despite the chilly hallways, and bafflingly flaccid bacon, I truly love the hotels there.)
A few words about this image
In my prior blog post I shared the details of this night above Tasman Lake. But before checking out, I’d like to add a thought or two.
Most of my Milky Way shoots skew heavily to a vertical orientation that maximizes the amount of Milky Way in my frame. Between the wall of peaks stretching northward, and the Magellanic Clouds high in the southern sky, if ever a scene were to break me of this habit, it’s this view of Tasman Lake.

New Zealand Night, Milky Way Over Tasman Lake
So this night I made a conscious effort to emphasize horizontal orientation, and the image I shared last week reflects that choice. But I’ve learned to never leave a beautiful scene, night or day, without giving myself both horizontal and vertical options.
Sometimes as soon as I reorient and put my eye to the viewfinder I’ll see something I missed; other times, it’s not until further scrutiny with the benefit of my large monitor at home, that I’m surprised to find I actually prefer the less obvious orientation.
So, despite my plan to emphasize horizontal frames this evening, I made sure I didn’t leave without some verticals as well. In this case, since I’ve photographed here before, I didn’t find anything especially surprising. But I did try something new, entirely ignoring the lakeshore and small pool on the rocks directly beneath me, including only enough lake to feature a couple of icebergs. This minimal foreground allowed the maximum Milky Way. (Which, at 14mm, turned out to be quite a bit of Milky Way.)
And as I’ve said before, the color of the lake in this image is real, though at night there isn’t enough light to see it. This ability to reveal realities lost to human vision is probably my favorite thing about photography.
Join Don Smith and me for next year’s New Zealand adventure
Workshop Schedule || Purchase Prints || Instagram
The Joy of Suffering
Click any image to scroll through the gallery LARGE


New Zealand After Dark
Posted on June 19, 2024

Dark Night, Milky Way and Tasman Lake, New Zealand
Sony a7S II
Sony 12 – 24 f/4 G
ISO 10,000
f/4
30 seconds
This week I have New Zealand on my mind. In preparation for the New Zealand Winter photo workshop that begins next week, I started going through unprocessed images from prior New Zealand visits. I was actually looking for something else when I stumbled upon this Milky Way image from the 2019 trip, when Don Smith and I guided a group of Sony influencers around the South Island. I’d already processed a virtually identical composition of this scene back then, but since my Milky Way processing has evolved (improved), I decided to give it another shot.
Day or night, I love this Tasman Lake scene in particular because it so beautifully captures what I love most about New Zealand. We only do this workshop in winter, which of course leads to the inevitable question: “Why?” The simple answer is that the modest sprinkling of tourists, consistently interesting skies, and snowy peaks I love so much, are only possible in winter. I could go on and on with my answer, but since a picture is worth a thousand words, I’ll just save you some time and give you six-thousand words worth of examples. (You’re welcome.)


But even once I convince skeptics that winter in New Zealand is in fact quite beautiful, I’m usually hit with a follow-up: “But isn’t it cold?” Sure it’s cold, but by most people’s expectations of winter, New Zealand’s South Island is actually quite mild—with average highs in the 40s and 50s, and lows in the 30s, it’s similar to winter in Northern California and Oregon. I would venture that there’s not a single person reading this who doesn’t already have in their closet enough winter warmth to ensure cozy comfort in a New Zealand winter. Also like Northern California and Oregon, in winter New Zealand’s South Island gets rain and fog in the lowlands, and snow in the mountains, conditions I find so much better for photography (and for just plain being outside) than the sweltering blank-sky California summers I left back home.
All that said, for me the strongest argument for winter in New Zealand is Southern Hemisphere’s night sky. Inherently pristine air and minimal light pollution makes New Zealand is an astrophotographer’s paradise any season. But winter is when the Milky Way’s brilliant core shines in the east after sunset, already much higher above the horizon than my Northern Hemisphere eyes are accustomed to. The galactic core remains visible all night, ascending further and slowly rotating westward, before finally fading on the other side of the sky in the pre-sunrise twilight. That means more than 12 hours of quality Milky Way time, and the ability to place it above landscapes facing east, north, or west, by simply choosing the time of night you photograph it. And joining the celestial show are the Large and Small Magellanic Clouds—satellite galaxies of our Milky Way, only visible in the Southern Hemisphere.
Benefiting from our years of experience on the South Island, Don and I have identified many very nice locations for photographing the Milky Way, but our two favorites feature the galactic core above glacial lakes that are bounded by snowy peaks. One of these is on the shore Lake Wakatipu near Queenstown; the other is a vista above Tasman Lake in Mt. Cook / Aoraki National Park. This week’s image, from the 2019 trip, is of the Tasman Lake scene.
From the very first time my eyes feasted on it, I marveled at what a spectacular place the Tasman Lake view would be to photograph the Milky Way. In 2019, Don and I were especially pleased to be guiding this group of young photographers who were as excited about photographing the Milky Way as we were, so this shoot was in our plan since before the workshop started.
The sky this evening was crystal clear, but as the sky darkened, I found myself still down at the foot of the lake (just out of the frame on the far right), where I’d photographed sunset with most of the group. The majority decided to stay put for the Milky Way shoot, and while I couldn’t deny that this spot would likely be no less spectacular, I couldn’t pass the opportunity at the elevated lake view that had been on my radar for so long. I also thought the Milky Way would align better with the most prominent peaks from this vantage point. So I scrambled back up the boulders to the trail and race-walked more than a mile, then scaled more than 300 stairs in near darkness, to get in position.
I expected to find the few who weren’t down at the lakeside sunset spot (this group always scattered) would already be up here, but I arrived to find the view empty. While I was happy to eventually have the company of a couple of others, the utter solitude I enjoyed for the first 30 minutes felt downright spiritual.
Going with my dedicated night camera, the Sony a7S II, I started with my default night lens at the time, the Sony 24mm f/1.4. But the scene was so expansive, I quickly switched to my Sony 16-35 f/2.8 GM for a wider view. While that did the job for a while, it wasn’t long before I found myself wanting an even bigger view, so I reached for my Sony 12-24 f/4 G lens. Because light capture is the single most important factor in a Milky Way image, in general I find f/4 too slow. (Today I’d use my 14mm f/1.8 or 12-24 f/2.8, but back then those lenses were still at least a year away.) But really wanting the widest possible view, I rationalized that since the a7S II can handle 10,000 ISO without any problem, and the star motion of a 30-second exposure at 12mm would be minimal, and just went for it. Mitigating the f/4 exposure problems was the fact that the best parts of the scene’s foreground, the snow and water, were highly reflective, while the dark rock wasn’t really essential to the scene.
The result as processed in 2019, while noisier than ideal, was still usable. But as time passes, I’ve become less and less thrilled with many of my old Milky Way processing choices—that image was no exception. Since I’ve been pretty thrilled with the results reprocessing old Milky Way images with Lightroom’s latest noise reduction tool, I thought this might be a great time to reprocess this old scene to see if I could do it better.


For no reason in particular, I chose different image to process, but the compositions are nearly identical. As expected, the new Lightroom noise reduction did a much better job minimizing the inevitable noise that comes at 10,000 ISO, so I was already ahead of the game. The only other major processing improvement I made was the color of the sky, which, as my night sky processing evolves, I’m making much less blue.
Because no one knows what color the night sky supposed to be when given the amount of exposure necessary bring out foreground detail, I’ve always believed that the color of the sky in a Milky Way image is the photographer’s creative choice. I mean, scientists might be able to tell you what color it should be (there’s a very strong case for green), but to me the bottom line is image credibility (and green just won’t do it).
Whatever night sky color I’ve ended up with has entirely a function of the color temperature I choose when I process my raw file in Lightroom—no artificially changing the hue, saturation, or in any other way plugging in some artificial color. Since I do think the foreground (non-sky) of a night image looks more night-like (I don’t want a night image that looks like daylight with stars) with the bluish tint I get when the color temperature is cooled to somewhere in the 3000-4000 degrees range (photographers will know what I’m talking about—non-photographers will just need to take my word), for years I cooled the entire image that way—hence the blue night skies. But Lightroom now makes it super easy to process the sky and foreground separately and seamlessly, so I no longer cool my night skies nearly as much as before (or at all). Now my night skies tend to be much closer to black, trending almost imperceptibly to the purple side of blue (avoiding the cyan side).
Oh, and the color of Tasman Lake you see in this image is real, I swear—the color of the South Island’s glacial lakes is another reason to love this country, but that’s a story for another day.
Workshop Schedule || Purchase Prints || Instagram
This year’s New Zealand workshop is full, but Don and I will do it again next year.
New Zealand After Dark


