Eloquent Images by Gary Hart
Insight, information, and inspiration for the inquisitive nature photographer
A Photographer’s Vision
Posted on February 9, 2026

Day’s End, Hell’s Gate, Death Valley NP
Sony α1
Sony 16-35 GM II
1/80 second
F/20
ISO 100
I just returned from a spectacular workshop in Death Valley, one of the most fascinatingly unique locations on Earth. After missing Death Valley last year, it was especially nice to return. (Of course it didn’t hurt that I had a great group that enjoyed fantastic conditions from beginning to end.)
I first got to know Death Valley as a kid, when my family camped there several times over the Christmas school break. We’d spend a most of the week between Christmas and New Year’s Day exploring all kinds of cool stuff that would thrill any young boy: Scotty’s Castle, Rhyolite (a ghost town), and collections of abandoned mining equipment scattered about the desert. We also went to all the standard vistas like Zabriskie Point and Dante’s View, and hiked some of the shorter, most popular trails (Golden Canyon, Mosaic Canyon, Natural Bridge). But with all the cool old stuff, I was much less interested in the scenery and hiking part of those trips, and never really registered Death Valley’s spectacular natural beauty.
About 20 years ago I returned with a camera and saw Death Valley in a completely different way. Suddenly, beauty was everywhere. It would have been easy to—and I probably did—think to myself some version of, “Gee, I don’t remember Death Valley being this beautiful.”
When traveling more with my camera to other childhood family vacation destinations kept eliciting similar epiphanies, I started noticing the way photography was enhancing my overall view of the world. Suddenly, I was seeing the world as a photographer and finding beauty everywhere.
Today, camera or not, my eyes naturally scan my surroundings for scenes, large and small, that resonate personally. Even without a camera, I now seem to unconsciously create compositions in my brain, mentally identifying striking features and their relationships to one another, and figuring out the best way to position myself and frame the scene.
This photographer’s vision isn’t limited to a scene’s physical objects, it also extends to weather and light, both current and potential. What conditions will complement this scene best, and how do I get here to enjoy them? Warm early/late light, moonrise or moonset, fall color, overcast, the Milky Way, a reflection, sunstar—anything that might elevate the scene.
I don’t think this makes me especially unique—in fact I’d venture to guess that many (most?) serious nature photographers view the natural world similarly. And for those who don’t, I believe it’s a quality that can be cultivated with a little conscious practice until it comes naturally.
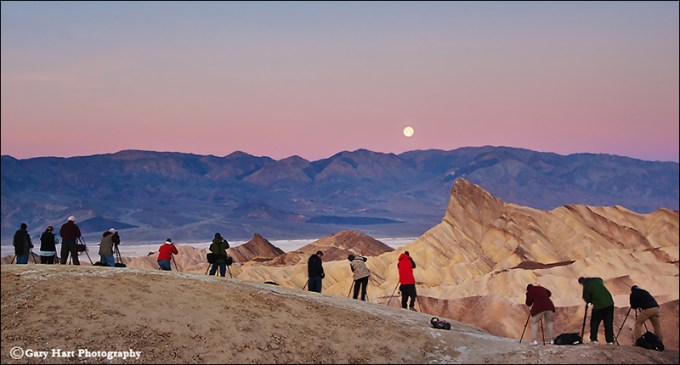
A great example of putting this mindset to use came the day before this year’s Death Valley workshop, while checking out the conditions at Hell’s Gate on Daylight Pass Road. At the end of an 8-hour drive that started a 7:00 a.m. (to ensure I could get here before dark), I pulled up to Hell’s Gate about 15 minutes before sunset.
I’ve been taking my groups here on my workshop’s first night for many years, but despite that familiarity, there are a few variables I always like to check out for their current status. And with heavy rain earlier this winter washing out many Death Valley roads and locations, I was especially keen to make sure there would be no surprises here.
What I like about Hell’s Gate is that it’s not commonly shot view, and it has a variety of photography options in multiple directions. Directly across the road from the Hell’s Gate parking area is a small mound dotted with photogenic rocks and shrubs that all make nice foregrounds for the long view down the valley toward Telescope Peak and beyond, and west toward pyramid-shaped Death Valley Buttes. There’s even a mini-canyon—7-foot vertical walls and no more than 30-feet long—that can be used to frame the view of the Funeral Mountains to the east and south.
Uphill from this little canyon is a short (100 yards or so) but steep (-ish) trail to an elevated prominence with a similar view. Foreground options up here include more striking rocks, plus an assortment of very photogenic cacti. My favorites are the many clumps of barrel cactus sprinkled around the surrounding slopes. Depending on the year, the condition of the barrel cacti can range from fresh pink with small flowers, to a dried out brown-gray. Though there were no flowers this year, I was happy to see that they were all beautifully pink and alive.
Walking up the trail on this visit, my eyes picked out the best cacti and I started making mental pictures without really realizing it. A little later, visualizing a potential sunstar I took note of exactly when and where the sun would drop behind the nearby buttes and distant Cottonwood Mountains.
Satisfied all was well, I hopped in my car and, instead of making the 30-minute drive to my hotel in Furnace Creek, I added 2 hours to my already long day by detouring to Pahrump so I purchase essential grocery items I’d foolishly left at home. (This is actually an improvement over my prior Death Valley workshop, when I forgot to bring my computer. And in my defense, that’s the only time in my 20 years of leading workshops I’ve done that, and I now triple-check to ensure it never happens again.)
But anyway… When I returned to Hell’s Gate with my group the following evening, I was able to point out all the possibilities and describe exactly what the light would do as the sun dropped. I encouraged everyone to identify the views they like best, as well as foregrounds to put with them, so they wouldn’t be scrambling around looking for shots when the light was at its best. (I’ve noticed that this kind of anticipation doesn’t happen naturally for some people at the start of a workshop, so it’s become a particular point of emphasis.)
On the first shoot of any workshop I try to get around to everyone and therefore rarely shoot, but as the sun dropped and I saw that everyone was quite content, I returned to a composition that I’d identified the prior evening.
Earlier I’d pointed out to my group the very large barrel cactus clump perched on the hillside about 20 feet above the trail, but I think the steep slope covered with loose rock, not to mention lots of easier access compositions nearby, had discouraged them from scaling the hill. So up I went. Reaching my target cactus, I checked out the even larger barrel cactus clump farther up the hill and maybe 20 feet away.
My vision on the first visit was to frame Death Valley Buttes and the sunstar (if the clouds permitted it) with these two cacti; once I was actually in position in front of the closest barrel cactus, I was pleased to confirm that what I’d visualized would in fact work. I just had to tweak my composition to account for the rocks at my feet and clouds near the horizon. The other thing I had to be careful about was my camera bag, which could very easily tumble down the hillside if I didn’t plant it firmly braces and balanced on the rocks.
To deemphasize the (ugly) brown foreground, I dropped my tripod to about a foot above the ground, which made the foreground all about the beautiful cactus and interesting rocks. And though scenes rarely fully cooperate with my goal for clean borders, I took special care to find the best place to cut the rocks at the bottom and sides of the frame, and the clouds at the top.
When I was satisfied with my composition, I picked my focus point—with the closest rocks about 18 inches away, it helped that I already needed to stop way down for the sunstar. Since I wanted everything in this frame sharp, I applied my tried-and-true seat-of-the-pants focus point technique: pick the closest thing that must be sharp (the rocks), then focus a little bit behind it—because focusing on the closest thing gives me sharpness in front I don’t need. (“A little bit” varies with the scene, focal length, f-stop, and subject distance, but the more you do this, the better you get at deciding what “a little bit” is.) I chose f/20 and focused on the close cactus, about 2 feet away.
When the sun reached the horizon, I started with a shutter speed that the balanced black shadows and white highlights as much as possible (knowing I’d be able to recover some of each in processing), and started clicking. After each click, I adjusted my exposure in 2/3 stop increments—first up about 3 stops above my starting point, then back down to 3 stops to below, continuing until the sun disappeared. This gave me a broad range of exposures to choose between on my computer later.
When we were finished, everyone seemed pretty happy with our start. Though I didn’t get a chance to process my own images until after the workshop, from what I saw in the image review, I’d say their excitement was justified.
Workshop Schedule || Purchase Prints || Instagram
A Death Valley Gallery


, Death Valley")


Ten Reasons to Take Up Nature Photography
Posted on January 16, 2025

Lunar Peek, Zabriskie Point, Death Valley
Sony a7R V
Sony 24-105 f/4 G
ISO 125
f/11
1/4 second
Recently I was talking to a friend on the cusp of retirement, and while she was looking forward to her impending freedom, she wasn’t sure what she was going to do with all her free time. I instantly blurted, “Nature photography!,” then started listing reasons. I surprised even myself with everything I came up with, and how quickly it came, which got me thinking the subject would make a good blog post. So here are my (very biased) thoughts on why nature/landscape photography makes the ideal pastime. (After reviewing the list, it turns out that most of my points apply to many other kinds of photography as well.)
- Save experiences: Ours is a beautiful, dynamic world. Over my lifetime, I’ve been fortunate to have witnessed Nature at its very best, more times than I can count. Though he’s no longer here to thank, for this I’m most grateful to my father—a serious amateur photographer who wouldn’t dream of traveling without a camera—for modeling the importance of recording these moments. It’s no wonder that, almost as soon as I was old enough to make my own major financial decisions, I purchased a 35mm SLR system of my own—mostly because (thanks to my dad) I thought that’s just what adults do. Thanks to my camera, the knowledge that I can revisit Nature’s ephemeral moments any time I want to is a source of great comfort.
- Share experiences: I think my father got as much pleasure sharing his travel experiences as he did recording them. Back in Dad’s time, most non-professional photographers’ images only reached other eyes when (captive?) visitors were sequestered in front a projection screen in a darkened living room (because there was really only one answer to the dreaded question, “Hey, do you want to see the pictures from our vacation?”). And while I won’t pretend Dad never subjected our visitors to the occasional slide show, as a United Methodist minister, he had a whole congregation filled with potential viewers, not to mention access to a large space ideal for sharing. Given the number of people who attended his shows without being compelled or held hostage, I’d say his images were well received. Today, the thrill of taking pictures that please others is as great as it’s ever been, but the opportunities to share them in our digitally connected world have increased exponentially.
- Low start-up cost: Camera gear can be ridiculously expensive, but it doesn’t need to be. Your smartphone will take surprisingly good pictures—good enough to reap most of the benefits listed here long enough to determine whether a bigger investment is justified. And when you do decide you want more serious dedicated photo gear, you can find quality equipment at pretty much any price point. In other words, expense should not be a reason not to pursue photography.
- Flexible income potential: I encounter many people who would like to make a living with their photography. And while there is still excellent money to be made with a camera, nature photography is not among the more lucrative options—not by a long shot (sorry). Fortunately, earning money with a camera doesn’t require you to quit your day job. You can pursue photography as an avocation, reaping the many personal benefits while dipping your toes into selling images (for publication), prints, and services until it grows into something lucrative. That was my path: More than 20 years ago I started doing weekend art shows while keeping my adult job, then gradually segued into workshops, training, and photography-related writing, until I felt confident pursuing photography as a profession. For a while after going fulltime I continued with the art shows, which were both lucrative and fun, but doing art shows and workshops felt like working two different jobs, and the path to a fulltime income with workshops was much clearer, so I dropped the art shows. On the other hand, I know photographers who earn a good living through art and gallery shows. And today, social media has increased the money-making opportunities far beyond what was available when I started.
- See the world (large): Need an excuse, or maybe just a catalyst, to travel? Try photography. It’s easy to get so locked into a day-to-day comfort zone that our dreams of visiting yearned-for locations are never fulfilled. I’m afraid that would probably describe my life were it not for photography. But, going all the way back to when photography was just a hobby, my camera and I have visited remote corners of the globe, enjoyed river rafting adventures in Grand Canyon, and witnessed more celestial and meteorological sights than I ever imagined possible.
- See the world (small): More than just visiting exotic locations, viewing the world with a photographer’s eye enables me to see beauty everywhere, from the distant horizon to right at my feet. I can say with absolute certainty that my own photographer-eyes have become hyperaware of my surroundings, noticing colors, textures, relationships, and minute detail everywhere—not just when I’m actively taking pictures, but pretty much as long as I’m awake: driving, walking, running, or simply sitting still. Not only that, to this day, the more time I spend taking pictures, the more this heightened vision improves.
- Commune with Nature: For many people, myself included, few things are more soothing than quiet time with Nature. This enhanced relationship with the natural world can be active or passive. When I’m immersed in a natural environment, away from the din of “civilization,” all of my senses intensify and seem to work in synergy, providing peace I don’t feel at any other time. But there’s more—even when I’m stuck inside, my life as a photographer inspires me to pursue deeper understanding of my subjects that helps me appreciate them even more.
- Ideal solitary activity: Are you an introvert who recharges by being alone? Nature photography has you covered. I think most of us have times when we just need to dial down the pressures and sensory dissonance of daily life. I can think of no better way than full immersion in the serene sights and sounds of the natural world, completely absent the need to please, impress, or in any other way interact with the rest of the world. When I’m alone in Nature, time seems to stand still, my senses amplify, and my connection to my surrounding is never stronger.
- Ideal group activity: Are you an extrovert who recharges by being around others? Nature photography has you covered. Some of the most memorable experiences of my photography life were made that way because I was able to share them with other like-minded individuals. The joy of these moments is contagious, at times amplified enough by the presence of others to move me to tears.
- Cultivate your creative and analytical brains: I can think of few endeavors that more perfectly blend the right and left brain than photography. Some photographers are drawn by photography’s creative opportunities to view and express the world; others love the technical aspects of managing exposure and focus with their camera’s many controls. While it’s possible to take pictures with just one side of the brain or the other engaged, most people who take up photography are surprised to learn that there is indeed life on the other side of the brain.
About this image
Lunar Peek, Zabriskie Point, Death Valley
The Zabriskie Point moonset is always a highlight of my Death Valley Winter Moon photo workshop. Often we get no clouds, making this sunrise moonset a no-stress event for me. This time (January 2024), when clouds threatened to wash out the shoot entirely, was not one of those events.
The moon was visible above the clouds when we arrived, but the sky was much too dark to capture lunar and foreground detail with one click (my personal requirement). When the moon dropped into the clouds and disappeared completely, I tried to rationalize that at least we’d have nice clouds for our moonless sunrise, but I used all the positive energy I could muster to will the clouds into parting.
Though it lasted for only a couple of minutes, the moon did indeed slip into a small opening long enough for everyone in the group to get a few frames before being swallowed for good. Though only had time for a handful of frames with enough moon to be worthwhile, I think most photographers would take quality over quantity any time.
Workshop Schedule || Purchase Prints || Instagram
The Joy of Nature
Click any image to scroll through the gallery LARGE


")


, Yosemite")


Full Circle
Posted on September 7, 2024

Sunset Mirror, Lake Manly (Badwater), Death Valley
Sony a7R V
Sony 24-105 f/4 G
ISO 100
f/11
1/15 seconds
For many people of my generation, their earliest memories of landscape photography are some version of Dad pulling the family wagon up to an iconic vista and beelining (camera flapping around his neck) to the railed viewpoint to snap a few frames—if you were lucky, he’d take long enough for you to use the bathroom. In most cases these pictures would be quickly forgotten—until 50 years later when, while searching through Mom and Dad’s garage/attic/basement/closets arguing with siblings about what stays and goes, you come upon shoe boxes stuffed with prints or slides of scenes that you feel absolutely no connection to.
I think the fact that I became a landscape photographer has something to do with an intermediate step that most people missed: when my dad’s slides came back from the lab, he would meticulously peruse and purge, then label and organize the survivors, before sequestering the family in our darkened living room until the each Kodak Carousel had completed its cycle. Sometimes we’d have to sit through multiple shows of the same pictures as friends and family visited.
I won’t pretend that my brothers and I loved these shows, or (let’s be honest) that we enjoyed them in any way. But in hindsight, I think on some level the message came through each time we visited Yosemite, the beach, or drove across the country (have tent trailer — will travel), that the beauty we experienced was worth preserving.
Learning that pictures could possess an actual aesthetic value that others could enjoy also helped me register that a camera could be much more than a mere outdoor accessory. Which probably explains why, when I became old enough to start creating outdoor memories of my own, preserving on film the beauty that moved me just seemed the natural thing to do.
Of course when I first picked up a camera, I naively believed that the only ingredients necessary for a successful picture were a camera and a pretty scene. That might have something to do with the fact that Dad’s photo stops were rarely timed for light or conditions, because vacations and photography don’t mix: the best time for photography is the worst time to be outside. Despite prioritizing family over photography like the good father he was, I appreciate now that he really did know his way around a camera, and how to frame a scene.
(Like many blog posts, I started with a point I wanted to land on, and now have ended up following a most circuitous route getting there. But here we are.)
I’m thinking about the influences that got me to where I am today, and need to give Dad a twofer on this one: prioritizing family over photography, while still modeling a photographer’s aesthetic. My own pursuit of photography started after childhood, but long before I married and had children, and while it went somewhat dormant during my daughters’ formative years (limited mostly to snaps of family moments), the interest came roaring back when the girls spread their wings and rendered my wife and me empty nesters—an event that (fortuitously) coincided with the advent of digital capture.
Acquainting myself with the new digital paradigm, I couldn’t help reliving some of my father’s enthusiasm for photography and the cutting-edge technology of his time (autofocus, through-the-lens automatic metering), that (I realize now) coincided with my parents’ own sudden empty-nester status. Digital photography was perfect for me—similar enough to film photography that there wasn’t lots to relearn, but with an infusion of the technical world I’d spent nearly 20 years in. Also like my father’s experience, the new-found freedom to research, study, and explore taught me (among other things) the importance of light on the landscape, and that I must prioritize the conditions when scheduling my photo trips.
Since virtually every family vacation of my childhood was a camping trip somewhere scenic, it made sense that my first instinct was to return to the locations of my strongest childhood memories. While a few vacations were rigorously planned interstate adventures with a different stop each night (I’m having flashbacks to KOA campgrounds and AAA TripTiks), more frequently we’d pick a picturesque setting and set up camp for a week or two, relaxing and enjoying day-trips to nearby sights. These are the locations that especially drew me with my new digital camera.
My strongest childhood memories of vacations were our summer Yosemite trips, but a couple of times Dad got a week off during Christmas break and Death Valley was the logical destination. So after I’d harvested Yosemite’s low hanging visual fruit, Death Valley was the next logical step for my burgeoning photography aspirations.
As a kid I was more interested in Death Valley’s mining and ghost town attractions, but returning as a photographer, it was the uniquely beautiful geology that got my juices flowing. In my previous blog post, I wrote about the proximity of the highest point in the 48 contiguous United States (Mt. Whitney) to the lowest point in the Northern Hemisphere, so I guess it makes sense to circle back to Death Valley.
That lowest point is Badwater, which also happens to be a personal Death Valley favorite. So what’s going on here? When you’re lower than all surrounding terrain, not only does water tend to find you, it can only exit via evaporation. In an inherently arid environment like Death Valley, inundation usually outpaces evaporation, leaving behind only minerals carried by the water but too heavy to evaporate. The predominant residual mineral at Badwater is salt, with a little more accumulating with each evaporation. As the mud beneath the salt layer dries, polygonal cracks form, creating openings that can accumulate extra salt. Death Valley’s intense summer heat causes this salt to expand and form corresponding polygonal shapes that stretch for miles atop the otherwise flat surface.
Extending miles in the shadow of 11,000 foot Telescope Peak, Badwater is always photographable, but its year-to-year variation is a source of great angst and celebration. Some winters I find these shapes filled with water, sparkling like faceted jewels; or when dry their color can range from muddy brown to as white as a bleached sheet. But by far my favorite happens when recent rains have flooded Badwater Basin to form Lake Manly, a shallow ephemeral lake that turns the entire basin into a giant mirror. During my 2005 visit, I watched a kayaker glide across the lake.
To explain a little more about Lake Manly, here’s an excerpt from my February 14, 2024 blog post:

Sweet Sunset, Lake Manly and Badwater Basin, Death Valley
The origins of Lake Manly in Badwater Basin date back nearly 200,000 years. In its earliest millennia, Lake Manly was much deeper, far more expansive, and persisted year-round. But in recent millennia, it has become an ephemeral lake, usually dry and filling only when rare intense storms generate enough runoff. The life of these recent versions of Lake Manly is measured in weeks or months.
The current version of Lake Manly formed when Tropical Storm (and former hurricane) Hilary saturated Death Valley with more than a year’s worth of rain (2.2 inches) in one day. Because Death Valley isn’t equipped to handle so much water at once, Hilary brought flooding that washed out roads, displaced rocks, carved new channels, and reshaped canyons. And with no outlet for all this water, after doing its damage, this runoff had to come to rest somewhere—and where better than the lowest place in North America?
At its peak volume last August, the newest incarnation of Lake Manly was 7 miles long and 4 miles wide, but no more than 2 feet deep. By late January its surface area had shrunk to half its original size, and the lake’s depth was measured in inches.
Despite its diminished size, Lake Manly was more than big enough to provide spectacular, valley-wide reflections for my workshop group. In addition to photographing mountain and sky reflections from the valley floor, we also enjoyed beautiful sunset reflections from Dante’s View, more than 5000 feet above Badwater.
I captured today’s blog image on the same evening as the image I shared in that February post. Because the sky is important as the foreground in a landscape image, my compositions this evening followed the rapidly scooting clouds, capturing the changing color as I went. I shifted my position on the lakeshore (and have the muddy boots to prove it) to ensure the best foreground/clouds relationship, and continued moving and tracking the clouds until they encountered a nearly full moon rising above the looming Amargosa Range.
On those childhood visits to these special places, rolling my eyes Dad’s goofy obsession and the inevitable boring slideshow in store, I had no appreciation for the foundation that was being laid, or for the full circle journey I was embarking on.
2026 Death Valley Winter Moon Photo Workshop
Workshop Schedule || Purchase Prints || Instagram
Death Valley


, Death Valley")


Reflecting on Reflections
Posted on February 14, 2024

Sweet Sunset, Lake Manly and Badwater Basin, Death Valley
Sony a7R V
Sony 24-105 f/4 G
ISO 100
f/11
1/30 second
One of the (many) great things about choosing landscape photo workshops to earn my livelihood is that selling images is optional. Don’t get me wrong, I love selling images (and every image you see on my blog or in social media is for sale), but since my income doesn’t depend on it, I don’t need to sell images. That allows me to photograph only the things I want to photograph, as many times as I want to photograph them, and to never choose a subject based on the image’s potential salability.
It seems like I’m most drawn to subjects and phenomena that feel to me like gifts, with the ability to elevate “ordinary” beauty. People following my blog or browsing my galleries probably have a pretty good idea of what those things are. If you’ve been paying attention, you’ve probably figured out that I find immense joy in the night sky (moon, stars, Milky Way), dramatic weather (lightning, rainbows, and so on), poppies, dogwood, fall color—I could go on, but you get the idea.
Another subject near the top of that list of joys is reflections. Without discounting reflections’ inverted doubling of Nature’s beauty that engages the brain in fresh ways, I think the thing that most draws me to a mirror reflection is the utter stillness required, and the soothing tranquility that stillness conveys.
Water reflections come in many forms, from a mirror-sharp inverted mountain peak atop a still pool, to an abstract shuffle of color and texture on a gently undulating lake. And rainbows are an a particularly special kind of reflection.
Without getting too far into the physics of light, it’s important to understand that every object we see and photograph that doesn’t generate its own light, comes to us courtesy of reflected light. For example, when sunlight strikes Half Dome in Yosemite, some of the sun’s photons bounce straight into our eyes and there it is. Other photons enter the water to reveal submerged sand and rocks, and some strike the surface and carom like a billiard ball ricocheting of the cushion and up into our eyes, creating a reflection. In other words, what we know as a reflection is in fact re-reflected light (reflected first from Half Dome, and again by the river).
When the reflective surface is disturbed by waves, the angle of the reflective light is continuously shuffled—depending on the amount of disturbance (size and frequency of the waves), the reflection can range from slightly distorted to abstract blends of color and shape to totally erased.
The best reflections happen when the reflective subject is fully lit, while the calm reflective surface is shaded from direct light. But that doesn’t mean good reflections aren’t possible when the subject is shaded or the surface is sunlit, or when small waves disturb the water.
Some locations are known for their reflections. That’s usually because they’re in an inherently calm, wind-sheltered environment, and/or the water is especially shallow (relative to its surface area).
The shallowness of the water is an often overlooked aspect of the reflection recipe, but it makes sense if you understand the fundamentals of wave formation. Waves are actually a circular motion in the water imparted by wind, with most of the wave motion happening beneath the surface—the deeper the water, the larger the potential wave. Unimpeded, waves can travel thousands of miles—until they encounter a beach, or shallow water that interferes with their circular motion. But waves that form atop shallow water are limited in size and travel by the lakebed or riverbed. Not only does shallow water mean smaller waves, the shallower the water, the sooner the surface smoothes when the wind stops.
A perfect example of a large, shallow body of water that seems designed for reflections is almost always dry Lake Manly in Death Valley. The origins of Lake Manly in Badwater Basin date back nearly 200,000 years. In its earliest millennia, Lake Manly was much deeper, far more expansive, and persisted year-round. But in recent millennia, it has become an ephemeral lake, usually dry and filling only when rare intense storms generate enough runoff. The life of these recent versions of Lake Manly is measured in weeks or months.
The current version of Lake Manly formed when Tropical Storm (and former hurricane) Hilary saturated Death Valley with more than a year’s worth of rain (2.2 inches) in one day. Because Death Valley isn’t equipped to handle so much water at once, Hilary brought flooding that washed out roads, displaced rocks, carved new channels, and reshaped canyons. And with no outlet for all this water, after doing its damage, this runoff had to come to rest somewhere—and where better than the lowest place in North America?
At its peak volume last August, the newest incarnation of Lake Manly was 7 miles long and 4 miles wide, but no more than 2 feet deep. By late January its surface area had shrunk to half its original size, and the lake’s depth was measured in inches.
Despite its diminished size, Lake Manly was more than big enough to provide spectacular, valley-wide reflections for my workshop group. In addition to photographing mountain and sky reflections from the valley floor, we also enjoyed beautiful sunset reflections from Dante’s View, more than 5000 feet above Badwater.
My group’s first visit was a planned sunrise shoot, but an unprecedented pea-soup fog—I’d talked to 20-year residents who had never seen fog in Death Valley—thwarted our sunrise dreams, as well as our dreams of catching snow-capped Telescope Peak and its neighbors reflecting in glassy water. Even with the fog we enjoyed truly unique photography that morning, but since I wanted my group to get an opportunity for the dazzling reflections I knew were possible, I brought them back to Badwater that night.
We were fortunate that Death Valley’s chronic blue sky held off for another day, delivering instead a cohort of clouds that caught the sunset color and reflected back to us from the surface of Lake Manly. Since the clouds and color were better to the north, I turned my attention away from Telescope Peak and pointed in this direction, just in time to capture this image.
The scene this evening was so special, we ended up staying out until the sky darkened enough for moonlight photography. But that’s a story for another day….
Workshop Schedule || Purchase Prints || Instagram
A Gallery of Reflections
Click any image to scroll through the gallery LARGE


, Yosemite")


Searching for Serendipity
Posted on February 8, 2024
 Dante’s Moon, Badwater, Death Valley
Sony a7R V
Sony 24-105 f/4 G
ISO 100
f/11
1/30 second
Miriam-Webster defines serendipity as, “Finding valuable or agreeable things not sought for.” Wikipedia calls it, “An unplanned fortunate discovery.” Though I can’t quibble with these definitions, I think photographers can create their own serendipity by keeping their eyes and mind open to unexpected opportunities.
Sometimes Mother Nature bludgeons us with serendipitous events that are too obvious to ignore—for example, a double rainbow suddenly coloring a gray downpour, a sunset that ramps up just as you’re about to pack up your gear, or maybe a rocket streaking through your Milky Way scene. But Nature’s more subtle gifts usually require our internal serendipity receivers to be tuned a little more sensitively—the unexpected is there if we keep an open mind.
Unexpected gifts from Nature are probably the single greatest joy I get from photography. But given the importance of planning and execution nature photography requires, it’s easy to understand how we might become so fixated on a specific plan that serendipity slips by undetected. The intense focus on a subject that shrinks the world and enables photographers to extract the best from one scene, also leads to overlooked scenes.
Over my many years photographing Nature, I’ve learned that rather than being mutually exclusive, laser focus and openminded awareness not only can coexist, they can actually collaborate to create photographic synergy.
Toward this goal, I’ve established a few techniques that nudge me into examining my surroundings more closely. These simple steps have become so ingrained in my photographic process that they no longer require conscious thought—in other words, the mere act of concentrating on my primary subject doesn’t mean my surroundings are denied the attention they deserve as well.
The first, and simplest, of these techniques is to periodically stop and do a slow 360, keeping a few questions in mind: What’s going on with the light, sky, shadows? What in the surrounding landscape draws my eye? Is anything moving? Then, to force myself to consider these observations even more closely, I try to anticipate what each of these factors will be doing over the next few minutes.
Another way to shake my single-minded focus while working any given scene is making sure I don’t move on without checking in on different perspectives: switch my camera’s orientation, zoom tighter and wider, reframe and/or adjust focus to emphasize different elements in my composition, and reposition my camera to change foreground/background relationships. I can’t tell you the number of times something unexpected and even better has magically appeared just because I adjusted some aspect of my perspective.
Despite these tools, extended periods away from my camera can make my serendipity generator a little creaky. So, following my recent two-and-a-half month workshop break, last month’s Death Valley / Alabama Hills workshop proved to be just what I needed.
Both locations, with their unique and diverse features, are great places to oil up the works and get my vision humming. And this workshop group in particular showed strong and varied vision that inspired everyone (myself included) during our daily image reviews.
I time this workshop to coincide with the full moon. Because the best full moon views in both Death Valley and the Alabama Hills face west, our moonsets come at sunrise. But that doesn’t mean we never see a sunset moonrise too. Even though the view isn’t great, and I never actually plot and plan a Death Valley moonrise, wherever I photograph a Death Valley sunset, I try to keep an eye on the east horizon for the moon’s arrival.
On our second evening, I took the group out to Badwater for sunset and the rare opportunity to photograph Lake Manly. Badwater Basin is almost always dry, but every once in a while extreme runoff will briefly restore it, adding a few inches of water that can stretch for miles, and for a few weeks or months transform the arid basin into a vast mirror. This version of Lake Manly is the vestigial runoff of Tropical Storm (and former hurricane) Hilary that laid waste to Death Valley last August.
The photography this evening was everything we’d hoped for—calm winds for a pristine reflection, and just enough nice clouds to catch the sunset color. The best Badwater views face west, toward 11,000 foot Telescope Peak, and north, up the valley. So while I knew the nearly full moon would be rising above the valley’s east wall this evening, lacking any kind of a view in that direction, the moon’s arrival wasn’t really a priority. Nevertheless, I occasionally glanced that way, and doubled-down when a cohort of clouds scooted across the eastern horizon and started catching sunset light.
And suddenly there it was, edging above the shear valley wall a little north of Dante’s View. With nothing beneath the moon but nondescript brown cliffs, at first I was content to simply watch it climb, but as the clouds closed in on the moon and their pink continued to intensify, I couldn’t help repositioning my camera.
With the clouds, moon, and color moving fast, the composition I ended up with was as simple as the scene was serendipitous. Since the scene really was all about the pink clouds and rising moon, I zoomed my 24-105 lens until my frame included as little of the surrounding (less appealing) elements as possible, and underexposed slightly to ensure lunar detail, emphasize the color, and darken (deemphasize) the barren mountain ridges.
The Badwater view and reflection this evening was so spectacular, especially when sunset started to color the sky, it would have been easy for this convergence of moon, clouds, and color to have unfolded behind my back, completely unseen. Instead, on an evening filled with the beautiful conditions I’d hoped for, I also got to enjoy one of those serendipity moments I love so much.
Workshop Schedule || Purchase Prints || Instagram
A Gallery of Serendipity Scenes (That I Didn’t Come Looking For)
Click any image to scroll through the gallery LARGE


, Yosemite")


Playing the Odds
Posted on November 21, 2023

Twilight Moon, Zabriskie Point, Death Valley
Sony a7R V
Sony 24-105 f/4 G
ISO 100
f/10
1/13 second
First and foremost, a good landscape image usually requires…, well…, a good landscape. But merely getting yourself to the good landscapes is only half the image success equation, because good landscape photography also requires good conditions: colorful sky, dramatic clouds, complementary light, a striking celestial object, or some other natural quality that elevates the scene to special.
One way to include these ephemeral variables is to monitor conditions closely enough to respond in time to photograph them. Which of course also requires being relatively nearby when the conditions become favorable. Not necessarily a problem when my desired subject is close to home and the only affected schedule is my own, but my photo workshops need be planned more than a year in advance, so the proximity and react quickly approach doesn’t really work. Instead, the best I can do is schedule workshops to maximize the odds for ideal light, interesting skies, and other photogenic conditions—then cross my fingers.
For example, visiting Iceland in January or February increases the odds for the northern lights and low angle all-day sunlight; June in New Zealand provides the best chance for snowy peaks, and it’s the month when the core of the Milky Way up all night; and early August (+/- a week or so) at the Grand Canyon is generally the peak of the Southwest monsoon’s spectacular lightning and rainbows. While each of these features can be thwarted by uncooperative weather, at least we’re close enough to be there when the good stuff happens.
My annual Death Valley / Mt. Whitney photo workshop is another example of playing the odds. I love clouds and Death Valley. But because Death Valley only gets about an inch of rain each year, it suffers from chronic blue skies. To maximize the possibility of clouds for my DV/Whitney workshop groups, I schedule the workshop from mid-January through early February, when temperatures are farthest from summer’s intolerable heat, and the (still remote) chance for rainfall and (more likely) clouds is highest.
While I always wish for clouds in my workshops, cloudless skies in Death Valley don’t mean lousy photography. Places like Mosaic Canyon and Artist’s Palette are nice in the soft shade of early morning and late afternoon. And few sights are more dramatic than the sun’s first or last rays on the curves and lines of the undulating Mesquite Flat Dunes. Another benefit of cloudless skies is the beautiful pink and blue pastels that hover above the horizon opposite the sun before sunrise and after sunset.
To further hedge my bets, in Death Valley I always give myself one more blank-sky card to play: the moon. Scheduling this workshop around a full moon opens moonlight opportunities, and gives my groups at least two mornings to photograph the setting moon in the pre-sunrise twilight pastels: first at Zabriskie Point, where it aligns beautifully with Manly Beacon, then in Alabama Hills, where we can photograph it slipping behind the alpenglow enriched Sierra Crest, bookended by 14,000 feet-plus Mt. Whitney and Mt. Williamson.
This year’s DV/Whitney workshop, last February, had more clouds than usual—great for our daytime photography, but a source of stress f0r the workshop leader as the Zabriskie Point sunrise moonset approached. But instead of thwarting my Zabriskie moonset plan, I woke this morning to find that most of the clouds had departed overnight, leaving behind just a handful of ideally placed cotton balls for the moon to play with.
Zabriskie Point is an extremely popular sunrise location, so I got my group out there nearly 45 minutes before sunrise. We ended up being the first ones out there (better to be 10 minutes early than 1 minute late)—too early, in the pre-dawn darkness, to capture detail in the daylight-bright moon and the rest of the scene in a single image, but since the moon was still fairly high, I suggested to everyone that they compose it out (shoot beneath the moon) and just concentrate on revealing the foreground in the sweet, shadowless light.
While waiting for the foreground to brighten, I enjoyed watching the clouds dance around the moon, alternating between obscuring, revealing, and framing. The darker the sky, the better the moon stands out, but when the sky is too dark, an exposure that captures detail in the moon also has an unrecoverably dark foreground (either its completely black, or there’s too much noise in the processing-recovered darkness). As the sun approaches the horizon behind us, the lighter the sky gets and the easier it becomes to get detail in both the moon and the landscape. But soon the sky becomes so bright, contrast between the moon (which isn’t getting any brighter) and sky is lost and the moon becomes less and less prominent.
My window for photographing a full moon is from 15 minutes before sunrise/sunset to 15 minutes after sunrise/sunset (maybe a few minutes earlier/later if I’m extremely careful with my exposure). At sunrise, the best moon photography is on the earliest side of this window, when the moon/sky contrast is highest; the easiest exposure (greatest margin for exposure error) is toward the end of the window. And of course this unfolds in reverse at sunset.
To ensure that I don’t miss any of the best photography when the moon exposure window opens, I always start a few minutes before my 15 minute window opens so I can identify later in Lightroom the earliest usable image. The image I’m sharing today wasn’t my very first usable click that morning, but it did come 14 minutes before sunrise, when the contrast was still high. I chose this one because it came shortly after the pink hues of the sun’s longest rays started pushing the Earth’s shadow toward the horizon, absolutely my favorite part of sunrise. For me, capturing the moon in this night/day transition is the Holy Grail of full moon photography.
Locations like Death Valley are always great to photograph, regardless of the conditions, so it always feels like I’m playing with house money there. But looking back at all the things I bet on when scheduling this workshop, I can see that this year most of them paid off. Thanks to the (long shot) clouds, we got beautiful sunset color at Dante’s View one evening, and on the dunes another. One morning the clouds cleared enough to paint the dunes in beautiful sunrise light (one reason we do sunrise and sunset there), and another morning just enough hung around to enhance, without obscuring, our beautiful moonset. We all felt like winners.
I actually have a couple of openings in my upcoming Death Valley workshop
Moons Over Death Valley and the Alabama Hills
Click any image to scroll through the gallery LARGE


Step Aside and Let Nature Do Its Thing
Posted on January 24, 2022

Nature’s Curves, Mesquite Flat Dunes, Death Valley
Sony a7RIV
Sony 24-105 G
1 second
F/11
ISO 125
Once upon a time, my most frequently asked question was some version of, “Did you put that leaf (or whatever) there?” (No.) When digital photography and Photoshop processing started to gather momentum, those questions expanded to whether or not I added the moon or the Milky Way to an image. (Again, no.) And now, with effortless sky replacement, any beautiful sunset seems to generate dubious looks. Sigh.
As discouraging as this cynicism is, given the number of photographers who seem willing to manipulate the natural world, viewers of today’s images have every right to be skeptical of their origin. But nature photography’s prime objective should to reveal natural beauty—and when we succeed, viewers’ first reaction shouldn’t be skepticism.
Order vs. chaos
The main reason I’ve always resisted manipulating scenes and manufacturing images is that I try to approach my photography with the mindset that Nature is inherently ordered and unimprovable. Sometimes natural beauty slaps us in the face; other times we have to look a little harder. But I’m afraid in a world where humans go to great lengths to suppress fires, divert rivers, raze forests, and in countless other ways try to control, contain, and otherwise manage the natural world, we’ve fostered the arrogant mindset that we can do it better.
When Nature gets “out of control,” we label it chaos and try to “fix” it. But what humans perceive as “chaos” is actually just a manifestation of the universe’s inexorable push toward natural order. I mean, think about it: Imagine that all humans leave Earth for an extended tour of the Milky Way. While we’re gone, no lawns are mowed, no buildings maintained, no fires extinguished, no floods controlled, no Starbucks built. Let’s say we return in 100 Earth years*. While the state of things upon our return would no doubt be perceived as chaotic, the reality is that our planet would in fact be closer to its natural state. And the longer we’re away, the more human-imposed “order” would be replaced by natural order—and I dare say, more beautiful.
I’m thinking about all this because there’s nothing like a visit to pristine sand dunes to remind a person that Nature doesn’t need our help when it comes to creating beauty. The exquisite choreography of dipping and soaring arcs, lines, and parallel grooves that form naturally when sand, wind, and gravity combine and are left alone is both beautiful and humbling.
I got my most recent dose of sand dune splendor last week, when I guided my Death Valley workshop group out onto the Mesquite Flat Dunes. Given their proximity to the highway and the tiny enclave of Stovepipe Wells, these dunes are almost aways swarmed by people and stained by enduring footprints. To avoid both, I take my groups on a one-mile cross-country (no trail) hike out to a spot much more likely to reward us with virgin sand.
When last week’s visit delivered as hoped, we made the trek twice—once for sunset, and again the next morning for sunrise. The sunset shoot featured a gorgeous red sky in all directions that had everyone spinning in circles to avoid missing something. But I actually enjoyed our sunrise shoot even more, when an 80-percent cloud cover created a natural softbox that let the dunes do their elegant thing.
It was still completely dark when we parked and started our morning hike—dark enough that I just kind of pointed my headlamp in the general direction I wanted to go, confident that it didn’t really matter exactly where in the dunes we’d end up. Because footprints in sand are forever (in the context of a 90 minute photoshoot), part of my job is finding a spot where we can all set up in relatively close proximity, then to play traffic cop to ensure no one strays into sand that might be photo-worthy. After scaling and descending several dunes, I finally paused atop an elevated sand platform. Surveying our surroundings in the first gray light of dawn, my eye was instantly drawn to a graceful serpentine ridge arcing across the face of the dune just opposite us. With enough space for the entire group, a view that spanned nearly 270 degrees, and a gorgeous foreground element, I decided that we’d found our spot.
One of the things I love about photographing sand dunes is that there are compositions for every lens in my bag, from my Sony 12-24 f/2.8 GM to the Sony 100-400 GM (and the Sony 200-600 if I hadn’t left it in the car). I played with several lenses before zeroing in on the arc that had originally grabbed my eye. For this feature I used my Sony 24-105 GM on my Sony a7RIV, starting fairly wide to include more dunes and some sky, then gradually zooming tighter to isolate the arc.
While I do all of my photography on a tripod, for dunes especially I like to take my camera off the tripod, put my eye to the viewfinder, and slowly scan the scene until something stops me. I can’t even tell you exactly why I stopped with this composition, except to say that it just felt right.
As these dunes illustrate (and I hope my image conveys), Nature creates the most astonishing beauty. I have no illusions I can improve on Nature’s offerings, but as long as I keep looking, I’m pretty confident that there’s enough naturally occurring beauty to keep me occupied for the rest of my life.
* Since this is my fantasy, I’ve chartered a spaceship that accommodates all of humankind and travels at 90 percent of the speed of light. While Earth has indeed aged 100 years during our holiday, we travelers return only a year older. (Dubious? Don’t take my word for it, ask Albert Einstein.)
Sand Dune Splendor
Click an image for a closer look, and to view a slide show.


2020 Highlights: Quality Over Quantity
Posted on December 27, 2020


Being a photographer is more than just capturing images, it’s also very much the experiences that go with their capture. So looking back on a year most notable for its lowlights, and browsing a portfolio that’s by far the smallest of any year since I’ve called myself a photographer, I’m surprised by the number of 2020 experiences that give me shear joy to relive.
So far so good
January 2020 kicked off what appeared to be shaping up to be a banner year, with wonderful conditions in Death Valley and the Alabama Hills: reflections at Badwater, a Zabriskie Point moonset, and a series of beautiful sunrises and sunsets. The year’s first month wrapped up in Iceland with too many highlights to mention, but none more memorable than back-to-back northern lights shoots on the workshop’s final two nights. February followed with some fantastic moonrises in Yosemite—so far so good.
Hit the brakes
Then came March, and the world shut down. Since the end of February, I’ve had to cancel 11 workshops. Lost to COVID and (in one case) wildfires were the Oregon and New Zealand workshops I share with Don Smith, two Yosemite spring workshops, my Grand Canyon raft trip, two Grand Canyon monsoon workshops, and the Eastern Sierra workshop. I was finally able to squeeze in the Yosemite fall color workshop in October, but have since had to cancel the upcoming Iceland workshop (also a collaboration with Don Smith) in January 2021.
But wait…
After wallowing in the isolation of a severely socially distanced spring, early summer arrived and out of nowhere came Comet NEOWISE. I’ve been comet-obsessed since I was 10 years old, so the opportunity to photograph what is arguably the most breathtaking phenomenon to grace the heavens (rivaled only by the northern/southern lights and a total solar eclipse) above Yosemite and the Grand Canyon, was just the elixir I needed. While my two Yosemite trips were comet-specific (8 hours of driving for about an hour of photography each time), my Grand Canyon trip was a (socially distanced) multi-day affair that also featured lightning and beautiful monsoon skies.
After the Grand Canyon in late July, I didn’t really get to do much photography until my Yosemite fall color workshop in late October—a real treat that enabled me to share with a group Yosemite at its autumn, reflective best. Not only was the photography nice, it was a joy to be back with a group of enthusiastic, fun photographers.
Then, just a week later, I hit the jackpot, spending a day in Yosemite photographing snow falling on peak fall color—not just a highlight of my year, but a highlight of my photography life. And finally, in early December I arranged a last-minute gathering with a few of my favorite photography friends to photograph a Yosemite Half Dome moonrise.
Quality (of experience) over quantity (of images)
Compiling the 2020 Highlights gallery at the bottom of this post, I’ve chosen not to focus on the opportunities lost in 2020, but instead to count the blessings I was granted. From sharing the northern lights with an ecstatic group of photographers/friends, to watching the miracle of Comet NEOWISE suspended above two of the most beautiful locations on Earth, to a magical day photographing Yosemite Valley with fresh snow on fall color, 2020 brought me memories that will stand as some of the most outstanding of my life. I can’t say that I’m not looking forward to 2021 more than I look forward to most new years, but I’m going to let 2020’s losses fade in favor of its indelible highlights.
For example
Click the image for the rest of the story (and check out the entire gallery at the bottom)

Sunset Reflection, Badwater, Death Valley (January)

Heaven Sent, Aurora Above Glacier Lagoon, Iceland (January)

Magenta Moonrise, Half Dome and the Merced River, Yosemite (February)

Moon’s Rest, Cloud’s Rest, Yosemite (February)

Comet Neowise and Venus, Half Dome from Glacier Point, Yosemite (July)

Comet NEOWISE and the Big Dipper, Grandview Point, Grand Canyon (July)

Fall Into Winter, Bridalveil Fall Reflection, Yosemite (November)
A Gallery of My 2020 Highlights
Click an image for a closer look, and to view a slide show.


Assembly Required
Posted on February 23, 2020

Dune Patterns, Mesquite Dunes, Death Valley
Sony a7RIV
Sony 100-400 GM
1/30 second
F/5.6
ISO 100
Some images are so obvious that all you need to do is frame the scene and click; others require a little assembly.
For example
There was a lot going on visually in this January sunrise at Mesquite Flat Dunes in Death Valley—some of it good, some of it not so good. The not-so-good was the sky, which was clear and infinitely blue—great for being outside, but lousy for photography. The good was the parallel arcs etched in the pristine sand, and the play of light on the dunes’ clean lines and sweeping curves.
My problem this morning was assembling all of this good stuff into a coherent photo. I usually start by finding something to anchor my scene, then construct an image around that anchor using positioning, focal length, and framing. But out on the dunes I couldn’t find a satisfying anchor and my muse was floundering without it. Compounding the difficulty, because I was out there with my Death Valley workshop group, my mobility was limited because when you move through someone’s frame, your footprints become a permanent stain in their scene.
Rather than concede defeat and settle for something not worthy of the morning’s beauty, I switched to my Sony 100-400 GM lens (on my Sony a7RIV), zoomed to 400mm, and slowly panned the dunes in long, sweeping, horizontal arcs, hoping to find the composition that had eluded me so far. The secret to this approach is to pan slowly and disengage conscious thought, allowing my unconscious to guide my eye until something stops it (easier said than done, but surprisingly effective when I can clear my mind). The element in this scene that stopped me was the large sunlit dune at least a mile away.
I started with compositions that emphasized the large dune at the expense of foreground sharpness. That was okay, but when I briefly focused on wind-etched ridges of nearby sand about 100 yards away, the spectacular patterns and intricate detail grabbed my eye and didn’t let go. Reluctant to give up the distant dune that had drawn me in the first place, I stopped all the way down to f/22, computed the hyperfocal distance with a hyperfocal app on my phone, and tried a variety of focus points before finally surrendering to the fact that I couldn’t get both the foreground and background sharp in one frame.
Today, most photographers would simply shoot two frames and blend them in post, a perfectly valid and ridiculously simple solution that (sadly) gives me no satisfaction. So I went the other way and used the limited depth of field to my advantage. Realizing that it was the distant dune’s shape that most appealed to me, not its detail, I went instead for a soft background that focused the frame’s primary attention on the exquisite detail in the nearby sand while retaining the background’s soft shapes and shadows.
I opened my lens to f/5.6, its widest aperture at 400mm, and focused near the middle of the nearby slope. This gave me a front-to-back range of sharpness of nearly 60 feet (according to my hyperfocal app)—enough to keep the entire slope sharp, a fact I later confirmed by magnifying my capture in my mirrorless viewfinder and moving the view around. I also confirmed that the softness of background dunes was sufficient to be clearly intentional (rather than a just-missed focus error).
In addition to using a soft background to emphasize detail on the closest dune slope, I slightly underexposed the entire scene to render the shaded mountainside in the extreme distance extremely dark. The nearly black background created contrast contrast that helped the dunes stand out even better, and virtually eliminated unattractive ruts and ravines in the barren brown slope.
A Death Valley Gallery
Click an image for a closer look and to view a slide show.


Near and Far: Thinking in Three Dimensions
Posted on January 27, 2020

Prickly Sunset, Hell’s Gate, Death Valley
Sony a7RIV
Sony 12-24 G
.4 seconds
F/11
ISO 100
Photography is the futile attempt to render a three dimensional world in a two dimensional medium. It’s “futile” because including actual depth in a photograph is literally impossible—but impossible doesn’t mean hopeless. One of the simplest things photographers can do to elevate their images is to think about their scene in three dimensions, specifically how to create the illusion of depth by composing elements at multiple distances from the camera.
Many photographers miss opportunities by simply settling for the beautiful scene before them instead of looking for ways to make it even better. A more productive approach is to start with the beautiful aspect of the scene you want to emphasize (brilliant sunset, backlit flower, towering peak, vivid rainbow, plunging waterfall, whatever), then aggressively seek an object or objects nearer or farther to complement it (this is one reason I love including the moon in my images). Of course it’s sometimes easier said than done, but this near/far mindset should drive every capture.
Thinking foreground and background is a great start, but merely having objects at varying distances usually isn’t enough—you also need to be aware of how those objects guide your viewer’s eye through the frame. We hear a lot of photographers talk about using “leading lines” to move the eye, but a line doesn’t need to be a literal (visible) line to move the eye because viewers will subconsciously connect certain elements to create virtual lines.
To help me achieve virtual leading lines, a term I like to use is “visual weight”: a quality in an object that tugs the eye like gravity, subconsciously pulling the viewer’s gaze in its direction. Qualities in an object that can create visual weight include mass, shape, brightness, contrast, color, texture, and sometimes just position in the frame. A single one of these qualities can give an object visual weight, but usually a combination of more than one is more effective.
Additionally, an object’s emotional power can boost its visual weight. For example, a small moon will pull the eye more than a larger bright cloud, and Half Dome has more visual weight than a random rock occupying the same amount of frame real estate.
With my primary subject and complementary (eye moving) objects identified, I still need to consider the linear connection between these visual components. I usually prefer diagonal relationships because I like the visual tension created by moving the eye along multiple planes. Creating these virtual diagonals requires careful positioning, but it’s surprising how many photographers just remain planted with their tripod as if it has grown roots—either they don’t see the benefit of repositioning, or don’t think moving is worth the effort.
Whatever the reason, it’s important for photographers to understand the power of shifting position to control foreground and background relationships: move left and your foreground shifts right relative to the background; move right and the foreground shifts left relative to the background. Either way, the closer the foreground is relative to the background, the more dramatic the shift. And contrary to what you might believe, it’s impossible to change foreground/background perspective with focal length—to change perspective, you must change position: forward/backward, left/right, up/down.
An often overlooked shift that can be quite powerful is the up/down shift. Often I’m able to un-merge objects at different distances by simply raising my tripod or climbing atop a nearby rock. And when my frame has a large and boring empty space (such as a field of weeds or dirt) between the foreground and background, I drop lower to shrink that gap.
For example
On the first evening of my Death Valley Winter Moon workshop earlier this month, I took my group to Hell’s Gate. At Hell’s Gate the view south is straight down the valley toward Furnace Creek and Badwater; in the east are rutted hills that turn gold with the sun’s last light; the view west takes in nearby Death Valley Buttes, with the Panamint Range in the distance. While I like this spot for these grand vistas, it’s the assortment of cacti, rocks, and shrubs to include with the vistas that especially appeal to me.
Of the many barrel cacti that dotting the hillside at Hell’s Gate, I’m especially drawn to a large specimen above the trail and about halfway up the steep slope. But because I’m leading a group and this barrel cactus usually taken by someone else, I rarely get to photograph it at prime time. This year, however, the rest of the group was occupied with other foreground subjects, so when the sky started to turn pink with sunset, I scrambled up the talus and went to work.
The color was best in the direction of the pyramid-shaped Death Valley Buttes, so I started working on a composition in that direction. I knew my foreground would be the barrel cactus, and the background subject would be the buttes, but I still needed to turn the scene into a picture. Using my Sony a7R IV, I started with my Sony 12-24 G lens to allow me to get as close as possible to the photogenic barrel cactus. Scanning the scene, I quickly recognized the visual weight potential in the bare shrub—not for its inherent beauty, but for the its contrast (against the dark rock) and flame-like shape. These qualities gave it enough visual weight to balance the right half of the frame and move the viewer’s eye diagonally toward the buttes.
I positioned myself so the cactus was closest to the frame and left of center, and the shrub was right of center, with the Death Valley Buttes right down the middle. With my camera at eye level the empty plain in the middle distance occupied too much of the frame, so I dropped down to near cactus level. Doing this had the added advantage of increasing the prominence of the interesting jumble of rocks in the near-right—they don’t stand out enough to pull the eye from the cactus-shrub-buttes path I’d laid out, but their texture added some secondary visual interest in that part of the frame.
At 12mm I had a ridiculous amount of depth of field to play with, but I still took care with my focus choices. My rule of thumb for these extreme front-to-back scenes is to identify the closest thing that must be sharp (the cactus), and focus a little behind it—if I focus on the cactus, I get near sharpness I don’t need, at the potential risk of essential distant sharpness. I probably could have gotten away with f/8, but since the light was changing fast, I didn’t want to take the time to check my hyperfocal app. I stopped down to f/11, focused on a rock a foot or so behind the cactus, metered, and clicked.
Near and Far
Click an image for a closer look and to view a slide show.


