Eloquent Images by Gary Hart
Insight, information, and inspiration for the inquisitive nature photographer
Among the wildflowers
Posted on March 9, 2016

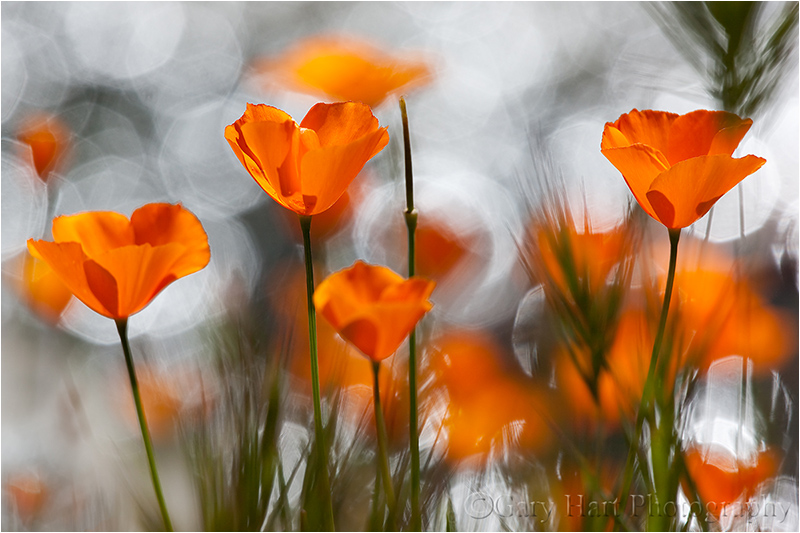
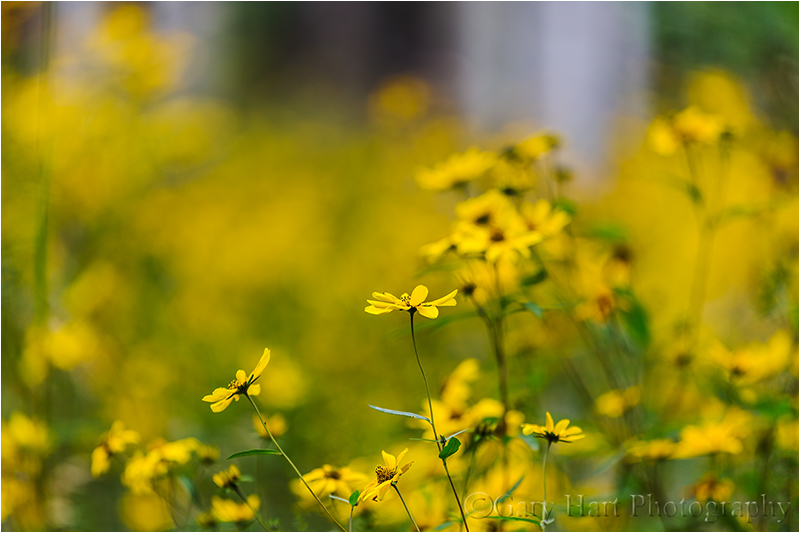
Foothill Gold, Mokelumne River, California
Sony a7R II
Sony FE 90mm f2.8 Macro
1/125 seconds
F/4
ISO 4000
Last year, a busy spring schedule and mediocre wildflower bloom conspired to thwart the wildflower photography I love so much. Vowing not to let that happen again this year, a few days ago I packed my gear and headed for the hills with fingers crossed. My goal was a familiar canyon off of Highway 49 in the foothill Gold Country south and east of Sacramento.
This would be the maiden voyage for my brand new Sony 90mm f2.8 macro, and I was really looking forward to seeing if it’s as good as everyone says it is. Not only that, this would be my first wildflower shoot since switch from Canon DSLR to Sony mirrorless nearly a year and a half ago (!).
It’s a sign
On the drive I’d been streaming a Giants Spring Training game, but turning up the canyon I lost my signal, so I opened the Music app on my iPhone, put it in Random mode, and was immediately distracted by an entire hillside of poppies unfolding before me. Each bend in the road seemed to be trying to outdo the one before it, and I was several curves up the road before my ears caught up with my eyes. Of the 5000 or so possibilities on my phone, what I heard was Tom Petty telling me, “You belong among the wildflowers….” (true story). A sign, definitely a sign.
But anyway…
I followed the road to the end to identify the places I wanted to return to. On the drive back I stopped at my first choice and stayed until darkness and rain (not necessarily in that order) drove me out. I started with the macro, but before I was done I’d used every other lens in my bag too: 16-35, 24-70, and 70-200 (and would have used the 150-600 if I hadn’t loaned it to my brother a couple of days earlier)—with and without extension tubes.
With the sun already behind the hills and rain on the way, light was limited, and fading. There wasn’t much wind, but there was just enough flower-swaying breeze to concern me. My f-stop choice was completely tied to the creative side of my composition (selective depth of field), leaving ISO as the only exposure variable for controlling my shutter speed. Rather than guessing before each shot exactly how fast the shutter needed to be and dial in just enough ISO to get there (and remember to adjust each time my f-stop changed or I added extension), I just cranked the ISO to 4000 and went to work. Problem solved.
I found lots of things to photograph, from entire hillsides to individual poppies like this one. Regardless of my depth of field, I took extreme care to ensure that my background complemented my subject. In this case I maneuvered my tripod until my subject was framed by background poppies. It took several frames to get the composition just right; once I was satisfied, I tried it with a variety of f-stops and focus points. (I can’t imagine even attempting this without a tripod.)
More love for Sony
The Sony 90mm macro was as good as advertised. And I can’t tell you how pleased I am with the high ISO capability of the Sony a7RII. Putting my wildflower images up on my large monitor at home confirmed that everything that was supposed to be sharp was indeed sharp, and the noise at 4000 ISO was minimal and easily managed without detail loss—even the images I shot toward the end, in a light rain and fading light, at 6400 ISO were just ridiculously clean.
This ability to push my ISO threshold allows me to shoot scenes I’d never have considered before. Along with the dynamic range and night photography capability, it’s another Sony game changer for me. The a7RII is exceptional, but regardless of the camera you use, I encourage you to test its high ISO capabilities before you find yourself in a situation where ISO matters—you may be surprised by its capabilities.
Another thing I enjoyed about shooting macro with the a7RII was the ease of achieving precise focus. With depths of field measured in millimeters, sometimes fractions of millimeters, identifying the focus point and getting it perfectly sharp is imperative. With my recent Canon DSLRs (1Ds Mark III and 5D Mark III) I’d become a real convert to live-view focus, but glare on the LCD can sometimes make seeing well enough to get precise focus difficult. That problem disappears completely with the ability to view the scene in the viewfinder.
I’m not done
I had so much fun last week, I’ll be going back as often as possible, until the hills brown and the wildflowers fade. With all the rain promised for the next couple of weeks, that might be quite a while—maybe all the way until dogwood season in Yosemite. Life’s good.
Blooming hillsides
Click an image for a closer look, and a slide show. Refresh the screen to reorder the display.


Playing the Hand You’re Dealt
Posted on April 27, 2015

Spring Sunrise, Memaloose Overlook, Columbia River Gorge, Oregon
Sony a7R
Sony/Zeiss 24-70
1/13 second
F/11
ISO 400
In family Hearts games when I was a kid, I loved to “shoot the moon” (tremendous reward for success, extreme cost for failure). But simply wanting to shoot the moon wasn’t enough to make it happen, and I didn’t really start winning until I learned to separate my desires from the reality of the moment—I know now to evaluate my cards when they’re dealt, set a strategy, then adjust my strategy as the game unfolds. It’s that way for most card games, and it’s that way with photography.
So much of successful nature photography is about flexibility, an ability to anticipate conditions, establish a plan, then adjust that plan when things don’t play out as expected. That’s why, given nature’s fickle tendencies, I’m never comfortable photographing any location without backup options. I was reminded of this during my recent 10-day, two photo workshop trip to the Columbia River Gorge with Don Smith, where rapidly changing Pacific Northwest weather makes flexibility the name of the game.
The Columbia River Gorge offers a full deck of photo opportunities that include numerous waterfalls in the gorge’s steep tributary canyons, mirror reflections of Mt. Hood and Mt. Adams in small lakes south and north of the gorge, and spring wildflowers blanketing the eastern gorge’s more exposed slopes. Of course merely showing up at a spot and expecting great captures isn’t sufficient: Waterfalls are dramatic subjects the camera struggles to capture in brilliant, midday sunlight; towering volcanos are the first subjects disappear when it rains; and I can photograph wildflowers all day—as long as there’s no wind.
During our workshops, Don and I had to shuffle our groups’ photo locations and timing around snow, rain, and clear skies, temperatures that reached the 80s and dropped into the 20s, and winds that ranged from calm to 40 MPH. Our plan for clear skies was to head to the volcanos; if we were dealt clouds and rain, we would use the diffuse light (subdued dynamic range) to concentrate on the gorge’s waterfalls. And rain or shine, the wildflowers were ideally positioned for sunrise and sunset if the wind cooperated.
Somehow we managed to pull it all off, our trip culminating with a sunrise jackpot on the final morning of the second workshop. The plan that morning was a vast, exposed, wildflower-smothered hillside on the southwest end of the gorge. I’d been monitoring the weather obsessively throughout the trip, and with the morning’s forecast calling for clear skies and calm wind, Don and I were looking forward showing the group these wildflowers backlit by the rising sun’s warm rays.
Despite our optimism for the morning’s shoot, as the group gathered in the dark, a chilly breeze gave me pause. The breeze stiffened on the drive to our planned location, and rather than cling to our original vision and attempt to photograph dancing wildflowers in low light, I started considering options.
Don and I had done extensive scouting in the area on multiple prior visits, and had arrived two days before these workshops for more scouting and to get a handle on conditions. My mind immediately jumped to a sheltered location just a short distance from our planned spot. This location had wildflowers too, but instead of being all about the wildflowers, we’d have lots scenes with rocks and trees above the Columbia River, allowing the clumps of balsam root, lupine, and paintbrush to serve as accents. This location’s advantages were that its primary subjects (rocks, trees, river) would be less affected by wind, and its wildflowers would be a little more sheltered.
The group ended up with an absolutely wonderful shoot that made Don and I look like geniuses. The morning started with a pink sky that reflected beautifully in the river, and ended with an orange ball of sun floating low above the horizon. There were more than enough wildflowers go around, and wind was much less of a problem than it would have been on a more exposed hillside.
Honestly, there was nothing genius about what Don and I did that morning. It should be standard operating procedure for any photographer to base location and timing plans on the expected conditions, but to be familiar enough with the area to have options if the conditions don’t materialize as expected. Additionally, no photographer should get so locked in to a plan, regardless of its potential, that he or she fails to see that it might not work out. (Because what good are options if you don’t use them?)
No shoot is a guaranteed success—sometimes nature’s cards just don’t fall right. But the more options you have, the more you read and respond to conditions, the more winners you’ll come home with.
Workshop Schedule || Purchase Prints || Instagram
A Spring Gallery
Click any image to scroll through the gallery LARGE


A sunny day solution
Posted on April 19, 2015

Wildflowers and Mt. Hood, Columbia Hills State Park, Washington
Sony a7R
Sony/Zeiss 16-35
1/50 second
F/20
ISO 400
For wildflower photography I prefer the diffuse light and soft shadows of a cloudy day, but when Mother Nature delivers clear skies and harsh sunlight, I look for backlight opportunities. Backlit flowers and leaves glow like they’ve been plugged in, and their brilliance allows faster shutter speeds that will compensate for a small aperture and quell a flower-waving breeze.
A frustrating downside of backlight is that the sun is more or less in the direction of your backlit subject, risking lens flare (scattered light that manifests as a contrast-robbing haze or distracting artifacts). If the sun isn’t in your frame, shading your lens will eliminate the lens flare. A lens hood helps, but I find lens hoods more trouble than they’re worth. Instead, when I encounter lens flare, I shade my lenses with my hand, a hat, or an umbrella (no camera bag should be without one). Or better yet, I do my best to position my lens in the shadow of a nearby tree.
But when the sun is in the frame, no amount of shading will work. In these situations I make the best of a bad thing by looking for sunstar opportunities. On last week’s visit to Columbia Hills State Park in southern Washington, I found a hillside awash with wildflowers—mostly yellow balsam root and violet lupine—in brilliant sunlight.
While waiting for the shade to arrive, I decided to take advantage of the backlight and look for a sunstar opportunity. The lupine were in better shape than most of the balsam root, and soon my eyes landed on a colorful group I could balance with Mt. Hood and the setting sun. I stopped down to f20, pulled out my Singh-Ray 2-stop graduated neutral density filter, and waited for the sun to drop to the horizon.
To salvage as much of my highlights as possible, I gave the scene as little exposure as I thought I could get away with. The foreground was pretty dark on my LCD, but the histogram looked okay (not perfect, but manageable)—in Lightroom I was able to pull up the shadows and subdue the highlights enough to work with. Photoshop’s Content Aware Fill tool helped me clean up the worst lens flare, but I still ended up with a little more than I like. (Oh well.)
Here’s my sunstar recipe (excerpted from a previous post):
- Start with a brilliant, fine point of light: The sun is the most logical candidate, but you can do it with the moon, stars, and pretty much any bright artificial light (lighthouse, headlights, and so on). The finer the light source, the more precise the star effect will be, and the less lens flare and blown highlights you’ll have. If it’s the sun you’re using, virtually all of it needs to be hidden to get the delicate, symmetrical distribution of beams that generally work best. In this image the horizon hides most of the sun, but you can use a cloud, tree, rock, or whatever.
- The smaller your aperture, the finer your sunstar will appear: I generally use f16 or smaller (larger f-number).
- Do something to control the highlights: When the sun is entering your frame, you’re invariably dealing with a sky that’s much brighter than your foreground and will need to take steps to avoid the foreground of murky shadows. If you have a foreground shape or shapes against the sky, you could turn the foreground into a silhouette. But when I want to capture foreground detail, I use graduated neutral density filters to hold back the brilliant sky. My 3-stop reverse is my go-to GND in these situations; in particularly difficult light I’ll stack it with a 2-stop hard GND. Whenever I use a GND, I find Lightroom or Photoshop dodging/burning is a great way to disguise the telltale GND transition. HDR blending of multiple images is another way to mitigate extreme sky/foreground contrast (but I don’t do HDR, so you’ll need to Google this). And Photoshop’s Content Aware Tool will help clean up lens flare.
- Different lenses will yield different results: Experiment with your lenses to see which one gives the most pleasing sunstar effect.
- Practice: You can practice sunstars any time the sun’s out. Just go outside with your camera, dial in a small aperture, and hide the sun behind whatever object is convenient (a tree, your house, etc.).
A sunstar gallery
Click an image for a closer look, and a slide show. Refresh the screen to reorder the display.


")


Going for bokeh
Posted on April 17, 2014

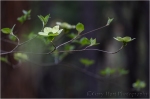
Forest Dogwood, Yosemite Valley
Canon EOS 5D Mark III
1/80 second
159 mm
ISO 800
F4
In this day of ubiquitous cameras, automatic exposure, and free information, a creative photographer’s surest path to unique images is achieved by managing a scene’s depth. Anyone with a camera can compose the left/right/up/down aspect of a scene. But the front/back plane, a scene’s depth, that we human’s take for granted, is missing from a two-dimensional image. Managing depth requires abstract vision and camera control beyond the skill of most casual photographers.
While skilled photographers frequently go to great lengths to maximize depth of field (DOF), many forget the ability of limited DOF to:
- Guide the viewer’s eye to a particular subject
- Provide the primary subject a complementary background
- Provide background context for a subject (such as its location or the time of day or season)
- Smooth a busy, potentially distracting background
- Create something nobody will ever be able to duplicate
They call it “bokeh”
We call an image’s out of focus area its “bokeh.” While it’s true that bokeh generally improves with the quality of the lens, as with most things in photography, more important than the lens is the photographer behind it. More than anything, achieving compelling bokeh starts with understanding how your camera sees the world, and how to translate that vision. The image’s focus point, its depth of field (a function of the f-stop, sensor size, focal length, and subject distance), and the characteristics of the blurred background (color, shapes, lines) are all under the photographer’s control.
No special equipment required
Compelling bokeh doesn’t require special or expensive equipment—chances are you have everything you need in your bag already. Most macro lenses are fast enough to limit DOF, have excellent optics (that provide pleasing bokeh), and allow for extremely close focus (which shrinks DOF). A telephoto lens near its longest focal length has a very shallow DOF when focused close.
Another great way to limit your DOF without breaking the bank is with an extension tube (or tubes). Extension tubes are hollow (no optics) cylinders that attach between your camera and lens. The best ones communicate with the camera so you can still meter and autofocus. Not only are extension tubes relatively inexpensive, with them I can focus just about as close as I could have with a macro. They can also be stacked—the more extension, the closer you can focus (and the shallower your DOF). And with no optics, there’s nothing compromise the quality of my lens (unlike a teleconverter or diopter). But there’s no such thing as a free lunch in photography—the downside of extension tubes is that they reduce the amount of amount light reaching the sensor—the more extension, the less light. On the other hand, since I’m using them to reduce my DOF, I’m always shooting wide open. And the high ISO capability of today’s cameras more than makes up for the loss of light.
Many of my selective focus images are accomplished without a macro or even a particularly fast lens. Instead, preferring the compositional flexibility of a zoom, I opt for my 70-200 f4 (especially) and 100-400 lenses. While my 100 macro is an amazingly sharp lens with beautiful bokeh, I often prefer the ability to isolate my subject, in a narrow focus range, without having to get right on top of it. On the other hand, if I have a subject I want to get incredibly close to, there’s no better way than my macro and an extension tube (or two, or three).
Managing depth of field
When using creative soft focus, it’s important that your background be soft enough that it doesn’t simply look like a focus error. In other words, you usually want your background really soft. On the other hand, the amount of softness you choose creates a continuum that starts with an indistinguishable blur of color, includes unrecognizable but complementary shapes, and ends with easily recognizable objects. Where your background falls on this continuum is up to you.
Your DOF will be shallower (and your background softer):
- The closer your focus point
- The longer your focal length
- The larger your aperture (small f-stop number)
A macro lens and/or extension tube is the best way to get extremely close to your subject for the absolute shallowest DOF. But sometimes you don’t want to be that close. Perhaps you can’t get to your subject, or maybe you want just enough DOF to reveal a little (but still soft) background detail. In this case, a telephoto zoom may be your best bet. And even at the closest focus distances, the f-stop you choose will make a difference in the range of sharpness and the quality of your background blur. All of these choices are somewhat interchangeable and overlapping—you’ll often need to try a variety of focus-point/focal-length/f-stop combinations to achieve your desired effect. Experiment!
Foreground/background
Composing a shallow DOF image usually starts with finding a foreground subject on which to focus, then positioning yourself in a way that places your subject against a complementary background. (You can do this in reverse too—if you see a background you think would look great out of focus, find a foreground subject that would look good against that background and go to work.)
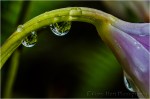
Primary subjects are whatever moves you: a single flower, a group of flowers, colorful leaves, textured bark, a clinging water drop—the sky’s the limit. A backlit leaf or flower has a glow that appears to originate from within, creating the illusion it has its own source of illumination—even in shade or overcast, most of a scene’s light comes from the sky and your subject will indeed have a backlit side. And an extremely close focus on a water droplet will reveal a world that’s normally invisible to the unaided eye—both the world within the drop and a reflection of the surrounding world.
My favorite backgrounds include parallel tree trunks, splashes of lit leaves and flowers in a mostly shaded forest, pinpoint jewels of daylight shining through the trees, flowers that blur to color and soft shapes, sunlight sparkling on water. I also like including recognizable landscape features that reveal the location—nothing says Yosemite like a waterfall or Half Dome; nothing says the ocean like crashing surf.
The final piece of the composition puzzle is your focus point. This creative decision can make or break an image because the point of maximum sharpness is where your viewer’s eyes will land. In one case you might want to emphasize a leaf’s serrated edge; or maybe its the leaf’s intricate vein pattern you want to feature. Or maybe you’ll need to decide between the pollen clinging to a poppy’s stamen, or the sensual curve of the poppy’s petals. When I’m not sure, I take multiple frames with different focus points.
Exposure
Exposing selective focus scenes is primarily a matter of spot-metering on the brightest element, almost always your primary subject, and dialing in an exposure that ensures that it won’t be blown out. Often this approach turns shaded areas quite dark, making your primary subject stand out more if you can align the two. Sometimes I’ll underexpose my subject slightly to saturate its color and further darken the background.
Tripod
And let’s not overlook the importance of a good tripod. In general, the thinner the area of sharpness in an image, the more essential it is to nail the focus point. Even the unavoidable micro-millimeter shifts possible with hand-holding can make the difference between a brilliant success and an absolute failure.
Virtually all of my blurred background images are achieved in incremental steps. They start with a general concept that includes a subject and background, and evolve in repeating click, evaluate, refine, click, … cycles. In this approach, the only way to ensure consistent evolution from original concept to finished product is a tripod, which holds in place the scene I just clicked and am now evaluating—when I decide what my image needs, I have the scene sitting there atop my tripod, just waiting for my adjustments.
Forest Dogwood, Yosemite Valley
I worked this scene for about a half hour before I was satisfied. I started with this dogwood branch and moved around a bit until the background was right. Then I tried a variety of focal lengths to simplify and balance the composition. Once I was satisfied with my composition, I used live-view to focus toward the front of the center cluster. Finally, I ran the entire range of f-stops from f4 to f16, in one-stop increments, to ensure a variety of bokeh effects to choose from.

Bridalveil Dogwood, Yosemite
This raindrop-laden dogwood image uses Yosemite’s Bridalveil Fall as a soft background to establish the location. An extension tube allowed me to focus so close that the nearest petal brushed my lens.

Champagne Glass Poppies, Merced River Canyon, California
The background color you see here is simply a hillside covered with poppies. To achieve this extremely limited DOF, I used an extension tube on my 100mm macro, lying flat on the ground as close as my lens would allow me to focus. Since my tripod (at the time) wouldn’t go that low, I detached my camera, rested the tripod on the ground in front of the poppy, propped my lens on a leg, composed, focused on the leading edge, and clicked my remote release.

Autumn Light, Yosemite
I had a lot of fun playing with the sunlight sneaking through the dense evergreen canopy here, experimenting with different f-stops to get the effect I liked best.
Sparkling Poppies, Merced River Canyon
The background jewels of light are sunlight reflecting on the rippling surface of a creek. I had a blast controlling their size by varying my f-stop.

Dogwood, Merced River, Yosemite
Looking down from the Pohono Bridge, finding the composition was the simple part. But as soon as I started clicking I realized that the sparkling surface of the rapidly Merced River was completely different with each frame. So I just clicked and clicked and clicked until I had over 30 frames to choose between.

Forest Dogwood, Tenaya Creek, Yosemite
Here, rather than background bokeh, I framed my dogwood flower with leaves in front of my focus point.
Bokeh Gallery
-

- Poppy Lanterns, Merced River Canyon
-
- Intimate Poppy, Point Reyes National Seashore
-

- Poppies, Hite Cove Trail, Merced River Canyon
-

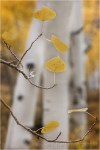
- Wildflowers and Aspen, North Rim, Grand Canyon
-

- Floating Dogwood, Yosemite
-

- Champagne Glass Poppies, Merced River Canyon, California
-

- Autumn Bouquet, Zion National Park
-
- Forest Dogwood, Yosemite Valley
-

- Bridalveil Dogwood, Yosemite
-
- Wildflower Collage, Sierra Foothills, California
-

- Solitude, Dogwood Bloom Above the Merced River, Yosemite
-

- Backlit Poppies, Folsom, California
-

- Poppy Pastel, Sierra Foothills, California
-
- Raindrops, Orchid in Lava Tree State Park, Hawaii
-

- Dogwood Branch, Pohono Bridge, Yosemite
-
- Aspen, Bishop Creek Canyon, Eastern Sierra
-

- Forest Dogwood, Tenaya Creek, Yosemite
-

- Dogwood and Bridalveil Fall, Yosemite
-

- Autumn Light, Yosemite
-

- Poppy With a View, Point Reyes National Seashore
-

- Forest Autumn, Yosemite
My photography essentials, part 2
Posted on March 17, 2014

Spring Potpourri, Sierra Foothills, California
Canon EOS-1Ds Mark III
1/125 second
F/7.1
ISO 200
340 mm
A couple of weeks ago the editors at “Outdoor Photographer” magazine asked me (and a few other pros) to contribute to an upcoming article on photography essentials, and it occurs to me that my blog readers might be interested to read my answers.Here’s my answer to the second of their three questions:
What are your three most important non-photo pieces of gear that you rely on for making your photographs and why do you rely on each of the three?
- How did I ever get by without a smartphone? Among other things, and in no particular order, it keeps me company on long trips (that are often far off the grid), informs, entertains, guides, provides essential sun and moon rise/set time and location, helps me choose the best f-stop, allows me to manage by business from any location, and even gives me traffic and weather warning. My iPhone (there are many similarly great Android and Windows phones) is 64GB (the largest available) to allows plenty of room to store maps, more podcasts than I can listen to on a single trip, and a lifetime worth of music. Of course a smartphone is be of little value without its apps. When choosing apps, a primary requirement is usability without Internet connectivity. My favorite connection-independent apps are: Focalware, for sun/moon info for any location on Earth; Depth of Field Calculator by Essence Computing, for hyperfocal info; and Theodolite, for general horizon and direction angles (among other things). I also make frequent use of the Dropbox Favorites option, which allows me to pre-download any file for review when I’m not connected.
- My dash-top GPS is compact enough to slip into any suitcase (there are many viable options; while I use Garmin, interface frustrations stop me short of endorsing it). Because I visit many distant locations that I’m not able to return to as frequently as I’d like, I save every potential photo spot in my dash-top GPS. For example, there are usually many months between my Hawaii visits. Over the years I’ve found far more incredible spots to photograph than my feeble brain can retain. But traveling with a GPS, I don’t have to re-familiarize myself with anything—I just pop it on my dash before driving away from the airport and instantly navigate to my locations like a native. (Or to the nearest Starbucks.)
- Here’s a just-discovered non-photo essential that didn’t get passed on to “Outdoor Photographer”: After many, many years of trying to find a hands-free way to communicate on my long drives in the middle of nowhere, my new Plantronics Voyager Legend bluetooth earpiece feels like a godsend. Wired earbuds get tangled and have lousy noise cancellation; sound quality makes bluetooth radio connections virtually unusable. And I’ve lost track of the number of earpieces I’ve discarded for some combination of discomfort, poor receiving sound quality, poor sending sound quality, and lousy battery life. I can wear my Voyager Legend for hours and forget it’s there; I can answer calls without taking my eyes off the road; and most importantly, I can hear and be heard as if I’m sitting in a quiet room.
About this image
My GPS guided me to this remote, wildflower-dotted hillside, discovered the previous spring and now a regular destination on my annual spring foothill forays. The wildflower bloom varies greatly each year, so without the GPS sometimes it’s impossible to know whether I’ve found a spot that thrilled me the year before. In this case I found the bloom everything I dared to hope.
Rather than pull out my macro lens, I twisted an extension tube onto my 100-400 lens and went to work. Since there were virtually no shadows, the dynamic range wasn’t a problem, despite the bright, direct sunlight. Metering on the brightest part of the scene and underexposing by about one stop (about 2/3 stop above a middle tone) prevented the brightest highlights from washing out and saturated the color.
Most of my attention that afternoon went to the poppies, but here I concentrated on a group of small, purple wild onions and let the limited depth of field blur the poppies into the background. Clicking the same composition at a half dozen or so f-stops from f5.6 to f16 allowed me to defer my depth of field selection until I could view my images on my large monitor.
It’s more than a hole with red rocks
Posted on September 1, 2013

Wildflowers and Aspen, North Rim, Grand Canyon
Canon EOS 5D Mark III
1/80 second
F/4
ISO 200
32 mm
Still charged with energy from the Grand Canyon lightning/rainbow Three Strikes morning, I decided to change things up and visit some of the trip’s more intimate, albeit less spectacular, images, scenes that portray the underrated diversity of the Grand Canyon’s beauty. Despite a wealth of options, I knew immediately that I wanted to start with a wildflower discovery the second group made at East Rim View. (Actually, credit for the discovery goes to workshop co-leader Don Smith.) Don and I had been at this spot on a scouting trip a few days before the workshops began, immediately recognizing it as the best location to combine the North Rim’s beautiful wildflower display with a more expansive view of the Grand Canyon and (especially) the Vermillion Cliffs. While we liked the view enough to stage both workshop group-photos here, we nevertheless tried to time our visits for the overcast skies and calm winds that make for the best wildflower photography.
As the group slowly trickled back to the the cars around the prescribed departure time, Don and a couple of participants returned with word of a wildflower discovery in the woods just a few hundred yards up the trail. The description sounded too good to be true, but when Don shared a few LCD previews of what he’d found, I was sold. So, after a quick consultation, Don and I jettisoned Plan A and added another hour to our East Rim View stay. Good call.
What we found was everything promised: a mature, sprawling aspen grove, carpeted with a dense array of yellow, daisy-like wildflowers (I don’t know what these flowers are, but I’m sure some reader will illuminate me). Virtually untouched by wind and evenly illuminated beneath a heavy, gray sky, this was macro photography heaven. But rather than do the obvious and pull out my macro lens and extension tubes, I decided to do the entire shoot with my 70-200 and 16-35 lenses, playing with compression, perspective, and depth. Using my 70-200, I compressed the background (made it appear closer to my subject than it really was); getting up-close with my 16-35, I emphasized the foreground and expanded the background. I also had tons of fun playing with depth of field—when I found a composition I liked, I ran entire range of f-stops, from f2.8 to f22, in one-stop increments. After reviewing these images on a big screen, I decided I prefer the narrow DOF frames for the way they guide the eye where I want it to go, rather than distract with the extraneous background detail the small aperture frames displayed.
I find it a bit ironic that, while intimate images like those in here are usually far more reflective of a photographer’s skill and creativity than the spectacular moments captured in scenes like the Three Strikes image, it’s the spectacular that commands the most attention (just count the number of Facebook “Likes”). In most of my lightning images, the most challenging aspect was being there; on the other hand, these wildflower scenes not only required discovery, most involved contorting while flat on the ground, and each required careful management of every aspect of the scene, from relationships, depth, light, and motion.
The entire group got similar stuff on our lightning morning (while so far I haven’t seen any others who were fortunate enough to get three parallel strikes, that’s exactly what my image was: the good fortune to click at just the right instant). On the other hand, I’m pretty sure nobody else got anything like these wildflower images (nor did I get wildflower images like the others got). So does that mean I like these wildflower images more my “Three Strikes” image? Uh…, no. That was a once-in-a-lifetime capture that every landscape photographer dreams of. But I think ultimately I take more pride in the skill and effort required to craft something like these.
Forest Wildflowers, North Rim, Grand Canyon
Canon EOS 5D Mark III
1/100 second
F/4
ISO 200
200 mm
Fire at will
Posted on May 20, 2013

Poppy Pastel, Sierra Foothills, California
Canon EOS 5D Mark III
1/125 second
F/4.0
ISO 400
100 mm with 12mm extension tube added
Maximize your investment
I clicked 54 versions of this scene (I just counted). I’m usually a pretty low volume shooter, sometimes not taking 54 pictures on an entire trip. And I have to admit, after years as a film shooter, the whole digital “fire at will” paradigm took some getting used to. But I’ve finally reached a place where I have no problem firing 54 frames in 30 minutes when the scene calls for it. The light came on for me when I realized that, while in my film days every single click cost money, with a digital camera, every click increases the return on my investment (the more images I have, the less per image my camera cost).
For example
These poppies were just a small handful of the thousands coloring a steep hillside near the Mokelumne River in California’s Gold Country. I’d been working the area for a couple of hours, using various combinations of macro, telephoto, and extension tubes to isolate and selectively focus poppies with various foreground/background relationships. I spent about an hour futzing around with compositions, occasionally stumbling upon something decent, but more often than not moving on to something else after a handful of mediocre frames. But the longer I worked, the more productive I became and the more I started seeing things the way my camera saw them.
The late afternoon sun that I’d been working with (and around) had just about left the scene when I decided to shift from one patch of poppies to similar patch about twenty feet away. I’d been concentrating on extremely close shots (inches from my subject) with at least 36mm of extension on my 100mm macro and 70-200 lenses, but when I saw this trio of poppies on (more or less) the same plane, I immediately pictured a slightly wider scene featuring this group sharp against a blurred background of poppies and grass.
Cutting back to a 12mm extension tube on my macro lens, I started with a wide aperture to limit the depth of field and spread the grass into a textured green canvas. With a slight breeze intermittently nudging the poppies, I switched to ISO 400 (in the few frames where I went smaller than f5.6, I bumped up to ISO 800). The preliminaries out of the way, I went to work refining my composition, framing the more or less centered foreground (sharp) poppies with the soft orange background poppy splashes.
Given the minuscule margin for error, I can’t imagine shooting something like this without a tripod. With my tripod I was able to use live-view to ensure precise focus, after each click evaluating everything from sharpness to exposure to composition, all with the security of knowing that the shot I’m reviewing is still sitting right there in my viewfinder, just waiting for whatever refinement I deem necessary.
Fifty-four frames later….
They don’t all have to be winners
Not only should you not be shy about shooting, your goal for each shot doesn’t necessarily need to be a “keeper” image. Often the purpose of a frame is to simply move you toward that keeper image. Sometimes that means a tangible improvement, but many times it’s just an education because nothing fosters creativity better than taking an “I wonder what happens if I do this” approach (followed by an effort to actually understand what happened). On the other hand, indiscriminate clicking (“The more I shoot, the better the chance I’ll find a keeper when I get home”) will wear out your camera faster than it improves your photography. In other words, shoot a lot, but make each shot serve a purpose.
Each frame that afternoon was a little different from the one before it: nearer, farther, up, down, left, right, more DOF, less DOF. While each wasn’t necessarily an improvement over the preceding frame, at the very least it advanced my understanding of the scene and gave me ideas for the next frame. And each gave me a variety of options from which to select when I could review and compare everything on a 27″ monitor. It was also lots of fun.
A Poppy Gallery
Click an image for a closer look and slide show. Refresh the window to reorder the display.


“Trophy” shots
Posted on December 18, 2012

Flowers and Red Rocks, Horseshoe Bend, Colorado River, Arizona
* * * *
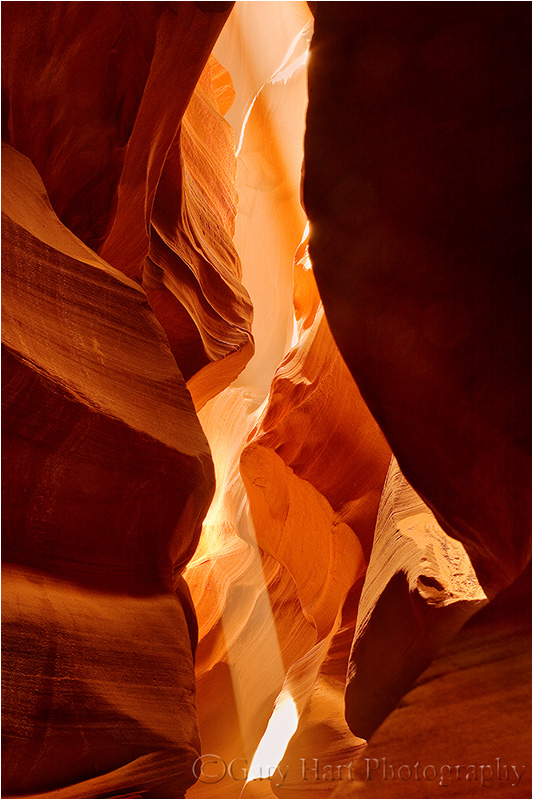
In my recently completed Hawaii Big Island workshop, the topic of “trophy shots” came up. (My definition of a trophy shot is a prominently displayed photograph of a scene captured previously by someone else.) Often these are “iconic” tourist scenes, places like Tunnel View in Yosemite, Old Faithful in Yellowstone, Delicate Arch in Arches, or Niagara Falls (I could go on). But with the digital-fueled photography renaissance, it seems that the number of trophy destinations has grown proportionally. For example, long an anonymous waterfall on El Capitan’s southeast flank, Horsetail Fall now draws thousands of photographers to Yosemite each February. And if you’ve ever jostled for position in front of Canyonlands’ Mesa Arch at sunrise, or at Antelope Canyon’s dazzling midday heavenly beam (below), you’ve been an active participant in a trophy hunt.
This isn’t an indictment of trophy photography—heaven knows I have my share of trophy-qualifying images. It’s more about me puzzling why so many photographers pursue them with such passion, and display them with such pride. To me the joy of photography isn’t duplicating what others have already done, it’s looking for something new, especially at frequently photographed locations. Of course these famous shots draw many photographers to my workshops, and I do my best to help them bag their trophy. Nevertheless, my challenge to workshop students is always, rather than make the trophy your goal, make it your starting point.
If the standard view is horizontal, look for something vertical; if it’s wide, try a telephoto. Chances are, if this shot is so special, there’s lots of other special views and subjects nearby. Challenge yourself to find a unique foreground, a different angle, or simply turn around and see what’s behind you.
Regrettably, some of my very favorite images, the images that give me the most satisfaction, are met with shrugs, while my trophy shots like Horsetail Fall and Antelope Canyon, compositions that are a dime a dozen, are among my most popular. Sigh. But when I decided to do landscape photography for a living, I started with a personal promise to only photograph what I want to photograph. And frankly, if someone else has done it, I just don’t get that much pleasure from re-doing it. Sometimes I’ll use the trophy compositions to warm up, but it seems the longer I do this, the more inclined I am to simply leave my lens cap on unless I see something I’ve never seen before.
Among the trophy destinations that I frequent each year is Horseshoe Bend near Page, Arizona. On my first visit I got my trophy shot, and on subsequent visits I’ve sometimes tried to upgrade that composition if I think conditions are better than I’ve had before, but with each visit I spend less time repeating previous efforts and more time looking for something new. Which is how I ended up with the image at the top of this post.
Spring Reflection, Horseshoe Bend, Arizona :: This is my Horseshoe Bend trophy shot. On this spring morning I did my best to use the broken clouds and sunlit cliffs reflecting in the Colorado River, and a solitary clump of wildflowers in the red rocks, to set my version apart from the thousands of similar compositions that preceded me.
Rather than limit myself to the “standard,” sweeping, (breathtaking) full horseshoe (Spring Reflection, above), I looked for something in the foreground to emphasize. I found a little clump of yellow flowers clinging to the cliff, 2,000 vertical feet above the Colorado River. Taking most of the bend out of the frame allowed me to use the foreground rocks to frame the flowers and guide your eye to the clouds building in the distance. Unfortunately (for sales), removing the horseshoe from Horseshoe Bend means this image won’t resonate with nearly as many people, but that’s okay.

Heavenly Beam, Antelope Canyon, Arizona :: Here’s my Antelope Canyon trophy shot. It really is an amazing scene that sells lots of prints, but there’s really nothing in it to set it apart from the thousands of others just like it.
Bathed in Light, Upper Antelope Canyon, Arizona :: While not dramatically different, at least this Antelope Canyon image is my own. I found it by looking up, over the heads of hundreds of other photographers lined up to get their trophy shot.
I’m not trying to portray myself as a creative genius (call me an aspirational creative genius)—I imagine that many of my “unique” images aren’t completely unique. But at least they’re my own (if others preceded me, they did so without my knowledge). We all take pictures for different reasons, and if the trophies give you the most pleasure, go for it. But honestly, does the world need another sunset from Tunnel View (guilty)? Or salmon-catching grizzly from Katmai National Park (not guilty)? If you’re trying to set yourself apart as a photographer (and maybe even make a few dollars doing it), look beyond the trophies to show the world something it hasn’t seen before. I may not be there yet, but that’s what keeps me shooting.
It isn’t easy, but it is simple
Posted on November 27, 2012
Spring Meadow, Rocky Mountain National Park, Colorado
* * * *
Easy: Achieved without great effort
Simple: Plain, basic, or uncomplicated in form, nature, or design
Photography may not be easy, but it is simple. Huh? What I mean is that the difficult part of photography is the creative stuff that by definition defies quantification, rules, logic, and reason—to be truly creative, something can’t have been done before. But before you can graduate to creative photography, you need to master the logical stuff–fortunately, that is simple.
Grasping photography’s simplicity starts with understanding that you’re only dealing with three variables: light, depth, and motion. To control them with your camera, you have shutter speed, aperture, and ISO. That’s it. Your job is to decide the combination of shutter speed, aperture, and ISO that returns the desired combination of light, motion, and depth. You could leave it to your camera to decide, but all automatic metering understands is light—your camera has no idea of the motion or depth effects that are so essential to creative results.
For landscape photographers still trying to get handle on their exposure settings, I think it’s best to start simple. I’ll start with the assumption that you’re working in a static world (generally true, but far from absolute—I’ll bring motion in later). Static requires a tripod—without one, all bets are off, as you’re adding unnecessary motion by virtue of your own unsteady hands (sorry). Don’t talk to me about high ISO performance (a compromise—why not go with your best ISO whenever possible?), a wide open aperture (another compromise that could reduce sharpness), or image stabilization (good, but never better than a rock-solid tripod).
Manual exposure made simple
ISO: So, if you’re on a tripod and your scene is static (no subject motion), you can go with your camera’s best ISO (usually 100, but 200 on some Nikon cameras). That’s one of our three variables out of the way and we haven’t even thought about exposure.
Aperture (f-stop): Landscape photographers shouldn’t use their f-stop to control light. Rather, the f-stop you choose is first determined by the depth of field you need. And if everything in your frame is at infinity and DOF isn’t a factor, go with your lens’s sharpest f-stop—because most lenses tend to be less sharp at their extreme f-stops, you should default to the middle f-stop range, usually f8 to f11, unless the scene dictates otherwise. (And in addition to optical problems, going much smaller than f11 risks diffraction that reduces your lens’s ability to resolve fine detail.) Read my “Depth of field” tips page for more info. We now have two of three variables out of the way, and we still haven’t even thought about exposure.
Shutter speed: With ISO and f-stop out of the way, only camera variable remaining to manage the light in your scene is shutter speed. At this point I simply aim my spot meter at whatever I decide is most important and dial in the amount of light I want it to have.
ISO part deux: If there’s motion in the frame (wind-blown leaves or flowers, flowing water, etc.), I’ll compromise my ISO to achieve the shutter speed that will freeze the motion or return the desired effect.
Admittedly, what I’ve outline here is a simplification—there are definitely situations where you’d want to deviate from this approach. But for someone just getting up to speed with manual exposure, this will work at least 90 percent of the time, and the more you do it, the more comfortable you’ll become making exceptions. For more on exposure and metering, read my “Exposure basics” and “Manual exposure” tips pages.
For example
These blanketflowers (gaillardia aristata) in Rocky Mountain National Park were the star of the scene. To fill my frame with the flowers and shrink the mountains to the distant background (that’s the creative part), I went to 17mm, as wide as my lens permitted and dropped down to about six inches from the closest flower.
My tripod eliminated camera shake, so the only motion in the frame I needed to worry about was the flowers’ motion in a light breeze. The relatively narrow dynamic range (difference between the lightest and darkest parts of the scene) made exposure pretty straightforward, but the potential for motion in the flowers and the extreme depth of field I needed made the way I achieved my exposure extremely important: too long a shutter speed and the flowers would blur in the breeze; not enough depth of field and the flowers wouldn’t be sharp enough.
With the closest flower only six inches from my lens, I knew it would be impossible to keep all the flowers and the mountains sharp. But I wanted the flowers sharp and felt I could live with a little softness in the distant mountains, so I stopped down to f20 and focused a little behind the closest flower, about one foot into the frame. F20 at ISO at my native (ideal) ISO 100 gave me a 1/10 second shutter speed. While I might have been able to time my exposure for a lull in the breeze that would freeze the flower at 1/10 second, I bumped my ISO to 200 and shutter speed to 1/20, just to be safe.
Click.
Chomping at the bit
Posted on March 26, 2012

Spring, California Gold Country, Sierra Foothills
It’s been over a week since my last post. I have 350 Maui images on my hard disk, calling my name, but I’ve been so busy since coming home that I haven’t touched them. To give you an idea how busy I’ve been, last Tuesday my new 5D MarkIII arrived and I haven’t clicked the shutter once. That will change in a few days (if it kills me).
I love being a photographer, but it’s an unfortunate reality that turning your passion into your profession risks robbing photography of all the pleasure it once offered. Suddenly earning money takes priority over taking pictures, especially in this day when images just don’t sell the way they used to.
When I decided to make photography my livelihood, it was only after observing other very good digital photographers who, lured by the ease of digital photography, had taken the same path without recognizing that running a photography business requires far more than taking good pictures. Rather than becoming further immersed in their passion, they found themselves forced to photograph things not for love, but because it was the only way to put food on the table. And with the constant need for marketing, collections, bookkeeping, and just plain keeping customers happy, they soon realized that there was no time left to do what caused them to become photographers in the first place. Sigh.
So when I decided to change from photographer to Photographer, it was with a pretty good idea of what I was risking. I vowed that I’d only photograph what I want to photograph, that I’d never photograph something simply because I thought I could sell it. In my case that meant sticking landscapes: no people or wildlife–in other words, pretty much nothing that breathes.
But how to make money? My previous life in technical communications–I’d been a technical writer for a (very) large high tech company and before that had spent many years doing tech support, training, testing, and writing for a small software company–combined with a lifetime of camping, hiking, backpacking, and (of course) photographing throughout the American West, made conducting photo workshops a very easy (and enjoyable) step for me. Supplementing the workshops with writing and print sales has allowed me to pay the bills, visit the locations I’ve always loved, and explore new locations. And most importantly, it has allowed me to keep photographing only the things I love photographing.
One of the things I love photographing most is spring in Northern California. March is a month of bipolar weather swings, a time when blue skies with puffy clouds turn into gray, frog-drowning downpours with alarming suddenness. March is also when our hills reach a crescendo of pupil-dilating green, the oaks leaf out with new life, and poppies start to appear everywhere.
One of my favorite diversions on these spring afternoons is driving into the Sierra foothills east town to photograph the poppies. With the window down, Spring Training baseball on the radio (go Giants!), and doing my best to get lost in the maze of narrow, twisting foothill roads, I’m in photography heaven. I found the above scene a couple of years ago on a quiet hillside beside the Cosumnes River in the Gold Country of the Sierra foothills. But this scene could be just about anywhere in California’s ubiquitous rolling, oak-studded hills.
Despite the current busy schedule, there’s comfort in the knowledge that our spring conditions will persist into June. Next month I’ll find poppies and other wildflowers mixed with redbud in the many canyons roaring with Sierra snowmelt. And come May, it’s dogwood time….

