Eloquent Images by Gary Hart
Insight, information, and inspiration for the inquisitive nature photographer
In Defense of the Tripod
Posted on July 5, 2020

Spring Sunrise, Rowena Crest, Columbia River Gorge
Canon EOS-5D Mark III
Canon 70-200 f/4L
1/10 second
F/8
ISO 800
This is another 6-year-old “brand new” image, just excavated from the depths of my 2014 folder
Photography without compromise
If you think the main reason to use a tripod is to avoid camera-shake, you’re mistaken. In this day of phenomenal high ISO performance and stabilized bodies and lenses, acceptable hand-held sharpness is possible in the vast majority of images. But here’s a reality that’s tough to deny: The steadiest hand-held image will never be sharper than it would have been if it had been properly executed using a sturdy tripod. And that’s not even the best reason to use a tripod.
Each camera has an ideal ISO—the quality of any image that doesn’t use it is compromised, sometimes just slightly, other times a lot. So if hand-holding an images forces you out of your camera’s ideal f-stop to reduce camera shake, you’ve made an unnecessary compromise. “Photographer’s light” (such as sunrise, sunset, and stormy or cloudy weather) only compounds the problem. While most of these compromises can be more or less remedied in post-processing, and many may not show up at all on a fifteen-inch laptop screen or in an 8×10 print, most serious photographers like the option to print their images large—and nothing reveals flaws more than a large print.
Let’s imagine you just got a request for a 24×36 print of the pride of your portfolio—a (hand-held) Yosemite Valley moonrise telephoto, captured at ISO 800 (it looks great in your Flickr gallery)—for the reception area of your mother-in-law’s law firm (a real coup after that whole llama-farm investment fiasco). So what do you tell her when you go to hang it and she asks why it looks “so mushy,” and what’s with all that “sludge in the shadows”? Oops—looks like another Thanksgiving at the kids’ table.
Not only does every camera have an ideal ISO, every scene has an ideal f-stop. Anyone with a camera can snap the lateral (left/right, up/down) dimensions of a scene, but artistic photographers understand that the key to rendering our three-dimensional world in photography’s two-dimensional medium is creating the illusion of the missing dimension, depth, by composing elements throughout the frame, from near to far. Since depth of field is controlled by the f-stop, of all the exposure variables at a landscape photographer’s disposal, f-stop is the least negotiable. In a static scene (as most landscape images are), the tripod removes motion (camera shake) from the equation, allowing you to select the ideal f-stop at your camera’s best ISO.
But what about a scene that’s all on the same plane, where depth isn’t a factor? The f-stop still matters because every lens has a single f-stop that renders the sharpest result. For some lenses the sharpness difference between f-stops is small, for others it’s significant. But it’s always there. So even when DOF isn’t a consideration, I choose my lens’s sharpest f-stop, usually f/5.6-f/11. Some photographers put each lens through extensive testing to determine its sweet spot; I usually go with f/8 or f/11 unless I see clear evidence that a lens is sharper at a different f-stop. I also try to avoid f-stops smaller than f/11 unless the scene requires extra depth—not only do lenses tend to be less sharp at their extreme f-stops, at f-stops smaller than f/11, diffraction starts to rear its ugly head.
The bottom line: By removing camera shake from the equation, a tripod frees you to choose the best f-stop for your composition, without compromise.
An image is not a snap, it’s a process
Still not convinced? Consider also the control a tripod gives to your composition process. Managing the relationship of elements in the frame is usually the single most important compositional decision a photographer can make. Relationships are especially important when you’ve included the front-to-back objects so essential to enhancing the illusion of depth. Photographing on a tripod gives you the time to consider each element in your frame and its relationship to other elements and eliminate distractions, and the flexibility to evaluate and refine until everything’s perfect.
When setting up an image, I try to achieve a sense of visual balance throughout my frame. I think about the path for my viewers’ eyes to follow, and where I want them to pause or land. I consider the elements that will move or stop the eye, and potential distractions that might pull the eye away, and merged elements that rob the scene of depth. With these things in mind, I position myself and frame my composition, identifying the focus point and f-stop for the ideal depth of field. Having my composition frozen in place atop my tripod enables me to make these adjustments deliberately and methodically, and helps me ensure that one tweak here didn’t break something else over there.
After each click, I step back and study the image on the LCD, imagine it framed large and hanging on a wall. I scrutinize my composition for possible composition and depth of field improvements, and check the histogram for exposure problems. With a tripod I can do all this at my pace, taking as much time as necessary, knowing that when I’m ready to make adjustments, the image I just reviewed will be waiting right there in my viewfinder atop my tripod, exactly as I captured it, ready for me to enhance.
And finally
Other benefits of a tripod I’ve almost come to take for granted. For example, I sometimes use graduated neutral density filters but find the holders that screw onto the end of my lens awkward. With a tripod, it’s easy to position my GND and hold it with my fingers during exposure (I don’t even own a filter holder). During long exposures I’ll sometimes move the GND up and down slightly to disguise the transition—also easy on a tripod.
A tripod also makes it easy to use a polarizer to reduce color-robbing glare, something I can do on virtually every daylight shot because unless something in my scene is moving, the two stops of light I lose to a polarizer are irrelevant when I’m on a tripod.
And advanced digital techniques such as image stitching (for panoramas or high resolution capture), HDR (high dynamic range blending of multiple images for exposure management), or focus blending to increase depth of field are all easier on a tripod. As is old-fashioned mirror lock-up to reduce mirror-slap induced vibration. And live-view focusing, the best way to ensure precise focus, is a snap on a tripod (and pretty much impossible hand-held).
For example

Spring Sunrise, Rowena Crest, Columbia River Gorge
There was a lot going on in this scene. I had wildflowers everywhere, the Columbia River, clouds, a freeway, railroad tracks, power lines, and lots of other photographers and wildflower peepers. Organizing all this into a coherent image, including the good stuff and eliminating the distractions, required no small measure of planning and execution.
I’d been wandering the hillsides of the Tom McCall Preserve on the Rowena Crest in the Columbia River Gorge for about an hour, playing with compositions and identifying potential subjects. I could see the potential for a colorful sunrise and wanted to be ready when (if) it happened. I wanted a foreground subject to anchor my frame, and needed to eliminate the freeway, tracks, wires, and people, and finally landed on this spot about 15 minutes before sunrise.
Rather than wait for the color to arrive, I started working on my composition immediately, choosing a height about two feet above the ground—any higher and the power lines would come into view; any lower and the flowers and near cliff (on the left) would merge with the opposite bank. To compress the foreground/background distance, I moved back a little and chose my 70-200 lens, putting the bottom of the frame a few inches below the yellow balsam root to frame the flowers with a little green, and taking care not to cut off any of the large, ear-shaped leaves.
The clouds weren’t very interesting, but I knew that if they colored up they’d add an important layer to my frame, so I made sure to include a strong stripe of clouds across the top of my frame. I liked the nearby sprinkling of lupine and other wildflowers, so I went wide enough to include a few without diluting my primary clump of wildflowers.
The final step was to determine depth of field and focus. To make the flowers’ sharpness stand out even more, I slightly softened the background by dialing to f/8 and choosing a focus point closer than the hyperfocal distance.
Each of these framing decisions were part of an iterative process that took more than a dozen clicks before everything was just as I wanted it. Because I was working on a tripod, I was able to click a frame, evaluate all of the variables, and make small refinements. The tripod also gave me the luxury of straightening to unkink my back between clicks. When I was sure everything was right, I stood and waited (fingers crossed) for the color. When the sky did finally color-up, an intermittent breeze came with it, forcing me to compromise my ISO (ISO 800) to freeze the flowers’ movement. But because I was on a tripod, I was able to stand and watch the scene confident in the knowledge that my composition was fixed, and click my remote release whenever there was a lull.
Workshop Schedule || Purchase Prints


Concise guide to tripod selection for the serious landscape photographer
Posted on September 5, 2016

Electric Scribble, Grand Canyon Lodge, North Rim
Sony a7R II
Sony/Zeiss 24-70 f4
1/6 second
F/9
ISO 200
Lightning Trigger LT-IV
Tripod axiom
There’s an axiom in photography (popularized by Thom Hogan): Photographers purchase three tripods: the first tripod is a flimsy, cheap aluminum/plastic monstrosity; next comes a sturdy but heavy “value” tripod; and finally, they spring for the tripod they should have purchased in the first place—a sturdy, light, expensive tripod that will serve them for decades. You’ll save yourself tons of money by biting the bullet and just starting with the tripod that you covet (and probably already know you’ll eventually end up with).
How tall?
Stooping, even just a few inches, may not seem like a big deal at first, but it gets old really fast. Your primary tripod should be tall enough to elevate your camera to eye level without extending the centerpost—it’s okay if the tripod has a centerpost, and to use it as a last resort when wind or long exposures aren’t a factor, but a centerpost adds weight and makes it impossible to lower your camera all the way to the ground. While not essential, even taller than eye level is better because extra height adds compositional flexibility, the ability to elevate above obstacles, and makes it easier to handle uneven terrain.
Your minimum tripod height (MTH) determines the shortest tripod you can use without stooping or raising the center post. But you don’t need a tripod that’s as tall as you are because you’ll be mounting a camera and head atop the tripod, and your eyes are probably not on top of your head.
Here are the steps for determining if a trip is tall enough for you:
1. Start with the tripod’s fully extended height (legs extended, center post down), easy to find in the manufacturer’s specifications 2. Add the height of your ball-head 3. Add the distance from the base of your camera to the viewfinder 4. Subtract 4 (or so) inches from your height, including shoes (unless you photograph barefoot), to account for the distance from the top of your head to your eyes.Variables dictated by need and preference
- Carbon fiber is lighter and and less prone to vibration than aluminum, but more expensive (see Tripod axiom above). Carbon fiber also doesn’t get as cold on those frigid winter mornings.
- Three leg-section tripods are less work to set up and take down; four leg-section tripods collapse smaller. In theory, the more leg sections a tripod has, the more it’s prone to vibration (each junction is a point of weakness), but this isn’t a big factor with a good tripod.
- And speaking of leg sections, you’ll need to choose between twist locks and flip locks. I find the flip locks a little easier when I’m fully extending and collapsing the tripod at the beginning and end of a shoot, but the twist locks easier for partial adjustments of the legs while I’m shooting. The flip locks can be noisy, and can catch on things.
Tripod head
For landscape photography, I strongly recommend a ball head (pivoting ball that can be controlled by loosening and tightening a single knob) rather than a pan/tilt (a lever for each axis of motion). And stay away from the pistol-grip ball heads—they don’t handle weight well.
Quick-release system
You’ll definitely want some kind of quick-release mechanism that allows you to quickly attach/detach the camera to/from the head. The simplest kind is a metal plate (don’t even consider anything with plastic parts) that mounts to the camera’s tripod screw and matches a corresponding clamp on the head. The clamp might engage/disengage with a lever or twist-knob—get the lever kind.
The flat plates are okay, but the easiest, sturdiest quick-release system is the Arca-Swiss L-plate (the Arca-Swiss style is a standard offered by many quick-release manufacturers). An L-plate is a 90-degree (L-shaped) piece of machined aluminum; one axis mounts flush with the bottom of the camera body, attaching via the tripod mount screw, and the perpendicular axis hugs one side of the camera body (providing a quick-release plate on the bottom and side of the camera). The entire length of both plate axes are quick-mount rails that attach (with a lever or knob) to the corresponding mounting clamp on the tripod head. This rail setup is more secure and easier to mount/unmount than a conventional quick-release plate, making switching between horizontal and vertical orientation a simple mater of releasing the clamp, rotating the body, and re-securing the clamp (it takes longer to read the description than to execute it).
If you’re really serious about your photography, you’ll invest in an L-plate system—once you do, it’ll be hard to imagine how you lived without it. Because every camera model has its own dimensions and unique cable, control, memory card, and battery access points, the best L-plates (like Really Right Stuff) are custom-machined for the body (when you get a new camera, you’ll need a new L-plate).
My tripods
I use two Really Right Stuff tripods: the larger RRS TVC-24L is my primary tripod; I also use a smaller, lighter RRS TQC-14 when I fly or hike. My TVC-24L has a RRS BH-55 (purchased when I was a DSLR shooter but overkill for my Sony mirrorless system— I’d probably get a BH-40 if I had to do it now); my TQC-14 has a BH-30. I’m about 5’ 9” and without the centerpost extended the TQC-14 is just a little shorter than ideal (I need to extend my centerpost a few inches to get my camera to eye level), but it’s a justifiable compromise when weight and/or storage length is a factor. All of my camera bodies and tripod heads are outfitted with RRS Arca Swiss type L-plates and corresponding clamps.
Links
Making the case for using a tripod
Really Right Stuff

Electric Scribble, Grand Canyon Lodge, North Rim
About this image
Electric Scribble, Grand Canyon Lodge, North Rim
The best nature images reveal aspects of the world that the human eye misses. For example, though lightning strikes so fast that it’s already a memory before the brain can process them, the camera’s ability to freeze an instant in time preserves magic moments like this that otherwise would be lost forever.
Lightning’s speed makes photographing it without a tripod virtually impossible: in daylight, it requires a lightning sensor that mounts atop the pre-composed camera and waits for lightning to fire; at night it can be captured with a manual shutter press, but at exposures far too long for hand-holding.
On this afternoon on the North Rim last month, Don Smith and I had our workshop group set up to photograph a series of active thunderstorms skirting the South Rim about 15 miles away from our vantage point on the Grand Canyon Lodge viewing deck. The deck was packed with people enjoying the show. In crowded locations like this I particularly appreciate the height of the RRS 24L, which gave me the flexibility to elevate above heads and other obstacles. The 24L’s sturdiness gave me peace of mind that my camera would remain stable despite all the heavy footsteps nearby.
Virtually all of the strikes were vertical, cloud-to-ground strokes directly across the canyon. But already having a pretty good selection of images like that, my camera was set up (on my tripod, Lightning Trigger ready for action) to favor the composition I wanted rather than in the direction of the most lightning activity.
Most of my lightning captures this afternoon were recorded relatively close to my memory, albeit with much more intricate detail than my eyes saw. This cloud-to-cloud strike, the only lightning I captured with this composition, followed a far too circuitous path for my eye/brain to register, but it was etched forever in pixels by my sensor. Better still, the resulting 42 megapixel raw file gives me the luxury of much closer scrutiny than you get with this 800 pixel jpeg. Magnifying the full file to 100 percent, I’m able to infer that what I have here is only a portion of a rather tangled mess of electricity that skipped in and out of clouds, appearing, disappearing, and doubling back on itself like a tangled thread—all in the blink of an eye.
Photo Workshop Schedule
A gallery of frozen moments in nature


The right stuff at the Grand Canyon
Posted on August 28, 2014

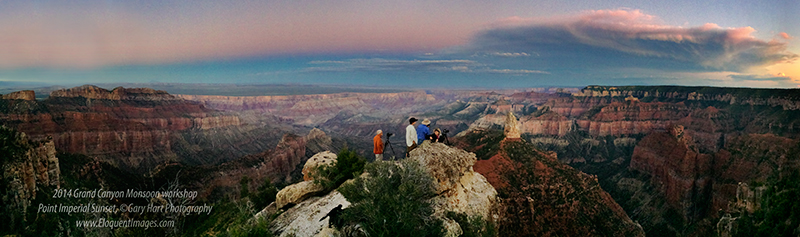
After Sunset, Point Imperial, Grand Canyon
Canon EOS-5D Mark III
47mm
8 seconds
F/16
ISO 100
I’ve been to the mountaintop
Personal growth should be a lifelong journey. But as a longtime tripod evangelist, I considered many truths carved in stone. Granted, like everyone else, my tripod use (and selection) evolved through my formative photography years. On my path to (perceived) enlightenment, I made the same mistakes most photographers make, mistakes like settling for the tripod I could afford rather than tripod I needed, which only meant spending more money than I would have when I eventually (inevitably) broke down and bought the tripod I needed. And there were those dark years when I believed that in most cases a hand-held shot was just as good as one captured on a tripod. But since my “the center post is more trouble than it’s worth” epiphany about ten years ago, I pretty much believed I knew it all where tripods were concerned.
But last month at the Grand Canyon, I realized that over the last couple of years, some of my tripod truths weren’t immutable as I’d imagined. This was underscored for me during a shoot at Point Imperial, the canyon’s highest vista, when I was able to use my Really Right Stuff tripod and live-view to get shots that wouldn’t have been possible a few years ago.
My (original) tripod commandments
For years my tripod sermon was delivered something like this:
- A tripod for every shot—no exceptions
- Sturdy trumps everything
- Forego the center post—it’s destabilizing, adds extra weight, and makes it impossible to drop your camera to the ground (without a shovel)
- Size does matter—you need a tripod that’s tall enough for you to see through your viewfinder without stooping (without extending the center post)
- Ball-head all the way for landscape shooters (no pan/tilt, no exceptions)
- An L-plate will change your life
Those are the basics; the other tripod variables—cheap vs. light (you can’t have both, no matter what the salesperson or marketing brochure says), three vs. four leg sections, leg-lock design, and collapsed length (for transport in a suitcase or camera bag)—come down to personal preference and budget.
And what’s the big deal about an L-plate?
And L-plate is an L-shaped plate (duh) that attaches at the bottom of your camera and wrapping 90 degrees up one side. It’s really just a two-sided quick-release plate—instead of the standard quick-release that only mounts to the bottom of your camera (forcing you to rotate the head 90 degrees to orient the camera vertically), to orient an L-plate-equiped body vertically, you pop the camera off the head, rotate the camera 90 degrees, and reattach it to the head using the plate’s other side, keeping the head upright (unchanged). Not only does this keep your camera at the same height regardless of its orientation, it’s just much more stable.
Lacking an L-plate, photographers whose tripod is tall enough when the camera is oriented horizontally are sometimes force to stoop or contort when they switch to vertical. Without realizing it, they often compensate for this awkwardness by simply avoiding vertical compositions. I know this because I was one of those photographers—when I switched to an L-plate, my percentage of vertical compositions increased markedly (I actually verified this using Lightroom filters to count the number of horizontal and vertical frames in my library), to the point where my vertical/horizontal images are about 50/50.
What’s your MTH?
By the time they’re serious enough to sign up for a photo workshop, most (but not all) photographers have a sturdy tripod. Still, things aren’t necessarily completely rosy. In addition to a deficient head—either a pan/tilt, or a ball head that’s not strong enough for the camera/lens it’s trying to support (both problems easily solved by going to reallyrightstuff.com and picking the head that best suits your needs, but that’s a discussion for a different day)—a too-short tripod is where I see most novice photographers struggle. Stooping, even just a few inches, may not seem like a big deal at first, but it gets old really fast.
Your minimum tripod height (MTH) is the shortest tripod you can use without stooping or raising the center post. Here are the steps for determining if a trip is tall enough for you:
1. Start with the tripod’s fully extended height (legs extended, center post down), easy to find in the manufacturer’s specifications 2. Add the height of your ball-head (if you have a pan/tilt you need a new head and will be doing this calculation all over again when you get it) 3. Add the distance from the base of your camera to the viewfinderThis gives you the tripod’s maximum usable height. Wait a minute, you say, that’s still not tall enough. To get your MTH, there’s one more step:
4. Subtract 4 inches from your height to account for the distance from the top of your head to your eyes.Old dog, new trick
But in the last year I’ve experienced a minor conversion, opening my mind enough to modify my rigid tripod height recommendations (I used to believe that a tripod that extended above my standing height was unnecessary weight and length)—not only should your tripod be tall enough to use while you stand upright, the ideal tripod is even taller than that, at least 4 inches taller than your viewing height when the legs are planted on flat ground. Extra tripod height allows me to comfortably stand on the uphill side of my camera when the tripod on uneven ground. (If you’re a landscape shooter, how often do you photograph on flat ground?)
Of no less significance is the way a tall tripod allows me to shoot over obstacles. In “ancient” times, photographers needed to to see through their viewfinder to compose and (sometimes) meter, but with the genesis of live-view came the ability to compose and meter without the eyepiece. So while a tall tripod has always been helpful for shooting on level ground, to me this ability to shoot over obstacles is the real game changer.
Going straight to the source
My conversion started with a pilgrimage to Really Right Stuff in San Luis Obispo, about a year-and-a-half ago. I was ready for a new tripod and wanted the best. I’d been quite happy with my Gitzo tripods, but they were purchased before RRS offered tripods—given my long-time experience with RRS heads and L-plates, and what I’d observed in my workshops, I thought I should see whether RRS tripods had supplanted Gitzo at the tripod summit.
RRS doesn’t actually have a retail store, but their beautiful new facility has a nice reception area with many products on display—you might even find the lobby empty when you walk in, but it won’t be long before a door from the back opens and you’ll be greeted by someone who knows more about tripods than you do. My expert was Erik—he spent close to an hour, first patiently demonstrating why the RRS tripods are the best tripods in the world (the comparison was to Gitzo, but his emphasis was on what makes RRS tripods great, rather than what makes Gitzo tripods bad, an approach I appreciated), and then helping me determine which model would best suit me.
I’d arrived with the RRS TVC 33 in mind, but on Erik’s suggestion ended up switching to the RRS TVC 24L Series 2, even though it has four leg sections (extra work extending and collapsing, but more compact when collapsed) and is quite a bit taller than I (believed I) needed. So tall, in fact, that I can almost (but not quite) use it by extending only three leg sections. I’m not going to go into all the reasons I love this tripod (but trust me, I do), but I will say that the extra 8 or so inches above my MTH (I’m about 5’9″) has enabled me to photograph in ways I wouldn’t have been able to do without it.
The paradigm shifting “revelations” I share here (extra-tall is important; Gitzo is no longer the Holy Grail of tripods) apply to photography, but one of the things I love about being forced to reconsider long-held “truths” is the reminder that the instant we believe we have all the answers is the instant we stop growing.
Case in point
All this (finally) brings me to the above image from Point Imperial on my recent Grand Canyon trip. Point Imperial is probably my favorite spot on the North Rim. The railed viewing area isn’t quite large enough for an entire workshop group to work comfortably, but there are enough spots nearby that nobody is disappointed. My favorite location here is on the rocks, just below the railed vista, that jut about 1,000 vertical feet above the canyon. There isn’t a lot of room out here either, and very little margin for error, so after guiding the brave photographers who aren’t afraid of heights out to the edge, I found an out of the way spot a few feet behind them.
It turned out this location was no less precarious than everyone else’s, but being behind the others and a couple of large rocks and shrubs made composing a challenge. Looking around, I decided the best view was on an uneven slope right on the edge, the closer the better. Yikes.
This is where I really appreciated the extra inches my tripod offers. Extending each leg fully, I pushed two legs right up to the edge, keeping myself a safe distance back. With the front (closest to the edge) legs’ planted, to elevate further and get the camera even nearer the edge, pushed the leg closest to me toward the cliff until the other two legs were nearly perpendicular to the ground (directly on the edge). Finally, I leveled the tripod with minor adjustments in the height and placement of the leg closest to me. Once the camera was positioned (about five inches above my eyes), I switched on live-view, composed, metered, and clicked.
As evidenced by the long shutter speed, it was fairly dark when I clicked the image above. Often the best light for photography is opposite the sun after sunset (or before sunrise). The smooth quality of this shadowless light, and the gradual deepening of the rich hues on the horizon, are often missed by the casual observer who is mesmerized by the view toward the setting or rising sun (not possible at Point Imperial at sunset), or unable to appreciate the camera’s ability to bring out more light than the eye can see. But then, you already knew that (right?)….
The view from just below the Point Imperial vista (iPhone panorama)
Extra credit
- Read The tripod difference (why I think every landscape shot should be on a tripod)
- Here’s Thom Hogan’s excellent article on buying a tripod
- Visit the Really Right Stuff website: in addition to the best camera support money can buy, there’s great information here
Fire at will
Posted on May 20, 2013

Poppy Pastel, Sierra Foothills, California
Canon EOS 5D Mark III
1/125 second
F/4.0
ISO 400
100 mm with 12mm extension tube added
Maximize your investment
I clicked 54 versions of this scene (I just counted). I’m usually a pretty low volume shooter, sometimes not taking 54 pictures on an entire trip. And I have to admit, after years as a film shooter, the whole digital “fire at will” paradigm took some getting used to. But I’ve finally reached a place where I have no problem firing 54 frames in 30 minutes when the scene calls for it. The light came on for me when I realized that, while in my film days every single click cost money, with a digital camera, every click increases the return on my investment (the more images I have, the less per image my camera cost).
For example
These poppies were just a small handful of the thousands coloring a steep hillside near the Mokelumne River in California’s Gold Country. I’d been working the area for a couple of hours, using various combinations of macro, telephoto, and extension tubes to isolate and selectively focus poppies with various foreground/background relationships. I spent about an hour futzing around with compositions, occasionally stumbling upon something decent, but more often than not moving on to something else after a handful of mediocre frames. But the longer I worked, the more productive I became and the more I started seeing things the way my camera saw them.
The late afternoon sun that I’d been working with (and around) had just about left the scene when I decided to shift from one patch of poppies to similar patch about twenty feet away. I’d been concentrating on extremely close shots (inches from my subject) with at least 36mm of extension on my 100mm macro and 70-200 lenses, but when I saw this trio of poppies on (more or less) the same plane, I immediately pictured a slightly wider scene featuring this group sharp against a blurred background of poppies and grass.
Cutting back to a 12mm extension tube on my macro lens, I started with a wide aperture to limit the depth of field and spread the grass into a textured green canvas. With a slight breeze intermittently nudging the poppies, I switched to ISO 400 (in the few frames where I went smaller than f5.6, I bumped up to ISO 800). The preliminaries out of the way, I went to work refining my composition, framing the more or less centered foreground (sharp) poppies with the soft orange background poppy splashes.
Given the minuscule margin for error, I can’t imagine shooting something like this without a tripod. With my tripod I was able to use live-view to ensure precise focus, after each click evaluating everything from sharpness to exposure to composition, all with the security of knowing that the shot I’m reviewing is still sitting right there in my viewfinder, just waiting for whatever refinement I deem necessary.
Fifty-four frames later….
They don’t all have to be winners
Not only should you not be shy about shooting, your goal for each shot doesn’t necessarily need to be a “keeper” image. Often the purpose of a frame is to simply move you toward that keeper image. Sometimes that means a tangible improvement, but many times it’s just an education because nothing fosters creativity better than taking an “I wonder what happens if I do this” approach (followed by an effort to actually understand what happened). On the other hand, indiscriminate clicking (“The more I shoot, the better the chance I’ll find a keeper when I get home”) will wear out your camera faster than it improves your photography. In other words, shoot a lot, but make each shot serve a purpose.
Each frame that afternoon was a little different from the one before it: nearer, farther, up, down, left, right, more DOF, less DOF. While each wasn’t necessarily an improvement over the preceding frame, at the very least it advanced my understanding of the scene and gave me ideas for the next frame. And each gave me a variety of options from which to select when I could review and compare everything on a 27″ monitor. It was also lots of fun.
A Poppy Gallery
Click an image for a closer look and slide show. Refresh the window to reorder the display.


Don’t mess with the Tripod Police
Posted on January 31, 2011

The Tripod Police
You’re wandering the banks of the Merced River in Yosemite near sunset when, without warning, El Capitan emerges from a swirl of clouds; at your feet a mirror reflection of the scene mingles with smooth granite rocks. Bringing your camera to your eye, you find the composition that works best is a 30mm vertical frame. But keeping El Capitan and the foreground granite sharp requires f16. Hmmm. In the fading light, at ISO 100 the meter suggests 1/2 second. Even with image stabilization that’s a bit of a stretch at 30mm. Unfortunately, your tripod is a) strapped to your camera bag (a misdemeanor); b) in the car (a felony); or c) at home in the closet behind the tux you haven’t worn since your first wedding (a capital offense). So you bump the ISO to 400, dial the aperture to f11, and push the shutter speed to 1/16 second. Your finger is poised on the shutter-release when from behind a tree you hear, “Tripod Police! Step away from the camera!” Uh-oh.
Fortunately, the Tripod Police are a kinder, gentler force. Their objective is not to punish, it’s to rehabilitate. As a fully deputized tripod officer, I must say that in my workshops I’ve cited more than a few tripod offenders. Of course it’s all in good fun–some workshop participants repent on the spot, others just laugh and wave me away. And while I’m really (I swear) not offended when they choose to forego their tripod, I do think it’s important that they understand what they’re giving up.
Disclaimer: The tripod comments that follow aren’t directed at the many for whom nature photography is simply a great way to spend time outdoors and record those memories–if using a tripod saps the pleasure from your photography, leave the tripod at home. But if your photography pleasure derives from capturing the best possible images of nature, or if you aspire to make money with your photography, no single piece of equipment will improve your results more than a tripod.
Photography without compromise
In this day of image stabilization and improving sensor sensitivity, satisfactory results can often be achieved through careful hand-holding. But most photographers love printing their images large, the larger the better, and a large print is an unforgiving reproduction that reveals even the tiniest flaws. No matter how steady your grip, the steadiest hand-held image will never be sharper than it would have been with a good tripod.
Stability problems are even more pronounced in the limited light conditions (such as sunrise, sunset, and stormy weather) that landscape photographers crave. Achieving hand-held sharpness in anything but the harshest light means resorting to image-degrading compromises like higher ISO or a larger than ideal aperture. The flaws introduced by these compromises are sometimes not visible in a 4×6 print or 6×9 72-dpi Flickr gallery. But let’s imagine that your father-in-law has requested a 24×36 print of the pride of your portfolio–a hand-held, 400 ISO Grand Canyon sunrise that looks great in your Flickr gallery–for his law firm’s reception area. (A real coup after that whole llama farm investment fiasco.) What do you tell him when he asks if you can do another one that’s not so “mushy” and doesn’t have all that “sludge in the shadows”? Oops.
A tripod provides a rock-solid foundation that removes image degrading compromise from ISO and aperture choices. A tripod simplifies your decisions in the field because you no longer need to decide between a potentially soft image and an image with extra noise and/or reduced depth of field. I have no problem increasing my ISO when there’s motion in the scene (flowing water, blowing leaves, etc.), or opening my aperture when I want to minimize DOF. But why would I compromise my image quality, even slightly, with a higher ISO or larger aperture to minimize motion introduced by me, when my tripod will completely eliminate that motion without compromising quality? As a professional, I never know how large an image may need to be, so I can’t afford to compromise the quality of my images, not even a little. I don’t really care that in today’s cameras ISO 400 is almost as clean as ISO 100, or the DOF at f8 is almost as good as it is at f11.
The ideal f-stop
There’s an ideal f-stop for every capture. Really. For many this ideal f-stop concept is the lightbulb moment that becomes the tipping point in their appreciation of their tripod’s value.
We all know that depth of field is controlled by the aperture, which is measured in f-stops. Because f-stop management is the key ingredient for rendering our three dimensional world in photography’s two dimensional medium, the best landscape photographers use aperture to regulate depth (the missing dimension), not shutter speed. (Shutter speed is for motion management.)
Determining an image’s ideal f-stop is essential to the creative process. It’s a moving target based on the depth-of-field the composition requires, and the aperture at which the lens is sharpest. The ability to manage a scene’s front-to-back component by creating the illusion of depth separates successful landscape photographers from everyone else. Sometimes a scene calls for maximum DOF, sometimes minimum, and sometimes something in-between–regardless, good photographers know that every composition has only one aperture that returns the result they seek.
But even when the entire scene is at infinity (no foreground subjects, so depth isn’t a factor), the f-stop still matters because every lens has still a single f-stop that renders the sharpest result–for some lenses this difference is small, for others it’s significant. In other words, when DOF isn’t a factor, I choose my lens’s sharpest f-stop. (Some photographers put each lens through extensive testing to determine its sweet spot; others trust that the sweet spot is usually be the camera’s mid-range, typically f8-f11, and default in that range unless their results suggest closer scrutiny.)
Put simply, in a static scene (no moving subjects), a tripod allows you to base your f-stop choice entirely on what the scene calls for; if depth isn’t a factor, you should choose the f-stop at which the lens is sharpest.
Compose yourself
Still not convinced? Consider also the control a tripod gives to your composition process. It slows you down (a good thing), making it easier to consider each element in the frame and its relationship to the other elements. Combined with depth of field management, careful management of the elements in your frame is the part of photography that separates the art from the snapshot.
Before capturing any image, I look for distractions on the side of the frame (objects cut off or intruding), merged elements at different distances (that rob the scene of depth), and attempt to achieve general sense of visual balance throughout the frame. Next I carefully determine the ideal focus point (selecting the ideal f-stop has little value if your focus is off). Having my composition locked in place on my tripod enables me to ensure my focus point is precise, and when necessary, makes it easy to check depth of field with the DOF preview button.
After capture, I study the histogram and composition for any possible setting adjustments or composition refinements. Sometimes it helps to step back from the camera and imagine the image on the LCD framed large, on a wall. With a tripod I can do all this at my pace, sometimes through the view finder, other times scanning the broader scene. When I’m ready, the original image is still sitting right there, exactly as I just captured it.
Advanced digital techniques image such as image stitching (for panoramas or high resolution capture), HDR (high dynamic range blending of multiple images for exposure management), or focus blending to increase depth of field are all difficult to impossible without a tripod. As is mirror lock-up to reduce mirror-slap induced vibration.
For example…
I’m rarely interested in photographing when the light is bright enough to allow uncompromised hand-held capture. While I don’t usually photograph in midday sunlight, I make exceptions when my subjects are backlit and the brightest thing in the scene. Flowers work great for this, which is why I was poking around on the banks of the Cosumnes River on a sunny afternoon last spring. And even though these flowers were brightly lit, without my tripod, I wouldn’t have been able to achieve my objective.
To turn the sparkling water drops to effervescent sparkles I needed f16, but that small aperture gave me enough depth of field to make the background too busy. So I twisted on a couple of extension tubes (at the expense of the several stops of light) to sufficiently soften the background. Since the meter’s suggested 1/20 second at ISO 100 was not fast enough to freeze the lupine in the slight breeze, I bumped my ISO to 400. The resulting 1/80 second shutter speed was still too slow for hand-holding, but was enough to freeze the lupine if I was careful.
Focus is particularly critical in macro photography. With my composition locked in place on my tripod, I used live-view to magnify my designated focus point 10x and carefully dialed it sharp. With my composition in place I stood back and waited for a lull in the breeze before clicking my remote release. And because the composition was sitting right there in my viewfinder, the tripod further facilitated my composition process by allowing me to study the LCD and further refine the composition after each click.
I took five frames of this composition, each slightly different than the others. If I follow the progression of the frames, I can see that each was a slight improvement over the previous, an incremental improvement that would have been nearly impossible without my tripod.
Tripod amnesty
Just as the llama farm is now dust in the Peruvian desert (just checking to see how carefully you’ve been reading), all those beautiful hand-held scenes from your unstable past are gone. Fortunately, the Tripod Police offer a wonderful amnesty program that rewards rehabilitated offenders with great new images each time they use a tripod. Just give it a try, and allow enough time for the tripod to become habit. Once you see the improvement, I don’t think you’ll relapse.

