Eloquent Images by Gary Hart
Insight, information, and inspiration for the inquisitive nature photographer
More Than a Pretty Picture
Posted on April 26, 2026
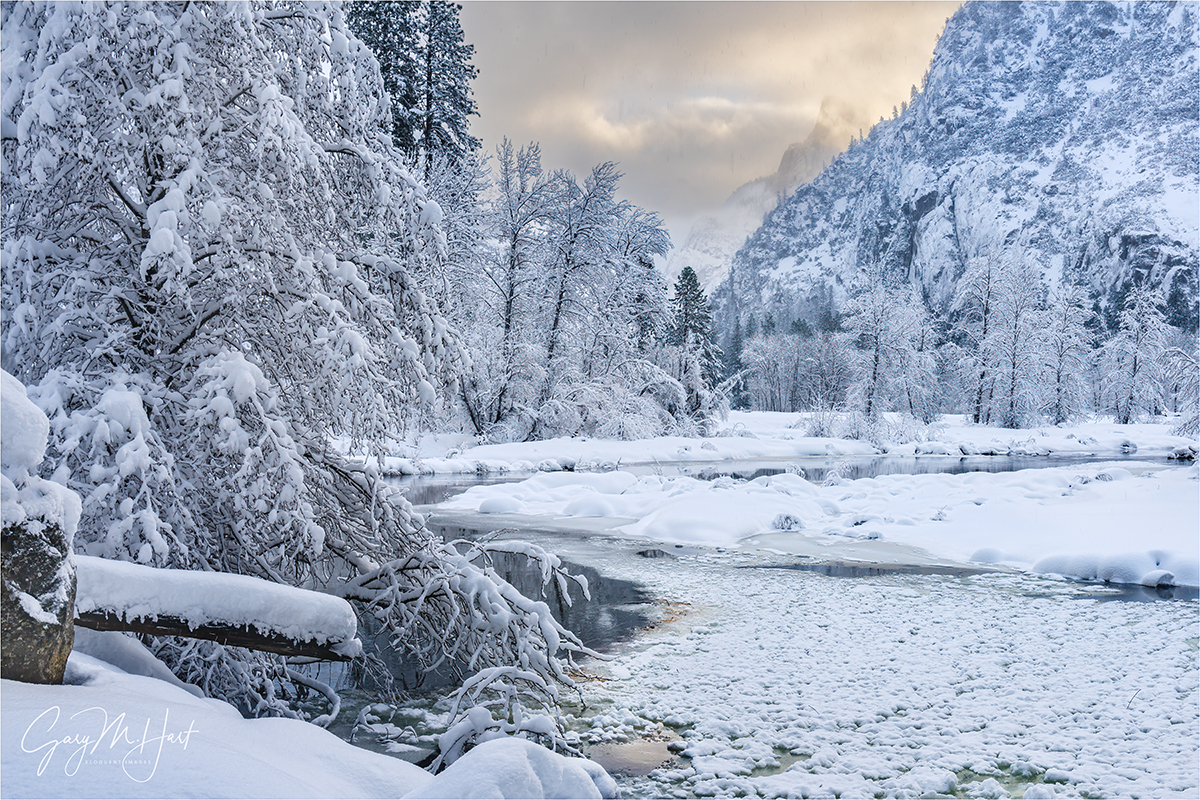
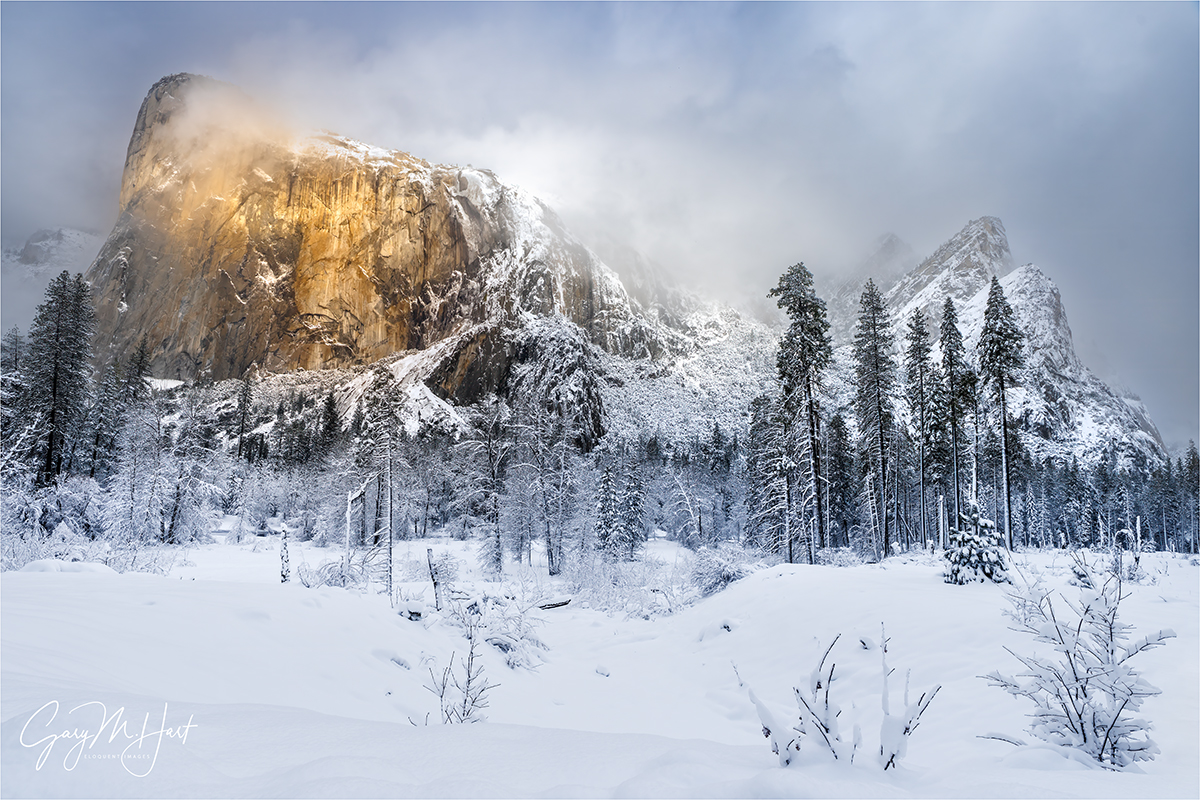
Morning Light, Half Dome and Merced River, Yosemite
Sony a7R V
Sony 24-105 G
1/25 seconds
F/11
ISO 100
Before exploring for the scene that ultimately delivered the image in my prior blog post, I got my February group set up at what I’ve always felt was the primary view at this location. With Half Dome framed on the left by towering evergreens, on the right by a long diagonal ridge, and the tree-lined Merced River in the foreground, this spot has all the landscape ingredients a beautiful image needs. Stir in fresh snow, translucent clouds, and warm sunlight, and the beauty is ratcheted off the charts.
I interrupt this photo blog to share a little about what’s been disrupting my life this week: a “minor” home remodel. In the grand scheme of things you can do to improve a house, upgrading kitchen cabinets (completely new exteriors, all new drawers, pull-out shelves) is no big deal. But anything that requires my wife and me to completely pack up the kitchen and basically camp out in our living room at least feels quite major.
Before the installers even started, our preparation included emptying the original cabinets into boxes, relocating our refrigerator to the dining room, removing the above-range microwave, and expanding the dining room table enough to host our kitchen essentials—convection oven, microwave, espresso machine, and Vitamix—while somehow leaving just enough remaining space for meal prep and dining for two.
Suddenly, our entire downstairs was a an obstacle course of boxes and countertop items (who knew a relatively small kitchen could hold so much?). My wife and I both work from home, but while I could retreat to my upstairs office, her workspace was downstairs amidst the mayhem. To get any work done amidst the din of power saws and sanders, each of us had to resort to noise-cancelling headphones at multiple points.
I’m happy to report that the just-completed cabinets exceed our lofty expectations, and the cars are back in the garage where they belong. On the other hand, at least half of our stuff is still in boxes as we meticulously unpack and reorganize our “new” kitchen.
Since every hardship is a learning opportunity, here are the things this experience taught us to never take for granted again: a kitchen sink, a dishwasher, parking inside, on-demand filtered water straight from the fridge, and not having to rummage through boxes to find that thing we never imagined we should leave out (cheese grater, coffee filters, 1/4 measuring cup, and on, and on…).
Next up? Hmmm, this 20-year old interior paint is starting to look a little dated…
So, anyway…
Finding the confluence of all these landscape and atmospheric elements is the stuff landscape photographers dream of. But I think far too many, when gifted this opportunity, simply settle for capturing the beautiful scene. (Not that there’s anything wrong with that.) In so doing, they miss an opportunity to elevate their images something extraordinary.
I see examples of this kind of settling everywhere. Whether it’s social media, hotel room “art,” screensavers, calendars, postcards, or any other medium that displays beautiful landscape photography, I can’t help shaking my head at clearly beautiful scenes that could have made much better images had the photographer taken a few simple steps.
It seems almost as if they said, “Wow, this is so beautiful, all I have to do is click my shutter before it goes away.” And if your only goal is to save the moment, read no further. But to my mind, the more beautiful a scene, the more important it is to squeeze every ounce of beauty from it. I could probably go on for hours on this topic, but I’ll try to distill my thoughts down to a few basic points.
Foremost is the need to be aware of the way the viewer’s eye moves through the frame. When I decide a scene is worth photographing, I start by identifying what I want the image to be about—a spectacular view, a specific subject, a collection of subjects, beautiful light, and so on (or some combination of these)—then identify the best way to guide my viewers’ eyes there.
With the “about” decided, I survey the scene to identify elements that possess “visual weight”—objects or features that pull the eye like gravity pulls celestial objects. Qualities that give an object visual weight include size, brightness, contrast, color, position in the scene, or any other characteristic that makes something stand out from its surroundings.
The value (in an image) of an object possessing visual weight isn’t necessarily a function of the object’s aesthetic appeal. A very ordinary feature in the right position qualifies as a desirable VW feature when it serves a scene’s most striking element, either by creating a balance point, by completing a virtual line that connects to the primary subject or other VW object, or through some combination of these. On the other hand, a beautiful but poorly positioned feature could actually work against the scene’s primary subject.
Undesirable objects with visual weight draw the eye away from the focal point of the image. I try to compose these out of the scene, or deemphasize them in the composition—for example, putting them in a less prominent location, burying them in the foreground of a silhouette, or deemphasizing them with soft focus. When none of those options are available, burning (darkening) the offending object in processing often works wonders.
Viewers subconsciously draw virtual lines connecting objects with visual weight. Desirable objects with visual weight can be “connected” virtually by creating appealing positional relationships. I’m especially drawn to diagonal connections between these objects, and look to create them whenever possible.
Another frequently overlooked aspect of “pretty scene” pictures that fall short of their potential is distracting elements that pull the eye from whatever the scene is supposed to be about. In addition to, and often even worse than, misplaced visual weight objects in the main part of the scene, is messy borders. Since the visual weight of objects seems to increase on the border of the frame (this is just a personal observation that feel pretty strongly about), I always strive for clean borders by avoiding cutting things off (most of it in the frame, but just a little piece missing), or having them jut in (most of an object outside the frame, with just a small piece visible).
But since we’re photographing the natural world, scenes usually don’t cooperate, often making it impossible to avoid objects cut off or jutting in at the edges of the frame. In that case, it’s most important to make cutting your border objects a conscious choice, rather than not checking at all and placing the border wherever it happens to fall while you concentrate on the main part of the scene. This border awareness includes clouds at the top of the frame, which I find to be an especially overlooked flaw that’s usually a pretty easy to fix—if you make the effort to look.
In the Half Dome image above, in a very general sense this was the first composition I saw when I arrived here. But not wanting to settle for the (undeniably) pretty scene, I went to work finding my about and visual weight objects and overall framing. Half Dome was the obvious “about” choice, but I also wanted to feature the snow and morning light in the clouds.
The first thing I noticed when I framed up something that featured these elements while composing wide enough to include the river too, was the log jutting in on the lower left. Eliminating it completely also eliminated the best part of the river, so I went with Plan B: composing wide enough to make the log one of my VW objects, taking it off the border and far enough into the scene to create a nice diagonal connection with Half Dome.
Including all of the rock (from which the log emerges) meant going much wider than I wanted to, and introduced other undesirable elements, like other workshop students (I know what you’re thinking: no, the students were not undesirable, I just didn’t want them in my frame). But I got enough of the rock so it didn’t appear to be an afterthought, making sure not cut off that small, horizontal patch of snow beneath the (unavoidable) snowy cap.
The right side of my frame was determined by a protruding branch that I didn’t want to include. With the left and right setting my focal length, I just had to aim my camera up and down until I found the right combination of foreground snow below, and translucent clouds above.
Assembly Required
Click any image to scroll through the gallery LARGE

")

, Yosemite")


")


Who’s Counting?
Posted on April 18, 2026
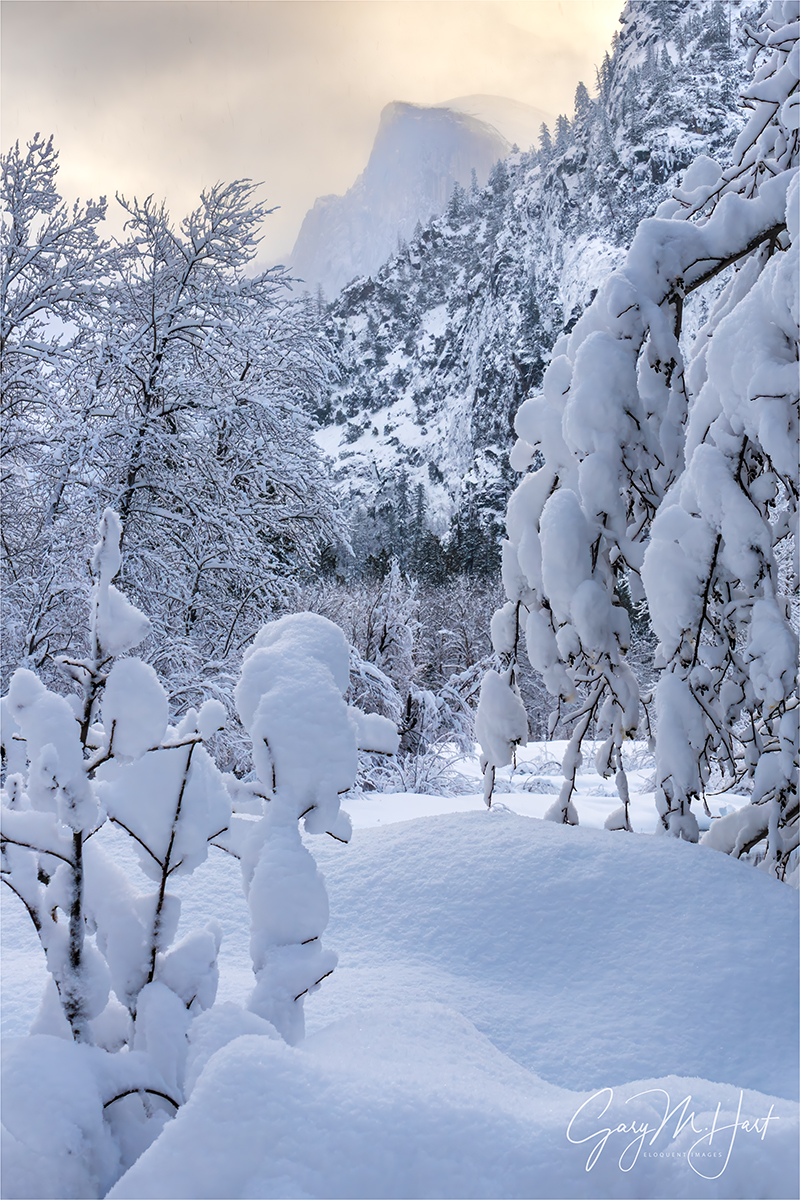
Winter Morning, Half Dome and Clouds, Yosemite
Sony a7R V
Sony 24-105 G
1/25 seconds
F/11
ISO 100
I get a lot of questions during a photo workshop, but about 80% of them are some version of, “Should I do it this way or that way?”:
- “Should I shoot this with a wide or telephoto lens?”
- “Should I shoot this horizontal or vertical?”
- “Should I include that rock or leave it out?”
- “Should I polarize this or not?”
- “Should I freeze or blur the waterfall?”
- “Should I…?”
Some photographers are so paralyzed by these choices, they choose to do nothing rather than make a “mistake.” They forget that, as with every other artistic endeavor, in photography there’s no universal right or wrong, no consensus on the best way to render a scene.
Other photographers are inhibited by the subconscious need to conserve resources at all costs. That need to conservative probably started way back in our childhood, when we were constantly warned not to waste: clean your plate, turn off the light when you leave the room, don’t leave the water running, and a host of other waste-related proclamations are a right of passage for American (and likely everywhere else) youth.
Adding to our formative-years’ “don’t waste” anxiety, when film shooters graduated to our first “grown-up” camera (one that didn’t involve a film cartridge and pop-on flash cube—I’m looking at you, Kodak 104), after being rendered destitute by our complex new equipment, we were suddenly punched in the wallet again (and again, and again…) by the perpetual expense of film and processing. It’s no wonder we grew accustomed to sparing every frame, an inclination that for most became ingrained.
Conserving resources is certainly important, but that parsimony shouldn’t come at the expense of your photographic success. In the immortal words of Michael Scott:
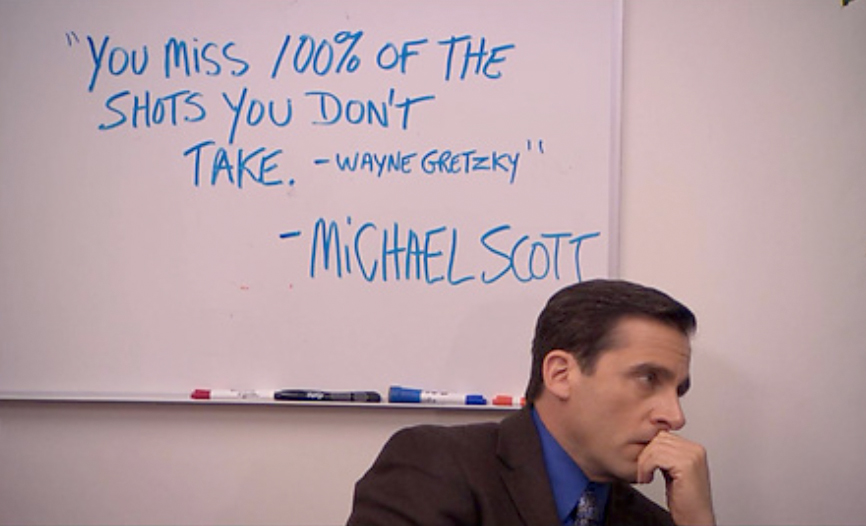
Still not convinced? Here’s a paradigm bending insight that might help: While every click with a film camera costs money (film and processing), every click with a digital camera increases the return on your investment. That’s right: each time you take a picture with your digital camera, your cost per click drops. So click freely and stop counting—there’s no limit to the number of pictures it takes to get to the one you’re hoping for.
I’m not suggesting that you put your camera in continuous shooting mode and fire away*. But I am encouraging you to shoot liberally, the more the better—albeit with a purpose. And there’s no law saying that purpose must be a successful image.
A shutter click can just be a way to get in the mood, or to determine whether there really is a shot there (I don’t always know whether a scene is worth shooting until I’ve clicked a couple of frames), or simply an experiment.
Following that mindset, I frequently play “what-if?” games with my camera: “What if I do this?” I’d be mortified if people saw some of these what-if? images, but I do usually learn something from even the worst of them. Often that learning is simply what not to do, because a failure is at least a way to understand why something didn’t work, and often leads to ideas for how it might work the next time.
Even when a scene is so beautiful that a successful picture feels inevitable, I always consider my first click a draft: rather than a completed masterpiece, my goal for the first few clicks of a scene is to establish a foundation that I can incrementally improve until I’m satisfied the finished product is as “perfect” as it can be.
When I’m not sure of the best way to handle a scene, I shoot it multiple ways, deferring the decision until I view the images on a large monitor. Not only using a variety of compositions, but a variety of depth, exposure, and motion effects as well.
And never settle for just one excellent image. When photographing a scene that truly thrills you, slow down and shoot it with as much variety as possible: horizontal/vertical, wide/tight, as well as multiple foregrounds, backgrounds, and framing—as many variations as you can come up with. I mean, you never know when a magazine might want to put a vertical version of that horizontal Half Dome in the snow image on their cover—even if it’s not obvious at first, most great horizontal scenes have great vertical scenes as well (and vice-versa).
Which brings me to today’s image of, not coincidentally, Half Dome in the snow.
This was the first morning of the workshop formerly known as “Yosemite Horsetail Fall.” Click the images below to read more (I’ll still be here when you get back):

Circling Yosemite Valley, we feasted our eyes on the new snow covering every exposed surface. My job was to find the best views to put with all that still pristine snow. Beauty surrounded us, but with filling the bowl of Yosemite Valley, views beyond 100 yards had disappeared.
Approaching Sentinel Bridge, I glimpsed Half Dome peeking through the clouds; my instant inclination was to pull into the Sentinel Bridge parking lot, but we found the lot covered with a foot of overnight snow still waiting for the day’s first snowplow. I was pretty sure my Outback could handle it, but I was less confident about the other two cars in our caravan. So I crossed my fingers that Half Dome would hang in a little longer and continued toward another favorite, and less known, view of Half Dome.
We found the parking at this next spot, about a mile beyond Yosemite Lodge, a little less problematic. The downside here was that getting to the view requires a (roughly) quarter mile “hike” on a flat and normally well-worn riverside trail. But of course that trail was now obscured by at least a foot of fresh powder. Since I was the only one who knew where we were going, it fell to me to blaze a new trail. Concerned about missing the window to photograph Half Dome before it disappeared again, I quickly grabbed my camera bag and headed through the forest as fast as the snow allowed, my group in tow.
At first the going was pretty manageable, but whenever we exited the evergreen canopy into a more open stretch, the powder doubled and I sunk in above my knees with each step. Normally when leading a group to a new spot, I need to take care not to walk too fast, lest those not familiar with the route lose track of me. But battling through the snow slowed me enough to allow everyone drafting behind me to keep up—and even if someone did fall a little behind, they’d have no problem following the path cut by the rest of us.
Needless to say, bundled for winter and hurrying as quickly as I could, I worked up a real sweat in that quarter mile. The rest of the group wasn’t far behind, and we shared the thrill of the workshop’s first peek at Half Dome, never a certainty in stormy weather. We photographed here for nearly an hour, watching Half Dome disappear and emerge from the clouds many times, creating new opportunities every minute, and also a constant reminder Half Dome could disappear for good any second.
To my eye, the obvious composition was horizontal, with a foreground that included the river (with a partial reflection) and lots of snow-draped trees and rocks. But after working on many versions of that scene, including some vertical versions, I went exploring to see what else I could find.
Less than 20 feet from my original spot, I found this view of Half Dome framed by snowy trees and the graceful curves of drifting snow. I tried many versions of this scene as well, both horizontal and vertical, before landing on this one that was a little tighter than most of the other frames I’d come up with.
In the dozens of photos I came away with are probably more clunkers than classics, but I don’t care. And honestly, this was one of those extra frames that I forced myself to shoot because the scene was too nice to quit, not because I saw something special—it wasn’t until I reviewed my images on my big monitor at home that I realized it was an image worth processing and sharing. (And I know there are probably more keepers in this morning’s folder, just waiting for me to uncover.)
Photography often requires instantaneous choices, and Nature doesn’t usually wait until you’re ready. Just because you’re not sure what you’ll end up with, or don’t have a pro photographer whispering guidance and reassurance in your ear, doesn’t mean you should stop shooting. Even if you don’t see any winners at the time, at the very least you’ll learn something—and who knows, you might just surprise yourself later.
* True story: I once had a woman in a workshop put her Nikon D4 in continuous shooting mode, hold the camera in front of her, depress the shutter button, and spin. When I asked her what in the world she was doing, she replied, “It’s Yosemite—there’s bound to be something good in there.”
Workshop Schedule || Purchase Prints || Instagram
Half Dome Views
Click any image to scroll through the gallery LARGE


, Yosemite")


Yosemite at its Best
Posted on April 5, 2026
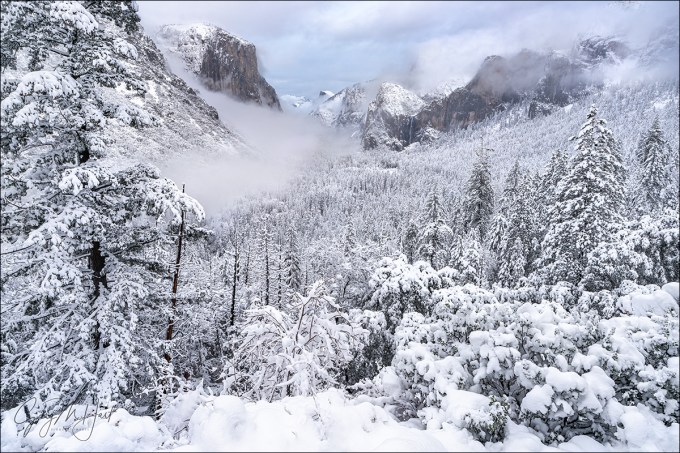
White Gold, El Capitan and the Three Brothers, Yosemite
Sony α1
Sony 16-35 GM II
1/100 second
F/10
ISO 100
If anyone had told me that my annual Yosemite Horsetail Fall photo workshop would get no opportunity to photograph the molten sunset light on El Capitan; that many of my go-to locations, including Tunnel View, would be inaccessible for the entire workshop; that Half Dome would be shrouded in clouds for all but a few hours; that the park would actually shut down the afternoon before our final day, I’d have started preparing to placate a lot of disappointed photographers. Instead, though all of that did in fact come true, this group got to see Yosemite at its absolute best.
Rather than the clear skies and sunset fire every Horsetail chaser prays for, the day before the workshop a series of cold winter storms descended on Yosemite, obscuring the sun and delivering more snow than I’ve ever had to deal with in 20 years of Yosemite photo workshops. In fact, I can’t think of any workshop at any location, including Iceland and New Zealand in winter, that had this much snow.
With all this white stuff came all the inconveniences you might imagine (and some you might not): challenging driving, difficult (to impossible) access to many photo sites, chilly photography conditions, wet clothes and gear, and vanishing Yosemite icons. Not only were some of my favorite views inaccessible, the views that were accessible aren’t much use when the featured monolith or waterfall isn’t visible.
Some of my workshops locations are so spread out, I don’t have a lot of location timing flexibility. But Yosemite Valley’s compactness enables me to change plans on the fly. I start each workshop with a mental list of must-see locations, plus a list of secondary and tertiary locations to augment the prime spots as schedule permits—exactly when we get to these locations depends on the conditions. But all this workshop’s snow really forced me to dig deep into my (lifetime’s worth) bag of location tricks.
One of my favorite locations to take my groups is a riverside view of El Capitan that has been unofficially, and affectionately, dubbed “Tahiti Beach.” Though no secret to photographers, being a little bit off the road with no obvious trail to the river makes Tahiti Beach relatively free of tourists. But if you’ve been in one of my Yosemite workshops, you’ve been here. Not just a great El Capitan view, it’s hands-down the best Yosemite Valley view of the Three Brothers. And if that’s not enough, Tahiti Beach’s proximity to an especially flat stretch of the Merced River means great reflections. (Continued below)
“Tahiti Beach”


Throughout Yosemite, the best Merced River reflections are possible when the spring snowmelt has subsided and the rushing Merced has slowed to a more leisurely pace—that’s usually from mid-summer through early the following spring. That’s the case at Tahiti Beach too, but if you’re especially lucky, you’ll find yourself here at peak spring runoff following a wet winter, usually sometime in May, when the river rises enough to leave its banks and flood the meadow and form a shallow, perfectly still reflective pool.
Tahiti Beach can be very nice in late afternoon light, but I’m especially fond of the morning’s first sun on El Capitan, and the opportunity to add a reflection makes this one of my favorite spots for that. In a normal Yosemite workshop, conditions are predictable enough that I can get my group to each of my prime locations in the best conditions, and Tahiti beach is often on the menu for our second morning.
This year, a look at the forecast was enough to know that the conventional location rules would be completely different for this workshop, and I emphasized in the orientation that we’d need to be quick on our feet to adjust to rapidly changing conditions. That reality became immediately clear from the instant we set out for our first shoot, and was further reinforced the following morning, when my plans were immediately thwarted by closed roads and low clouds at several of my first-choice locations.
Refusing to be defeated, we slowly circled the valley, waiting for the inevitable clearing. I eventually took everyone on a short but sweet hike to an off-the-beaten-path spot where we enjoyed a brief but beautiful view of Half Dome before the clouds lowered again. Leaving there in very limited visibility, my plan was to circle back to the Lower Yosemite Fall trail, hoping that we might be able to get close enough to the fall to photograph it through the low clouds. I was afraid that this driving and waiting for openings was frustrating my group, but took heart in their unbridled awe for the beauty surrounding us.
Most of Yosemite Valley is navigated via a pair one-way roads: eastbound Southside Drive for those entering the park; westbound Northside Drive for those exiting; and a mid-point crossover to shortcut the loop. As we navigated the crossover and headed back east on Southside Drive, I saw hints that El Capitan might soon emerge and made a quick decision to pull over at the parking area for Tahiti Beach. Tahiti Beach wasn’t part of my plan for this morning, but I knew there were no more good views of El Capitan beyond here.
I parked and exited my car, and told everyone to stay put while I surveyed the scene. Though access to Tahiti Beach isn’t treacherous, even in good conditions it can be a little problematic for people with mobility problems—fortunately, multiple routes down to the river that range from short-but-steep to long-but-gradual allow me to offer my group multiple choice. But this morning I also had to factor in all this fresh snow that meant whichever route we chose, we’d be blazing a new trail.
About the time I decided I probably could get everyone down to the river, El Capitan and the Three Brothers popped out of the clouds. Though this roadside parking area provides nice views of El Capitan and the Three Brothers, its foreground—a scrubby meadow filled with similarly scrubby shrubs and small trees—can’t compete with the reflections possible at the river. But the snow had erased all of the negatives, replacing it with an undulating carpet of pristine white. Since there was no telling how long the increasingly spectacular El Capitan and Three Brothers view would last, I made a snap decision to not attempt to get to the river and just shoot from here.
Within minutes a shaft of warm sunlight split the swirling clouds to spotlight El Capitan, and I knew I’d made the right call. That was further validated when the direct light disappeared for good within a few minutes. Fortunately, the clouds stayed open long enough for everyone to get a wonderful assortment of beautiful and truly unique images of two Yosemite icons.
This workshop was filled with stories like this: frustrating disappearances, surprise appearances, sudden adjustments to plans, and ubiquitous beauty. Through it all, my group responded with euphoric enthusiasm, ignoring minor discomfort and inconvenience. Despite ending a day early, we all came away with memory cards filled with one-of-a-kind Yosemite images—no small feat in one of the most photographed places on Earth.
Workshop Schedule || Purchase Prints || Instagram
The Many Faces of El Capitan
Click any image to scroll through the gallery LARGE


, Yosemite")


Distilling the Essence
Posted on April 2, 2023

Frozen, Skógafoss, Iceland
Sony a7R V
Sony 100-400 GM
ISO 100
f/10
1/13 second
The art of subtraction
Presented with a complex world, the nature photographer’s job is to identify a scene’s visually interesting elements and figure out how to use them in an image. While most photographers have no problem seeing what to include in their images, many struggle with what to leave out. But the best pictures usually work at least as much for what’s not in them as for what’s in them.
That’s because, as much as we seek beauty to add to our images, photography is ultimately an art of subtraction. Our ability to ruthlessly subtract elements that, despite their inherent visual appeal, don’t serve the image is an important skill that’s worth cultivating.
When I look back at old images that somehow ended up pleasing me less than the scene excited me when I photographed it (we’ve all been there, right?), I see now that often the problem was that I included too much. The product of my failure was an image with visual busyness that distracted from the main point, or that completely lacked a point, and confused viewers: “What am I supposed to be looking at here?”
As my photography evolved, I started identifying ways to distill complex scenes. One approach is through careful use of exposure variables to manage what I call photography’s “creative triad”: motion, depth, and light—motion blur to smooth turbulent or choppy water; focus blur to soften background and foreground distractions; and silhouette or high key exposure to erase unwanted elements and simplify the scene to just color and shape.
But even before working the creative triad, distilling a scene to its essence requires ruthless (there’s that word again) cropping—simply knowing what to put in, what to leave out, and the confidence (courage) to do it. Start by identifying the elements in the scene that draw the eye. Think in terms of implicit connecting lines that define their relationship to each other. Move around—forward/backward, left/right, up/down—until your prime elements feel organized.
If you’re still not feeling a connection between all of your prime elements, it’s time to start eliminating things—you can always return to that beautiful subject you composed out and feature it in another composition. And if you’re still not finding visual coherence, don’t be afraid to just click an image, stand back and evaluate it on your camera’s LCD screen, and adjust. Then repeat as necessary.
Try this
One simple way to exercise this skill is with the Crop tool in Photoshop or Lightroom. Start with any image (your own or someone else’s—the goal is to train your eye, not to create an image you’ll use), open it in your image processing software of choice (I use Photoshop for this exercise), set the Crop tool to 2/3 aspect ratio (or whatever your camera uses), and see how many new images you can find in the original. Whether the source image was horizontal or vertical, use both orientations of the Crop tool. Again, this is an exercise to train your eye, not to create a usable image, but I’m confident that you’ll find this new vision translates to your viewfinder when you’re in the field.
You can do the same thing on location with a telephoto lens. After you feel like you’ve exhausted all of a scene’s wide options, remove the camera from the tripod, increase your focal length by zooming tighter or switching to a longer lens, and slowly pan with your eye to the viewfinder. Closely monitor your reaction to what you see and honor any urge to stop. The goal isn’t to forgo wide angle compositions, it’s to help identify the scene’s essence, those visual aspects of the scene that matter most. I think you’ll be surprised by what you find (what your eyes originally missed).
For example

Winter Rainbow, Skógafoss, Iceland
Too often we get so caught up in a scene’s grandeur and miss the details that make it special. Most nature photographers when presented with a grand scene go straight to a wide angle lens—a perfectly valid way to start. The problem is, once we feel like we’ve nailed the wide shot, we move on—even if not physically, then at least mentally.
After a long drive from Iceland’s Snæfellsnes Peninsula, still basking in the thrill of the previous night’s aurora show (and oblivious to the show we’d enjoy that night), the Iceland workshop group wasn’t really thinking about much but getting comfortable at our hotel in Vik. But anyone arriving at Skógafoss near Iceland’s South Coast on this January afternoon couldn’t help being excited by the scene’s beauty.
Always an impressive waterfall for the massive amounts of water it dispenses, recent extreme cold (even for Iceland) had turned the abundant mist saturating the surrounding rocks into an icicle convention. But the real eye candy that grabbed everyone’s instant attention was the rainbow ebbing and flowing with the wind above the fall—one second it was there, the next it was gone.
Reinvigorated, we all charged from the bus and “rushed” as fast as our crampons could navigate the frozen path. Wanting to capture all this scene’s beauty, I instantly reached for my Sony α1 which was preloaded with my Sony 16 – 35 f/2.8 GM lens. Each time the rainbow appeared I clicked like crazy, trying a variety of wide compositions and continuing until shadow overtook the fall and the rainbow disappeared for good.
It would have been so easy to be satisfied with my bounty and retreat to the comfortable warmth of the bus. But before leaving I took a few seconds to scrutinize the surrounding ice more closely. And the longer I looked, the more I realized that I was seeing something truly special. I grabbed my Sony a7R V, attached my Sony 100-400 GM lens, and started panning the scene, finally stopping on this beautiful natural ice sculpture.
After attaching my camera to my tripod, I spent the next 20 minutes repositioning, then deliberately clicking and refining, until I was satisfied that I’d found the right location and framing. In the wider image with the rainbow, this section of ice was still illuminated by low, warm sunlight that created deep shadows and bright highlights. But by the time I landed on this composition, the sunlight was gone and all the ice was bathed in cool, soft shadow with minimal contrast.
This is another one of those simple images that probably won’t generate a swarm of social media attention, but it makes me happy because it taps one of the prime reasons I’m a photographer: to reveal Nature’s exquisite intricacies that are often overlooked in favor of more in-your-face beauty.
Workshop Schedule || Purchase Prints || Instagram
Essence Distilled
Click any image to scroll through the gallery LARGE


, California")


Perfect Timing
Posted on March 14, 2023

Big Moon, Mt. Williamson, California
Sony α1
Sony 200-600 G
Sony 2x teleconverter
ISO 800
f/13
1/500 second
In the Alabama Hills to photograph sunrise in neck-craning proximity to the Sierra Crest, I knew precisely what time, on this date, the sun’s first rays would color the towering granite, and exactly when a 98% moon would would disappear behind the left flank of Mt. Williamson, California’s second highest peak.
Clocks and calendars enable us to time some aspects of our lives, like sunrises and moonsets, to within microseconds. But when I scheduled this sunrise moonset more than a year ago, I had no idea whether the sky would be clear, perhaps feature a few clouds that would catch the sunrise hues, or be completely filled with overcast that would block sunlight and hide the moon. I didn’t know how much snow would drape the peaks, or whether the peaks even would be visible at all.
Clocks and calendars are essential, but as a self-employed landscape photographer, I’m beholden to far more fundamental constructs than the bustling majority is. I work when there’s work to be worked, and play when (fingers crossed) there’s play to be played. The business side of my life sometimes requires a clock and calendar, but the actual photography part is governed by fundamental laws of nature that transcend the rest of the world’s clocks and calendars.
The irrelevance of conventional time measurement is never more clear than immediately following a time change. On the second Sunday of each March, when “normal” people moan about lost sleep and having to rise an hour earlier, the sun thumbs its nose at Daylight Saving Time and rises a mere minute (or so) earlier than it did the day before. So do I. And on the first Sunday of November, as others bask in their extra hour of sleep, I’ll get to sleep an entire minute longer. Yippee.
The immutable natural laws that are the foundation of our clocks and calendars, that keep the world on schedule and enable us to precisely predict events like sunrise/sunset, the moon’s phase and position, as well as countless other celestial phenomena, are also solely responsible for the uncertainty that torments the lives of landscape photographers. While I can’t tell you what thrills me more, the impeccably punctual appearance (or disappearance) of a full moon, or the unpredictable explosion of a lightning bolt, I find it ironic that the precision of a moonset and the (apparent) randomness of a lightning strike are ultimately the product of the same celestial choreography.
Earth’s rotation on its inclined axis and revolution about the Sun, the Moon’s monthly journey around Earth, are are timed to microseconds. But this celestial dance also drives the atmospheric and tidal machinations that generate weather, stir oceans, and make every day unique and unpredictable.
This year the mercurial photography gods smiled on me and my Death Valley workshop group. For our 3 days in Death Valley, instead of the blank blue sky that often greets me here, we had a wonderful mix of clouds and sky—enough clouds to make the sky interesting, but enough sky to allow the sun to color the clouds at sunrise and sunset.
On the workshop’s penultimate day we drove to Lone Pine to wrap up with a sunset and sunrise shoot in the Alabama Hills. The highlight of this trip is always the Alabama Hills sunrise that I try to accent with the moon, just a day past full, setting behind the Sierra Crest. But this is winter, and these are the Sierra Mountains, so success is far from guaranteed.
A few years ago I drove to Yosemite on New Year’s Eve (because what else is there to do on New Year’s Eve?) to photograph a full moon rising between El Capitan and Half Dome. After a successful shoot (nearly thwarted by clouds), I hopped in my car and made the 6 1/2 hour drive to Lone Pine to photograph the moon setting behind Mt. Whitney.
I’d picked out a location along Highway 136 where I could align the moon and Mt. Whitney, and far enough back to allow an extreme telephoto big moon while still including all of Whitney. I went to bed really looking forward to this opportunity to get an image I’d thought about for years, and woke to clouds that completely obscured the moon and Sierra Crest. With nothing better to do, I still drove out to my spot, and even caught a very brief glimpse of the moon about 1/2 hour before zero-hour, but ended up not clicking a single frame. Such are the travails of anyone who pins their hopes on Nature’s fickle whims.
My plan this morning was far less grand. Since I was leading a workshop group, the goal was to get everyone in place for the best possible photography, not to assuage my own failed moonset wounds. And the good fortune that blessed us in Death Valley followed us to Lone Pine. (You can read more about this morning here.) In addition to a clear view of the moon and mountains, I was especially grateful to find the entire Sierra Crest frosted top-to-bottom with snow.
My photography day began in near darkness with my Sony a7R V and Sony 100-400 GM lens, photographing the descending moon throughout the morning’s many stages of advancing light. My starting focal length was 100mm, wide enough to include some of the Alabama Hills, then went progressively tighter as the moon dropped.
My favorite big moon images don’t usually happen until the moon is within a moon-width of the horizon, but I like to give myself a little wiggle room to get the composition balanced and focus just right. So when the moon got about 3 diameters from Mt. Williamson, I turned to my Sony α1, which was standing by with my Sony 200-600 G lens and Sony 2X Teleconverter already attached. And while 3 moon diameters might sound like a reasonable cushion, if you want to appreciate the speed at which the moon transits the sky, try pointing 1200mm at it and keeping it in your frame.
I love my Really Right Stuff Ascend tripod, but because the camera-shake margin of error is microscopic at 1200mm, I had the α1 pre-mounted on my (much more robust) RRS 24L Tripod with the RRS BH-55 ball head (carrying 2 tripods is a luxury I allow myself when I don’t have to fly to my location). I bumped to ISO 800 for a 1/500 second shutter speed, and switched from my standard 2-second timer (beep, beep, beep, BEEEEEEP—the Sony mating call) to a 5-second timer (I’m not crazy about any of Sony’s remote options, wired or wireless), to give the whole setup plenty of time to settle down—probably overkill, but I was taking no chances.
With my composition ready and focused, I just let the moon slide through my frame and started clicking. The alpenglow on Mt. Williamson was just about peaking when to moon first touched it. Perfect timing.
Workshop Schedule || Purchase Prints|| Instagram
More Massive Moons
Click any image to scroll through the gallery LARGE


")

Transcending the Trophy
Posted on February 7, 2023
 Wonderland, Golden Circle, Iceland
Sony a7R V
Sony 12-24 GM
1/40 second
F/11
ISO 200
With the digital-fueled photography renaissance, it seems that the number of trophy destinations has grown proportionally. For example, once no more than an anonymous trickle on El Capitan’s southeast flank, Horsetail Fall now draws thousands of photographers to Yosemite at sunset each February. And long gone are the days of a peaceful midday walk in the quiet coolness of Antelope Canyon.
Because I’ve photographed all of these scenes, and no doubt will continue doing so, I completely understand the urge to bag the trophy shot. They’re trophies because they’re beautiful, and (usually) relatively easy to access. But what puzzles me is why so many photographers pursue trophies to the exclusion of opportunities to create something uniquely their own. To me, the greatest joy of photography isn’t duplicating what others have already done, it’s the search for something new—especially at frequently photographed locations.
That said, I can’t deny that the opportunity to capture a trophy draws many photographers to my workshops. But while I do love helping my workshop students land their trophy, my job doesn’t end there—a significant part of my responsibility is challenging them to not make the trophy shot their goal, make it their starting point. Chances are, I tell them, if a shot is special enough to achieve trophy status, there are lots of other special views and subjects nearby.
Transcending the trophy is a mindset. Once you’ve bagged your trophy, see if you can identify a unique foreground or background, or approach the scene from a different angle. And if the standard view is horizontal, look for something vertical; if it’s wide, try a telephoto—and vice-versa.
And don’t forget that there might be great stuff happening behind you—you’ll never know if you don’t turn around. I try to make a point of checking behind me, but sometimes I need a reminder. For example…
Don Smith and I wrapped up the last day of this year’s back-to-back Iceland photo workshops with an afternoon in the Golden Circle. A recent storm had dumped loads of fresh snow everywhere, a great way to wrap up two fantastic workshops. After spending a couple of hours at massive Gullfoss waterfall, we took the group to Strokkur geyser for our final sunset.
Strokkur is a towering geyser in a beautiful setting. Erupting up to 125 feet every 5 to 10 minutes, Strokkur’s frequency allows many do-overs if you don’t get it right the first (or second, or…) time. This year fast-changing clouds and fresh snow added a new visual dimension I was especially excited to take advantage of.
I think the best shot here is getting the geyser backlit by the setting sun, so I positioned myself accordingly and waited, adjusting my position and composition after each eruption. As the sun set and I prepared for the next eruption, I noticed that our guide Albert Dros was on the other side of the geyser, pointing the exact opposite direction my camera pointed. Normally when I see another photographer not taking what I think is the best shot, I don’t think much of it. But since Albert is such a fantastic photographer, I glanced over my shoulder to see what I was missing. Yikes.
I instantly forgot the geyser, grabbed my gear, and “raced” toward the snow-glazed trees that were now framed by electric pink clouds, and garnished with a dollop of moon. Much to my frustration, the trail was completely coated with ice—since I’d decided to forego the crampons, to avoid falling I could only move about as fast as I do in those dreams when I’m trying to run for my life in a normal speed world, but find I can only move in slow motion (I’m not the only one who has those dreams, right?).
Fortunately, Iceland twilight is slower than any slow-motion dream, and I covered the 50 feet over to this scene with plenty of time to work the composition. I already had my Sony 12 – 24 f/2.8 GM lens mounted on my Sony a7R V, which turned out to be perfect for emphasizing the snowy scene in my immediate foreground, while still maximizing the colorful clouds. Of course this shrunk the moon to almost microscopic proportions—some may disagree, but I kind of love the small moon as a delicate accent to this already magic scene.
Workshop Schedule || Purchase Prints || Instagram
Transcending the Trophy


Playing the Cards You’re Dealt
Posted on January 9, 2023

Winter Veil, Half Dome, Yosemite
Sony a7R IV
Sony 24-105 G
8 seconds
F/16
ISO 160
In family hearts games when I was a kid, I loved to “shoot the moon” (tremendous reward for success, extreme cost for failure). But simply wanting to shoot the moon wasn’t enough to make it happen, and I didn’t really start winning until I learned to separate my desires from the reality in my hand—I know now to evaluate my cards when they’re dealt, set a strategy, then adjust my strategy as the game unfolds. It’s that way for most card games, and it’s that way with photography.
Given nature’s fickle whims, I try not to lock in on something I want so much that I miss what I can have. I got my latest reminder last month in Yosemite, when I really, really wanted to shoot the moon. It was the workshop’s first sunset, and I knew exactly where I wanted to be to start my workshop group off with a beautiful full (-ish) moon rising above Half Dome at sunset. I’ve written about the weather related moon frustrations in this workshop in other recent posts, but this is where it all began.
This evening’s frustrations were compounded by the fact that not only was the moon a no-show, for most of the our time there it looked as if Half Dome would be joining it. So when we arrived out here, I had to reassure everyone that there really is a view of Half Dome right up there, and it’s really beautiful, I swear.
Because I’d told them before starting the short hike out to this spot that our target would be the moon and Half Dome, when neither appeared, it would have been easy to simply stand around and wait for something to change. So I tried to point out some of the other, more subtle opportunities available.
I suggested using the swirling clouds, bare trees, and pristine snow to convey a frigid wintry atmosphere. And the reflection, while not as dramatic as it can be here, nevertheless nicely complimented the scene, while a long exposure, in addition to smoothing the reflection, could stretch the white dollops of drifting foam into white steaks that reveal the Merced River’s motion.
I visit this spot so much that I often just leave my camera in the bag here, but as I pointed out these subtle features to my group, I started talking myself into the opportunity to photograph something new. So, partly to demonstrate to others and partly to actually capture something of my own, I pulled out my Sony a7RIV and Sony 24-105 and went to work.
While the scene was dark enough to get exposures of a second or so without a neutral density filter, I wanted something a little longer and added a Breakthrough 6-stop Dark Polarizer. I started with horizontal frames that maximized the foreground reflection and middle-ground wintry scene, but when Half Dome’s outline started to materialize through the clouds(a harbinger of good things to come?), I changed my emphasis. And because I’d already been working the scene’s other elements, it was a simple step to start incorporating Half Dome into my compositions.
Half Dome never appeared completely, but for a few minutes it did peek out enough to be recognizable. In fact, the ethereal feel the clouds create are a big part of this image’s appeal for me. This was an 8-second exposure at ISO 160. I wish I could say I chose ISO 160 because 200 was too fast and 125 was too slow, but I’m guessing that my intent was to use ISO 50 for the longest possible shutter speed, but while fumbling with my camera wearing bulky gloves (it was as cold as it looks), I accidentally turned the ISO dial.
This evening is a good reminder that consistently successful nature photography not only requires the ability to anticipate conditions and establish a plan, but also to maintain enough flexibility to adjust when things don’t play out as expected. No shoot is a guaranteed success, and sometimes nature’s cards just don’t fall right. But the more options you have, and the more you can read and respond to conditions, the more winners you’ll come home with.
Workshop Schedule || Purchase Prints || Instagram
Variations on a Scene: Different Takes on the Same Location
Click any image to scroll through the gallery LARGE


The Third Time’s the Charm
Posted on December 12, 2022

Moonrise and Clouds, Tunnel View, Yosemite
Sony a7R IV
Sony 24-105 G
1/4 second
F/11
ISO 100
Large or small, crescent or full, I love photographing the moon rising above Yosemite. I truly believe it’s one of the most beautiful sights on Earth. The moon’s alignment with Yosemite Valley changes from month-to-month, with my favorite full moon alignment coming in the short-day months near the winter solstice when it rises between El Capitan and Half Dome (from Tunnel View), but I have a plan for each season. Some years the position and timing are better than others, but when everything clicks, I do my best to be there. And if I’m going to be there anyway, why not schedule a workshop? (He asked rhetorically.)
Strike one, strike two
For last week’s Yosemite Winter Moon photo workshop, I’d planned three moonrises, from three increasingly distant vantage points. On our first night, despite the cloudy vestiges of a departing storm, I got the group in position for a moonrise at a favorite Merced River sunset spot, hoping the promised clearing would arrive before the moon. The main feature here is Half Dome, but the clouds had other ideas. Though they eventually relented just enough to reveal Half Dome’s ethereal outline and prevent the shoot from being a complete loss, the moon never appeared. Strike one.
With a better forecast for the second evening, we headed into the park that afternoon with high hopes. But as the sun dropped, the clouds thickened to the point where not only did I fear we’d miss the moon again, I was pretty sure Half Dome would be a no-show as well. So I completely aborted the moonrise shoot and opted for sunset at Valley View, where El Capitan and freshly recharged Bridalveil Fall were on their best behavior. The result was a spectacular sunset that made me look like a genius (phew), but still no moon. Strike two.
Revisiting nature photography’s 3 P’s
Because the right mindset is such an important part of successful photography, many years ago I identified three essential qualities that I call the 3 P’s of Nature Photography:
- Preparation is (among many things) your foundation; it’s the research you do that gets you in the right place at the right time, the mastery of your camera and exposure variables that allow you to wring the most from the moment, and the creative vision, refined by years of experience, and conscious out-side-the-box thinking.
- Persistence is patience with a dash of stubbornness. It’s what keeps you going back when the first, second, or hundredth attempt has been thwarted by unexpected light, weather, or a host of other frustrations, and keeps you out there long after any sane person would have given up.
- Pain is the willingness to suffer for your craft. I’m not suggesting that you risk your life for the sake of a coveted capture, but you do need to be able to ignore the tug of a warm fire, full stomach, sound sleep, and dry clothes, because the unfortunate truth is that the best photographs almost always seem to happen when most of the world would rather be inside.
Most successful images require one or more of these three essential elements. Chasing the moon last week in frigid, sometimes wet, Yosemite got me thinking about the 3 P’s again, and how their application led to a (spoiler alert) success on our third and final moonrise opportunity.
Meanwhile…
As we drove into the Tunnel View parking lot, about 45 minutes before sunset, our chances for the moon looked excellent. There were a few clouds overhead, with more hanging low on the eastern horizon behind Half Dome, but nothing too ominous. My preparation (there’s one) had told me that the moon this evening would appear from behind El Capitan’s diagonal shoulder, about halfway up the face, and that area of the sky was perfectly clear. So far so good.
Organizing my group along the Tunnel View wall, I pointed out where the moon would appear, and reminded them of the previously covered exposure technique for capturing a daylight-bright moon above a darkening landscape. Eventually I set up my own tripod and Sony a7R IV, with my Sony 200 – 600 G lens with the 2X Teleconverter pointed at ground 0. In my pocket was my Sony 24 – 105 G lens, which I planned to switch to as soon as the moon separated from El Capitan. Then we all just bundled up against the elements and enjoyed the view, waiting for the real show…
But, as if summoned by some sinister force determined to frustrate me, the seemingly benign clouds hailed reinforcements that expanded and thickened right before our eyes. Their first victim was Half Dome, and it looked like they’d set their sights on El Capitan next. By the time sunset rolled around, my optimism had dropped from a solid 9 to a wavering 2. I knew the moon was up somewhere behind the curtain and tried to stay positive, but let everyone know that our chances for actually seeing it were no longer very good. I reminded them not to get so locked in on waiting for the moon that they miss out on the beauty happening right now. Ever the optimist, I switched to my 24-105, privately rationalizing that even without the moon, we’d had so much spectacular non-moon photography already, nobody could be unhappy. But still…
At that point it would have been easy to cut our losses, come in out of the cold (pain), and head to dinner. But I have enough experience with Yosemite to know that it’s full of surprises, and never to go all-in on it’s next move. So we stayed. And our persistence (we’ve checked all three now) was rewarded when, seemingly out of nowhere, a hole opened in the clouds and there was the moon. The next 10 minutes were a blur of frantic clicking and excited exclamation as my group enjoyed this gift we’d all just about given up on.
A few full moon photography tips
- Sun and moon rise/set times always assume a flat horizon, which means the sun usually disappears behind the local terrain before the “official” sunset, while the moon appears after moonrise. When that happens, there’s usually not enough light to capture landscape detail in the moon and landscape, always my goal. To capture the entire scene with a single click (no image blending), I usually try to photograph the rising full moon on the day before it’s full, when the nearly full (99% or so illuminated) moon rises before the landscape has darkened significantly.
- The moon’s size in an image is determined by the focal length—the longer the lens, the larger the moon appears. Photographing a large moon above a particular subject requires not only the correct alignment, it also requires distance from the subject—the farther back your position, the longer the lens you can use without cutting your landscape subject.
- To capture detail in a rising full moon and the landscape (in a single click), increase the exposure until the highlight alert appears on your LCD (any more exposure blows out the moon). At that point, you can’t increase the exposure any more, even though the landscape is darkening. You’ll be amazed by how much useable data you’ll be able to pull from the in nearly black shadows in Lightroom/Photoshop (or whatever your processing software). In the image I share above, my LCD looked nearly black except for the single white dot of moon. Eventually the scene will become too dark—exactly when that happens depends on your camera, but if you’re careful, you can keep shooting until at least 15 minutes after sunset.
Learn More
Moon Over Yosemite


Doing the Scene Justice
Posted on January 19, 2022

Falling Snow, El Capitan, Yosemite
Sony a7RIV
Sony 12-24 f/2.8 GM
1/250 second
F/9
ISO 800
Woe is me
I just returned from nearly a week in Death Valley, where I had virtually no connectivity (wifi at my hotel made the Grand Canyon North Rim feel like a Silicon Valley Starbucks). Workshop or not, I try to post something on social media every day, and a new blog article each Sunday, but with no wifi and spotty 3G cellular that struggled just to send or load a text-only e-mail, I felt virtually cut off from civilization (there was a tsunami?!). I know in the grand scheme of things these are small problems, and that I probably missed the world more than it missed me, but still….
So anyway…
Last week I wrote about creating unique perspectives of familiar scenes, and offered some ideas for achieving this. As admirable as it is to make unique images, sometimes Mother Nature delivers something so magnificent that best thing to do is just get out of the way and let the scene stand on its own.
For example
Though last month’s Yosemite Winter Moon workshop wasn’t scheduled to start until the afternoon I took this picture, I drove to Yosemite the evening before the workshop to get a few hours of morning one-on-one time with the multiple inches of snow forecast to fall overnight. And as hoped, I arrived that morning to find every square inch of exposed surface glazed white—and the snow was still falling.
The paradox of photographing Yosemite during a storm is that all of the features you came to photograph are most likely obliterated by clouds. Sometimes visibility is so poor, it’s difficult to imagine the obscured features ever existed—and quite easy to imagine the comfort and warmth of your hotel room. The key Yosemite storm success is to be there when the storm clears—but job-one for catching the clearing part of a Yosemite clearing storm, is first enduring the storm part.
So, rather than succumb to the temptation of comfort and warmth, I armored up and went to work in near zero visibility. After an hour or so of driving around, interrupted by a stop or two (or three) to photograph some of the more intimate nearby beauty, I pulled up to El Capitan Bridge and noticed the clouds starting to lift (fingers crossed). In the still-falling snow, I quickly set up my tripod, grabbed my Sony a7RIV, attached my Sony 12-24 f/2.8 GM lens, and hoped.
I digress
Without getting too preachy, let me just say that if you ever want to piss off a photographer, look at one of their images and say, “Ooooh, you must have a great camera.” While that may very well be true, the photographer’s unavoidable inference will be that the questioner means the beautiful image is a product of the photographer’s equipment, not his or her photographic vision and skill.
But…. As much as I’d like to say my equipment is irrelevant and I could achieve the same results with a pinhole camera, I’ll admit that I have images I couldn’t have created without the right camera or lens. And this is one of them.
Back on point
I’ve written before about Sony’s 12-24 lenses, and how they feel specifically designed for Yosemite’s ultra-close views of massive monoliths. El Capitan Bridge is one of those views, so close that I’ve always felt that even a 16-35 wasn’t wide enough to do the scene justice. So when Sony released its 12-24 f/4 G lens, this was one of my very first stops. My excitement was validated when I discovered that at 12mm I could indeed get all of El Capitan, plus its entire reflection, in a single vertical frame. I became so enamored of my new top-to-bottom-reflection power that pretty much every subsequent 12-24 El Capitan composition here (both with the original Sony 12-24 f/4 G, and the newer Sony 12-24 f/2.8 GM) had been vertical. My goal this morning was to change that.
-

- Winter Storm, El Capitan in the Snow, Yosemite
-

- Autumn and Winter, El Capitan Reflection, Yosemite
-

- Storm Clouds, El Capitan, Yosemite
While the clouds didn’t completely part for several more hours, during this stop at El Capitan Bridge they did lift just enough to reveal all of El Capitan for about 15 minutes. During that time, their swirling vestiges careened across the granite face so rapidly that the scene seemed to change by the second.
Photographically, there wasn’t really a lot I could do for this scene besides not mess it up. Mounting my camera horizontally, I widened my lens all the way out to 12mm, put the top of the frame slightly above El Capitan (to maximize the amount of reflection below it—more sky would have meant less reflection), and used the snow-covered trees on both sides to frame the scene.
Depth of field wasn’t a factor, and very little contrast made metering easy. Wanting a fast enough shutter speed to freeze the falling snowflakes, I dialed to ISO 800 and f/9, which I quickly determined centered my (pre-capture) histogram at a more than adequate 1/250 second. Then I clicked a dozen or so images to ensure a wide variety of cloud formations and falling snowflake patterns, pausing occasionally to appreciate the moment.
This scene felt like a gift that I really didn’t want to overthink. I’m just grateful for the opportunity to photograph it (and the equipment that allowed me to do it justice).
An El Capitan Gallery
Click an image for a closer look, and to view a slide show.


Dare To Be Different
Posted on January 9, 2022
Snowfall, Tunnel View, Yosemite
Sony a7RIV
Sony 16-35 f/2.8 GM
1/15 second
F/9
ISO 100
What does it take to make a great landscape image? The answer to that question could fill volumes (so I hope you don’t expect the final word in one blog post), but for starters, it seems pretty obvious that a great landscape image should involve some combination of beautiful scene and compelling composition. Of course it’s possible for one side of that scale to tilt so strongly that it renders the other side all but irrelevant: I’m thinking about the masterful composition that manages to extract beauty from the most ordinary scene, or the scene that’s so spectacular that it would be virtually impossible to not return with a beautiful image.
But as much as photographers should strive for the former, I’m afraid ubiquitous cameras and information have given us too much of the latter—because it’s easier. Not only can today’s photographers learn where to be and when to be there with the tap of an app (or the click of a mouse), even when unexpected beauty suddenly materializes before our eyes, we’re almost certainly armed with a tool to capture it. Add to this the power of today’s computers and software to actually manufacture beauty (don’t get me started…), and I’m concerned that the world is becoming numbed to the appreciation of photography as a craft—the ability to see the less obvious beauty and convey it by deftly controlling the scene’s framing, motion, depth, and light.
This is especially relevant to me because I make my living serving people who dream of getting “the” shot at my workshop locations. Usually they’ve seen some other photographer’s version of their “dream” shot and simply want one of their own to display and share. Whether it’s sunset light on Horsetail Fall, a lightning strike at the Grand Canyon, or fresh snow at Tunnel View, I completely understand their motivation and I do everything in my power to make it happen (I love photographing these things too). But still…
In addition to helping my workshop student get their dream image, I also encourage them to make these shots their starting point, not their goal. Photograph the icons without shame, but don’t stop there, also find your own perspective on the scene’s beauty. That could be identifying a foreground element that complements a glorious background, going vertical when the obvious composition is horizontal, introducing motion or focus blur to part of the scene, or any number of large or small compositional twists.
My own approach when photographing a scene imbued with obvious inherent beauty—such as a spectacular sunset, vivid rainbow, or breathtaking vista—is to remind myself not to settle for something I’ve already done, no matter how beautiful it might be. While that’s a relatively small challenge at new or less familiar scenes, this approach makes familiar places like Tunnel View in Yosemite (arguably the most beautiful vista on Earth, and one that I’ve photographed more times than I can count) a much higher photographic bar to clear. So high, in fact, that I rarely take out my camera at Tunnel View anymore. (Well, at least that’s the mindset when I get there—I’m a sucker for this scene and sometimes can’t resist photographing a beautiful moment here because some scenes are too beautiful to ignore—but you get the point.) Even still, these days I pretty much only photograph Tunnel View when I can include some a scecial, transient element, like the moon or a rainbow. Or fresh snow.
Last month my Yosemite Winter Moon workshop group had the immense good fortune to start just as a cold winter storm finished dropping 8 inches of snow on Yosemite Valley. For a couple of reasons, we started at Tunnel View—first, because it’s the best place to introduce first-timers to Yosemite’s majesty; second, it’s probably the best place in Yosemite to view a clearing storm. The scene that greeted us was as spectacular as you might imagine—and as also you might imagine, it wasn’t something I hadn’t seen before.
My original plan was to keep my camera in the car, but once I got everyone settled into their spots and was confident they were content (and wanted to be left alone), I couldn’t resist the beauty, no matter how familiar. Oh—and before I go any farther, let me make clear that I am not trying to say, nor do I in any way believe, that this image is more special than thousands of other Tunnel View images that preceded it (or even that were captured that day). I just want to use it to illustrate my approach, and the decisions that got me to something that turned out to be a little different for me. But anyway…
The first thing I usually I preach about photographing Tunnel View is to not go too wide. As beautiful as the entire view is, the real (permanent) visual action is between El Capitan on the left, and Leaning Tower (the diagonal, flat granite face angling up from Bridalveil Fall) on the right. Another problem at Tunnel View is that the sky in Yosemite is usually boring (cloudless), and the foreground trees are nothing special. So not only does the real estate left of El Capitan and right of Leaning Tower pale in comparison to the primary scene it bookends, composing wide enough to include that extra granite also means shrinking the best stuff (from left to right: El Capitan, Cloud’s Rest, Half Dome, Cathedral Rocks, Bridalveil Fall, Leaning Tower) while including more bland sky and trees. Therefore, my go-to lens for Tunnel View is my Sony 24-105 f/4 G lens. And when I want to isolate one or two of the primary features, I’ll switch to my Sony 100-400 GM lens.
But this afternoon, with the entire landscape glazed white, those scruffy foreground trees were suddenly a feature worthy of inclusion. So, rather than starting with the 24-105 on my Sony a7RIV, I reached for my Sony 16-35 f/2.8 GM lens. Going wider created another problem: that large tree on the left is a usually an obstacle, a potential distraction always that must be dealt with. My standard approach is to move to the right to completely eliminate the tree from my composition, but this afternoon the vista was so packed with gawkers and photographers that moving around without encroaching on someone else’s space was difficult-to-impossible. Because I got my group setup before grabbing a spot for myself, I’d found myself stuck farther to the left than I like, making my plan to shoot the scene extra-wide while eliminating the tree even more problematic. So, grateful once again for the snowy glaze, I decided to use my arboreal nemesis to frame the left side of my composition (if you can’t beat ’em…). For the right side of my frame, I chose to go wide enough to include a couple of more prominent trees in the middle distance, as well as the interesting clouds swirling near the rim behind them.
In any composition, the decision between sky and foreground always comes down to which is more interesting—in this case, despite some fairly interesting clouds overhead, those clouds couldn’t compete with the snowy foreground. To maximize the snowy foreground, I put the bottom of my frame in the homogeneous white snowbank at the base of the shrub line just a few feet below me—just low enough to allow me to include only the most interesting clouds.
And finally, because I know someone will ask, even with so much detail from near-to-far, at 20mm and f/9, my focus point was pretty much irrelevant (hyperfocal distance was 5 feet). As something of a control freak in my photography life (understatement), I’ve always been a manual focus evangelist, but I’m getting lazy in my old age and in this case I just hit my back-button focus button to autofocus somewhere in the scene (wherever the focus point happened to be), then clicked with the knowledge I’d be sharp throughout.
More Tunnel View Magic: One Spot, Many Takes
Click an image for a closer look, and to view a slide show.


